Contents
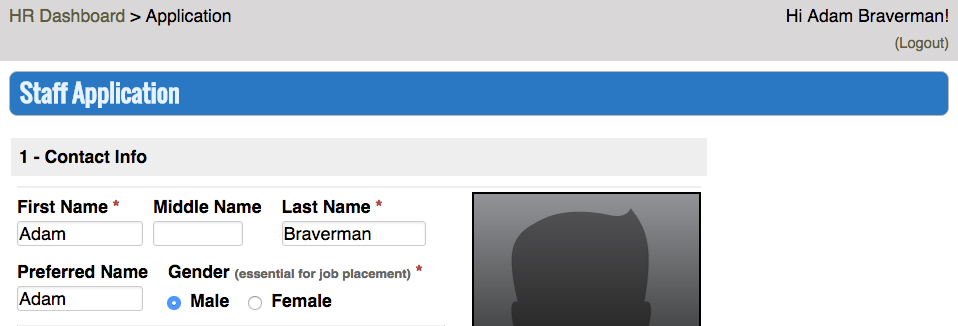
A Job Posting is a collection of different sections that can be used to collect applications and references, conduct interviews, extend offers, submit onboarding documents and evaluate staff. Job Postings are also used as the primary search criteria to organize content in HR Management and Reporting.
Best Practices
When planning out strategy for your Job Posting, here are some items to consider:
- Creating one Job Posting for Summer Staff is generally recommended. Job Postings are flexible to cover hiring for multiple positions, different locations as well as new versus returning staff.
- Consider creating a new Job Posting when there are differences between the questions that you need to ask during the Application, significantly different Work Periods or if there is a unique process for Onboarding. Examples where two Job Postings may be useful include:
- Summer Staff and Part-Time Hourly Staff
- Summer Staff and Specialized Staff [nurses and doctors]
- Summer Staff and Volunteers
If you have questions on the best route to take, please contact your Business Analyst.
Configure Job Posting
Before creating a Job Posting, make sure you have completed configuration.
Create Job Posting
To create a Job Posting, follow these steps:
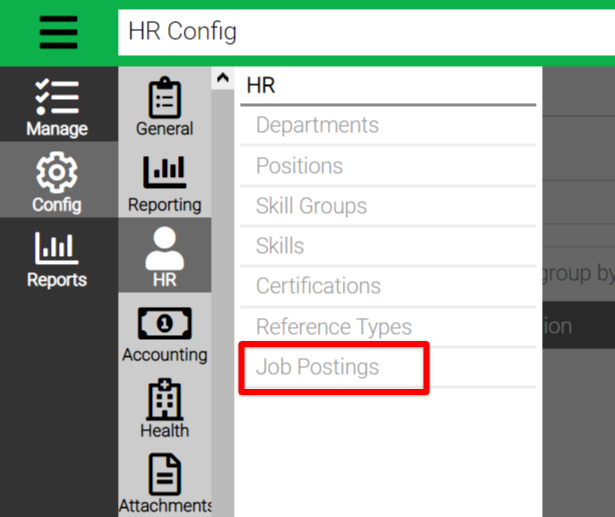
- In CT6, go to Config > HR > Job Postings.
- Click
 in the bottom right corner
Details
In this section, you will set some of the general settings for the Job Posting.
- Fill out the following fields:
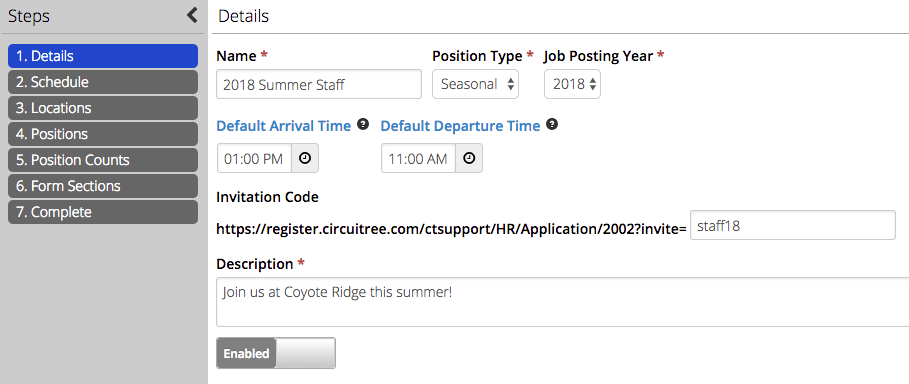
- Name – Add a name for the Job Posting. This will be used as reference for reports, queries and other Staff management features.
- Position Type – Choose between:
- Full Time
- Part Time
- Seasonal
- Volunteer
- Job Posting Year – Select the year that the Job Posting will take place.
- Default Arrival / Departure Time – Default time used in Offer for Arrival and Departure. Can be overridden when setting up Arrival / Departure times for Work Periods or the Arrival / Departure date in Offer. Arrival and Departure times are considered unpaid.
- Invitation Code – Add a code to provide a direct link on your website to the Job Posting. Add the following to the end of your Registration Site URL: /HR/Application/1?invite=code where code is the value entered in the field.
- Description – Add a description that will help the Applicant select the correct Job Posting.
- Enabled / Disabled – Easy way to disable or enable a Job Posting.
- Once finished, click Continue.
Schedule
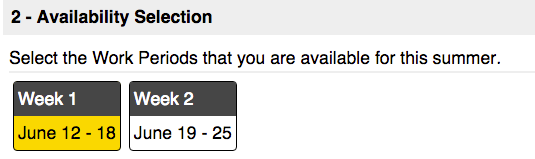
The next step allows you to configure if this Job Posting has Work Periods. A Work Period is a specific time range that is offered for employment. Work Periods can be used for different scenarios:
- Staff Training sessions
- Each week of the summer [multiple Work Periods]
- Entire summer session [one Work Period]
You can also configure the Job Posting to not have Work Periods to be able to hire Full Time and Part Time staff that don’t have a specific end date.
- Determine if the Job Posting needs Work Periods.
- If No, then click Continue.
- If Yes, then click
 .
.
- Fill out the following fields:
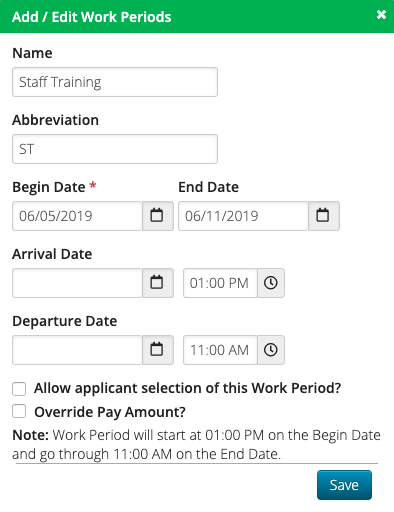
- Name – Add a name for the Work Period.
- Abbreviation – Add an abbreviation that will be used in Reporting.
- Begin / End Date – Set the length of the Work Period.
- Arrival / Departure Date – Set these dates if your Staff need to be present before or after the Work Period. This time is considered unpaid.
- Allow applicant selection of this Work Period? – By checking this box, Applicants will be able to select their preference for this Work Period. By unchecking, the Work Period will only show up internally and can be used to make Offers. Can be useful for training sessions.
- Override Pay Amount – Select option and then set a default amount that is different than other Work Periods.
- Click Save.
- Click to add additional Work Periods as needed.
- Once finished, click Continue.
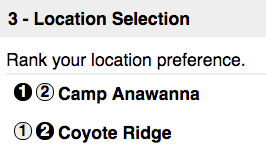
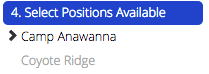
Locations
This section allows you to determine which Locations are available in the Job Posting.
- Click the checkbox next to the Location.
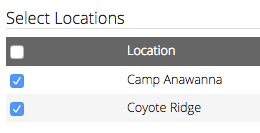
- Once finished, click Continue.
Add Location
To add a location to this list, follow these steps:
- In CT5, go to CampLink > Configuration > Registrations > Locations.
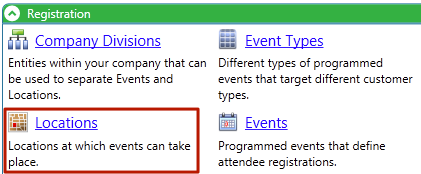
- Click Actions > New Location.
- Fill out the required fields and then click Actions > Save.
Positions
In this section, you will set which Positions are available at each Location as well as the Pay Rate.
- Positions are assigned in order by Location as indicated on the left.
- Click the checkbox next to the Positions that you would like to add for that Location.
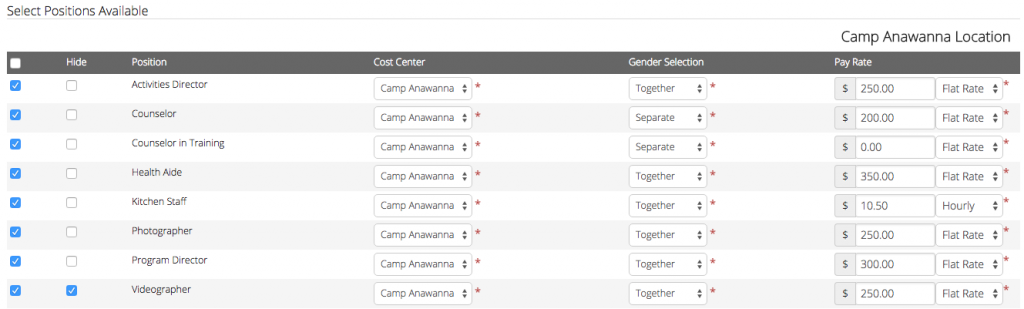
- Hide – Check this box if you would like to hide the position from the Application. It will still be available internally for Offers.
- Cost Center – Select which Cost Center this position falls under for Payroll. There are 5 AR categories used for Payroll that can be assigned GL Codes.
- Gender Selection – Choose between the following. The last three choices allow for different quantities to be assigned during the next step, Position Periods
- Together – Gender not considered when determining quantity of staff needed for the position.
- Separate – Creates an option for Male and Female for one position. Useful for Counselor where you have one position, but need to know how many of each gender.
- Male Only
- Female Only
- Pay Rate – Assign a rate for the job and then select a frequency. The frequency of the rate will be used during Payroll to determine the wage.
- Hourly – Displays the Hourly wage, no calculation is made during payroll.
- Daily – Multiplies the number of days of employment during pay period by pay rate.
- Bi-Weekly – Displays the Bi-Weekly wage, no calculation is made during payroll.
- Annually – Divides the pay rate by 365 and then multiples by the number of days of employment during pay period.
- Flat Rate – Divide the number of days in pay period by the number of days in Work Period and multiple by pay rate.
- Once finished, click Continue to move on the next Location. Continue until all Positions have been allocated for each Location.
Position Counts
This section allows you to set the quantity of staff that you need for each Work Period as well as assign a Manager for each Position.
- For each Position, fill out the following fields:
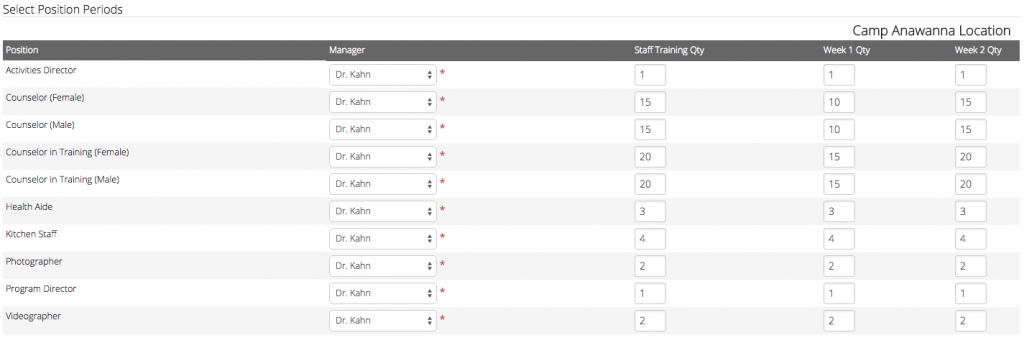
- Manager – Assign the person who is responsible for this position. The list of available Managers is pulled from the users that are assigned to the HR Manager Security Group. The Manager will be displayed to the Applicant in the Offer as the Job Contact.
- Work Period Quantities – Fill out the quantities needed for each Position for each Work Period. These numbers will help you keep track of how many Positions are needed in the Employment view.
- Once finished, click Continue to move to the next Location. Continue until all Position Periods have been assigned for each Location.
Form Sections
There are six Form Sections that make up the Job Posting. The articles below will go into detail on how to setup each one.
Job Posting Complete
Once all the Form Sections are finished, you will be prompted that your Job Posting is complete.

The next step is to post a link on your website for Applicants to access the Job Posting. Using the link to your CT Registration Site, add one of these options, which after login will go to the following:
- /HR – Goes to HR Dashboard.
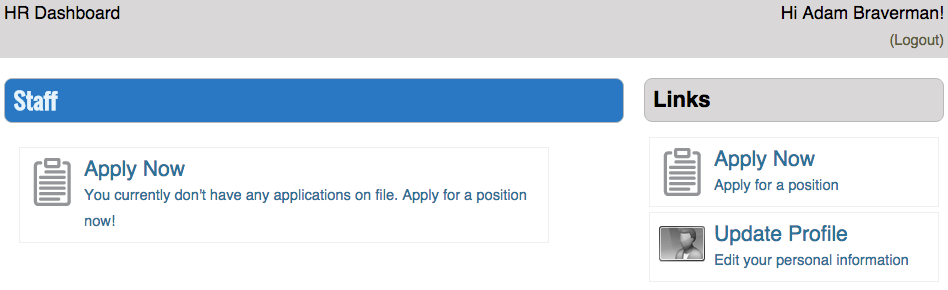
- /HR/Application – Goes to list of available Job Postings.
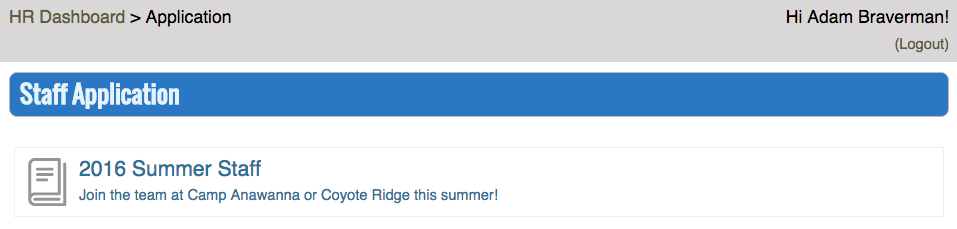
- /HR/Application/1?invite=code – Goes straight to the specific Job Postings.