It’s time for one of the final steps of employing staff: Onboarding! The Onboarding process can include several options, such as tax forms, a background check, direct deposit information, and much more. Let’s take a look at how CircuiTree handles Onboarding:
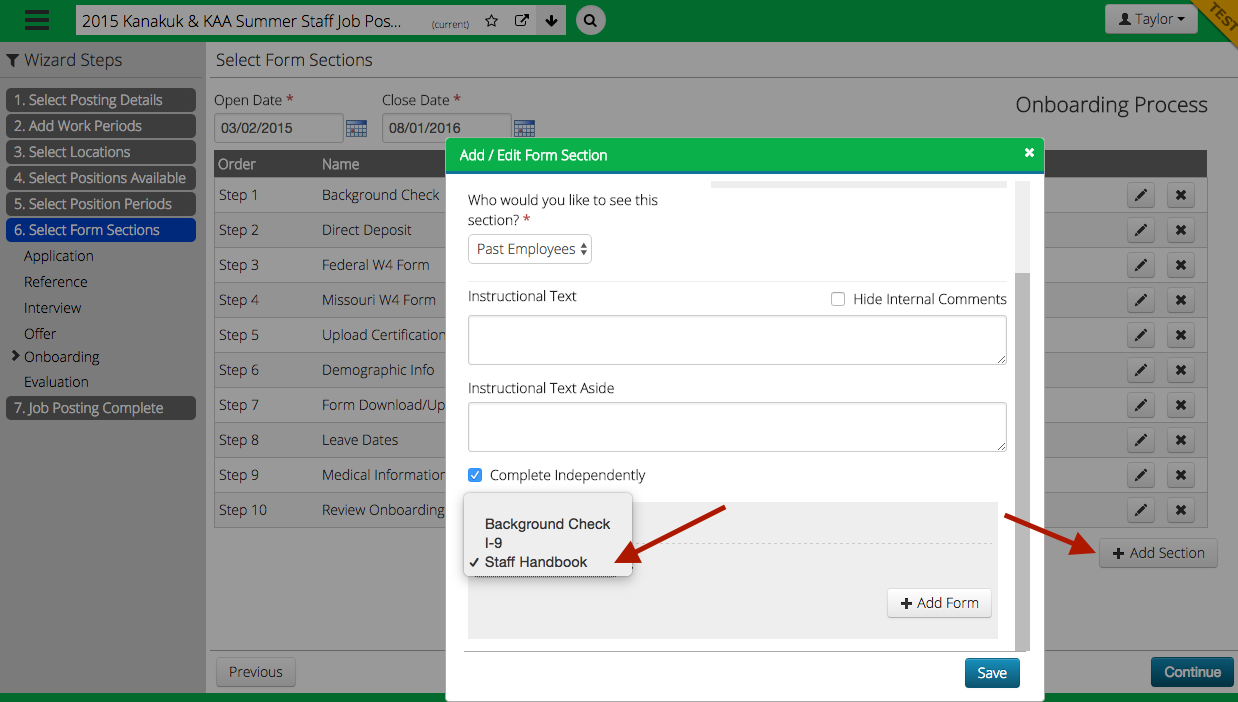
1. First, navigate to Configure > HR > Job Postings and select the applicable job posting. Once there, go to “Select Form Sections” and move the last section: Onboarding. Here, you can add a new section, edit or delete a section, or save and continue.
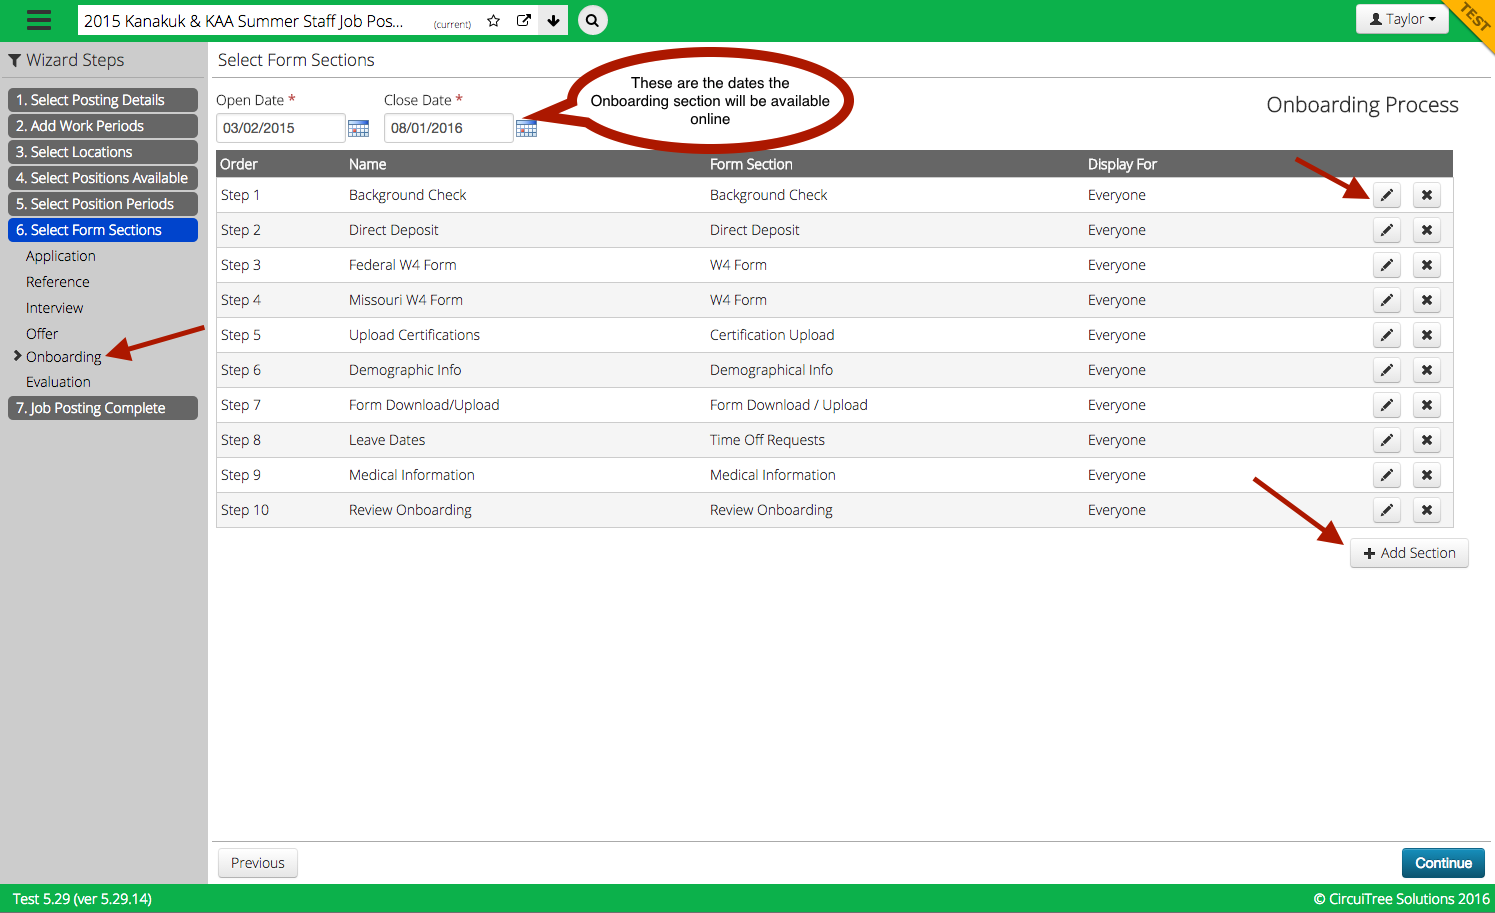
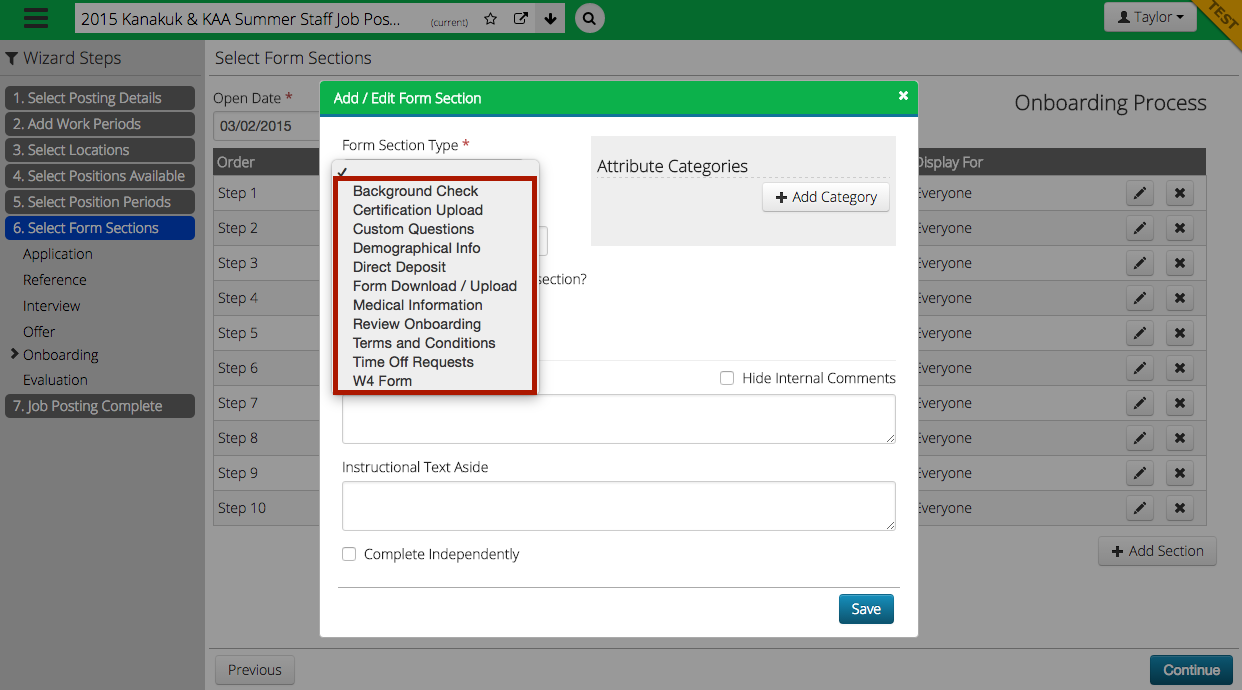
2. Select “Add Section”. After doing this, a box will appear with all of the different options for sections. Below, we will go over the majority of them. But here’s a look at a few of the simpler ones:
- Custom Questions: This is an attribute field, similar to the ones in the application, interview, etc.
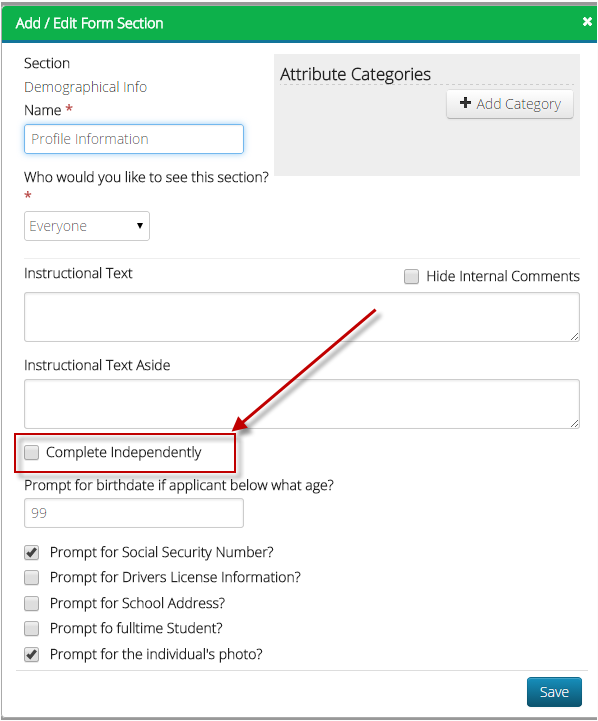
- Demographical Info: This is the same name, birthdate, and contact information you will find in other sections.
- Form Download/Upload: Here is a place for you to require staff to upload any other form that doesn’t fit into one of the other categories. Here’s a how-to guide to adding forms in CT6:
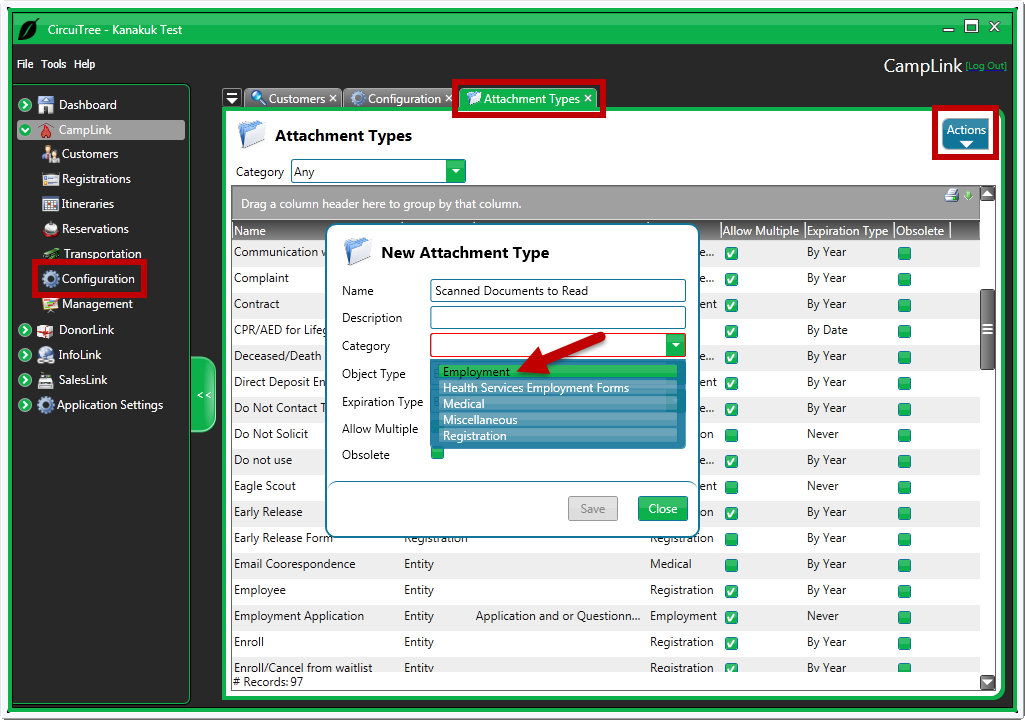
Create Attachment Type
In CT5, go to CampLink > Configuration > Attachment Types and click on the Actions > Add New. Fill out the appropriate fields, but make sure to select the “Entity” object type for it to show up online.
Go to Configuration > HR > Attachment Forms and click on the gear icon to select “Add Attachment Form”.
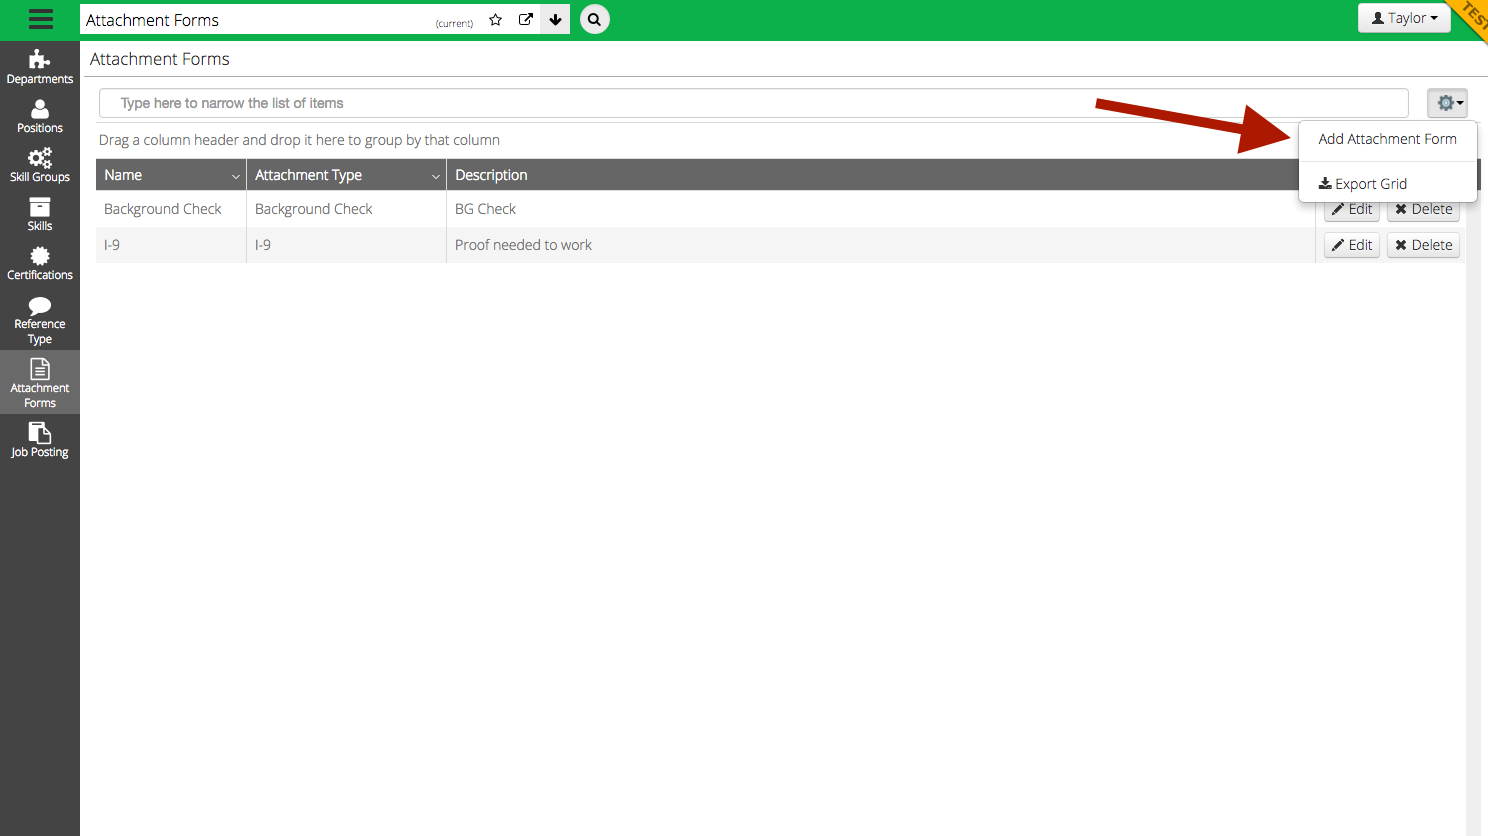
Give your form a name and select an attachment type (this comes from Configuration in the internal application). Then click “Select Files” and add a form to the section. Click on “Save”.

Click refresh and your form will show up!

Add Form Sections
Now go to your Job Posting and click on the “Onboarding Section”. Select “Add Section” and choose the “Form Download/Upload” section. Fill out the required fields and select the attachment form you would like to add at the bottom of the box. Now your applicants can download and upload all important forms!
- Medical Information: Here, you can select a medical form for your employees to fill out before coming to camp.
- Terms and Conditions: There is also the option to include Terms and Conditions to your Onboarding process.
Complete Independently
NOTE: There is also a setting called “Complete Independently” on each of the “Onboarding” sections. This setting will allow employees to go back and edit the section after the form has been submitted. This is particularly helpful in the “Direct Deposit” and “Medical Information” sections.
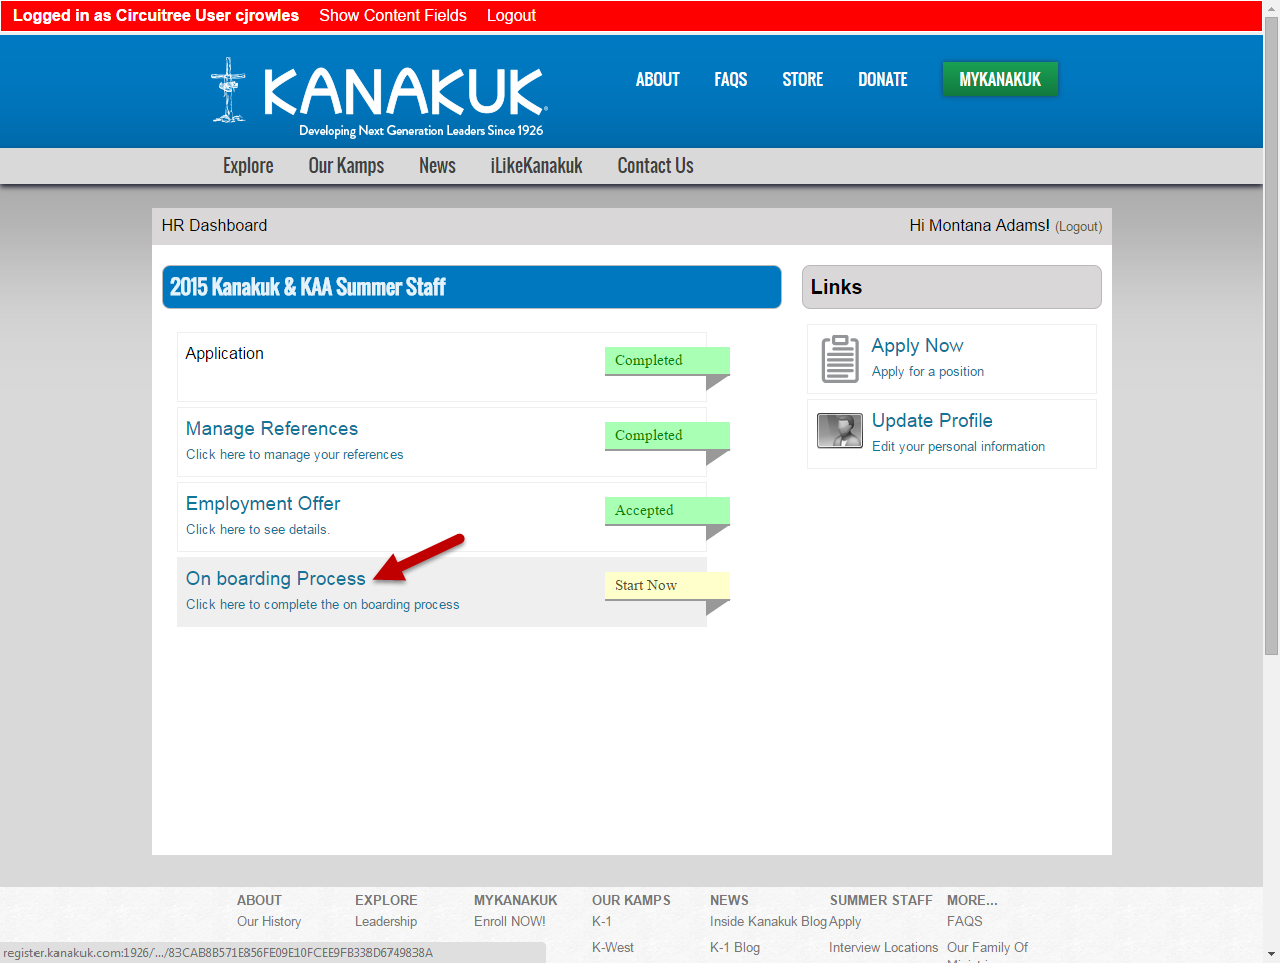
Website View
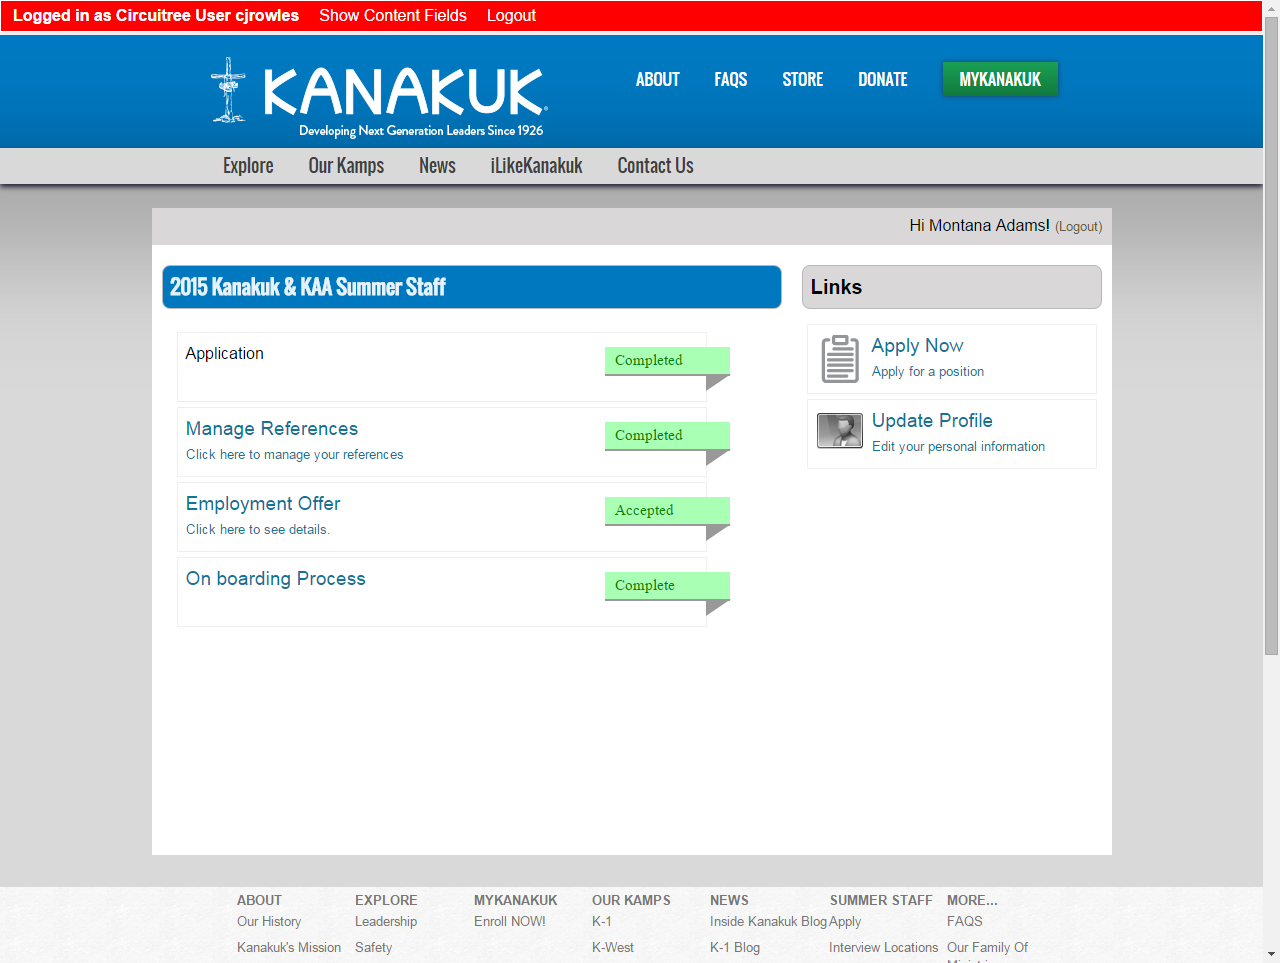
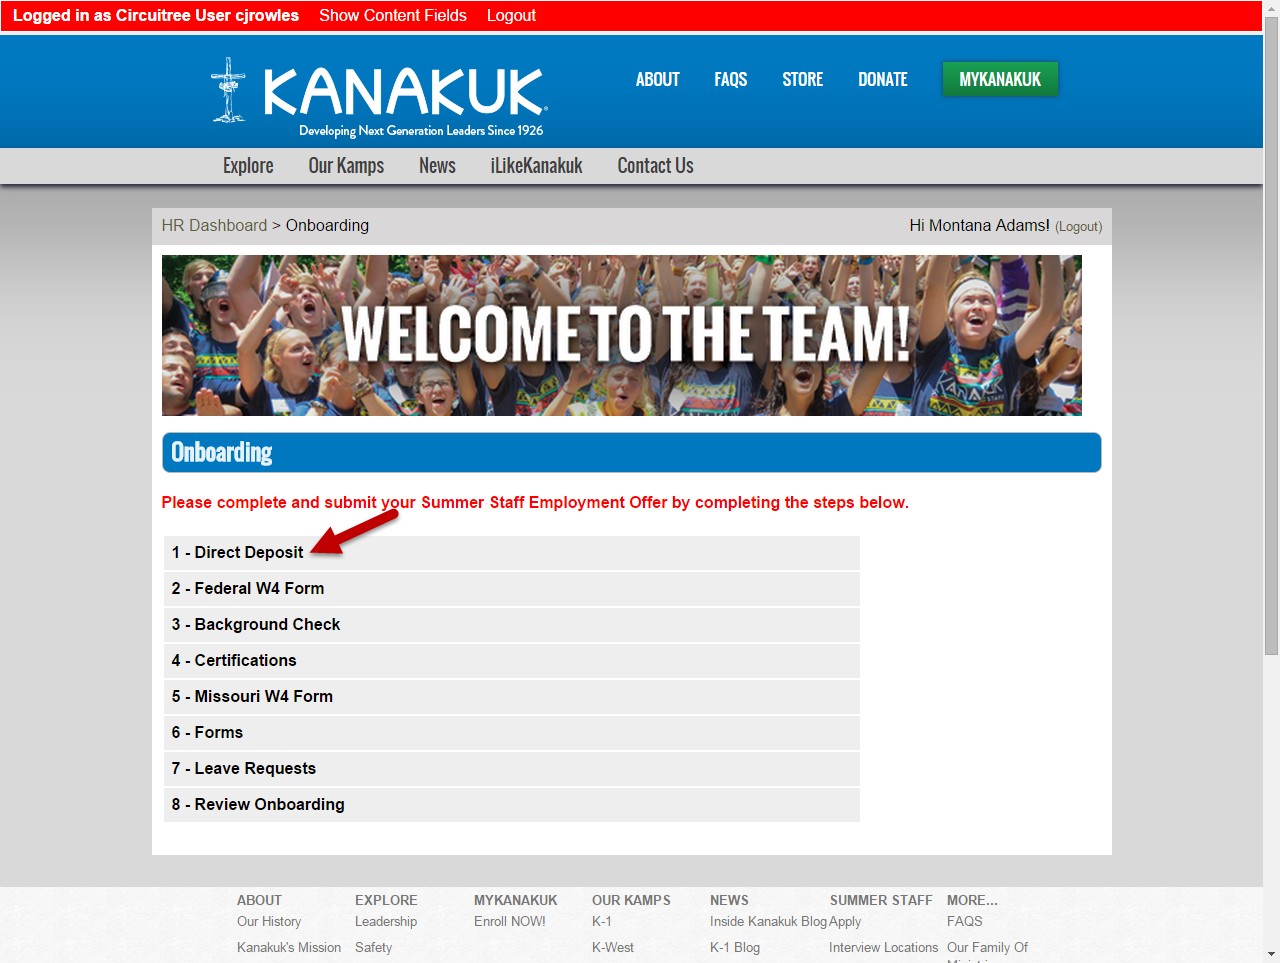
And here’s a look at the Onboarding portion online! Just click on “Onboarding Process” to get started.
And here are some of the other sections we didn’t discuss previously. Users will just click on the first gray bar to begin.
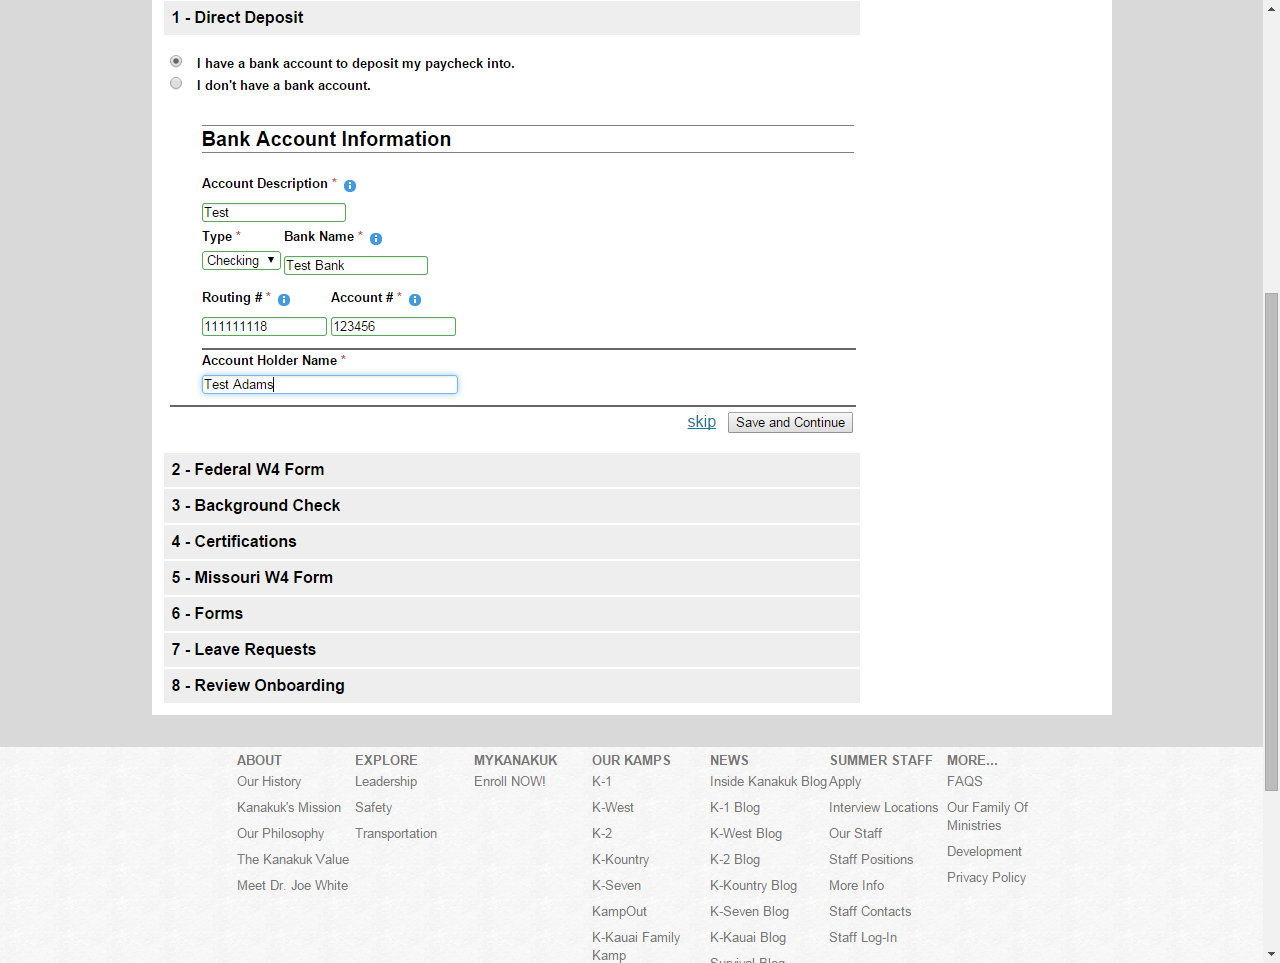
Here is where staff can enter bank information for their direct deposits.
They can also fill out their federal W-4 form.

And enter all their information to run a background check.

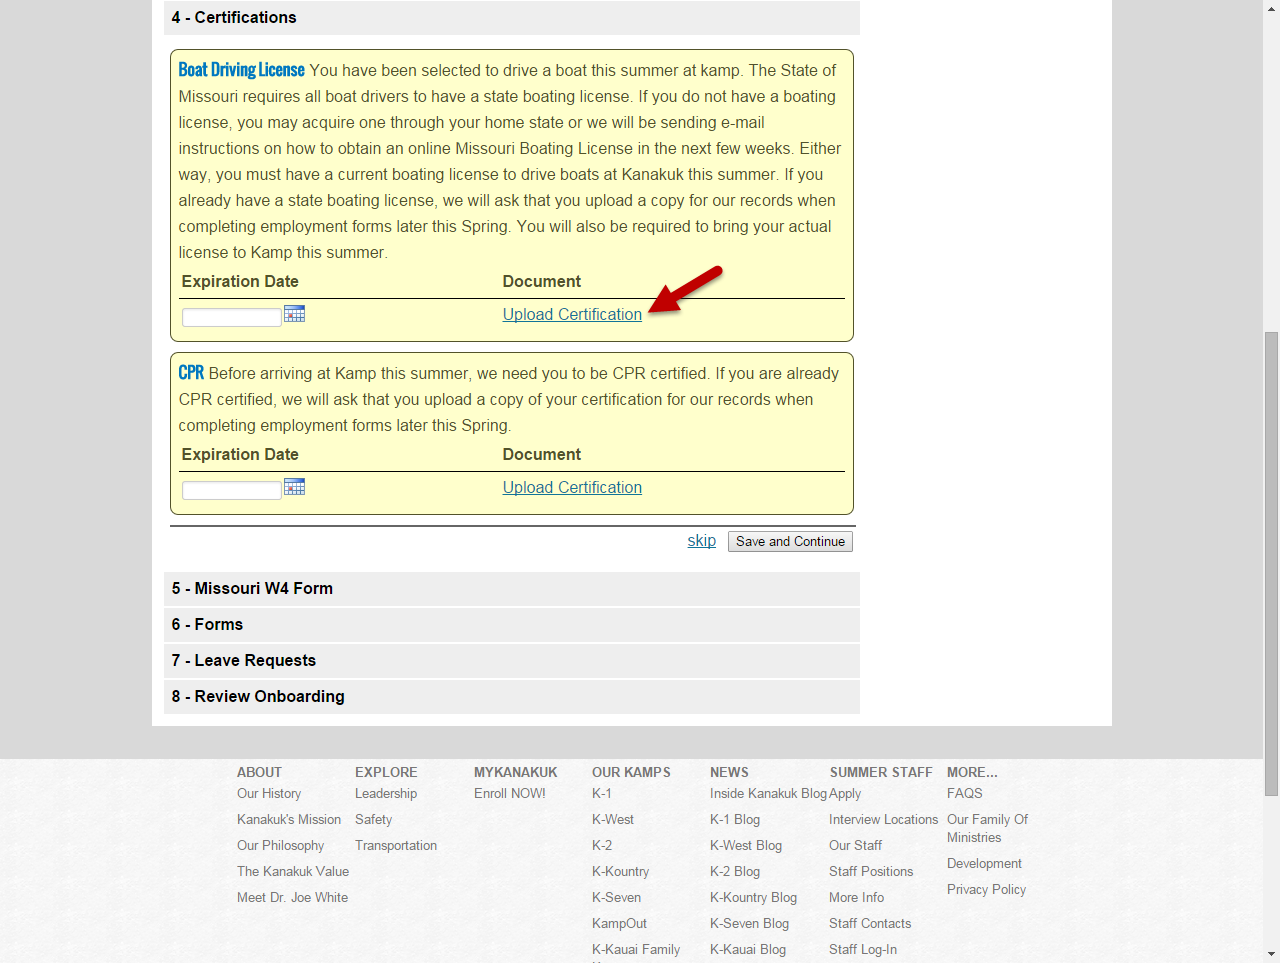
They can even upload any certifications they may have!
Don’t forget your state’s W-4 form!

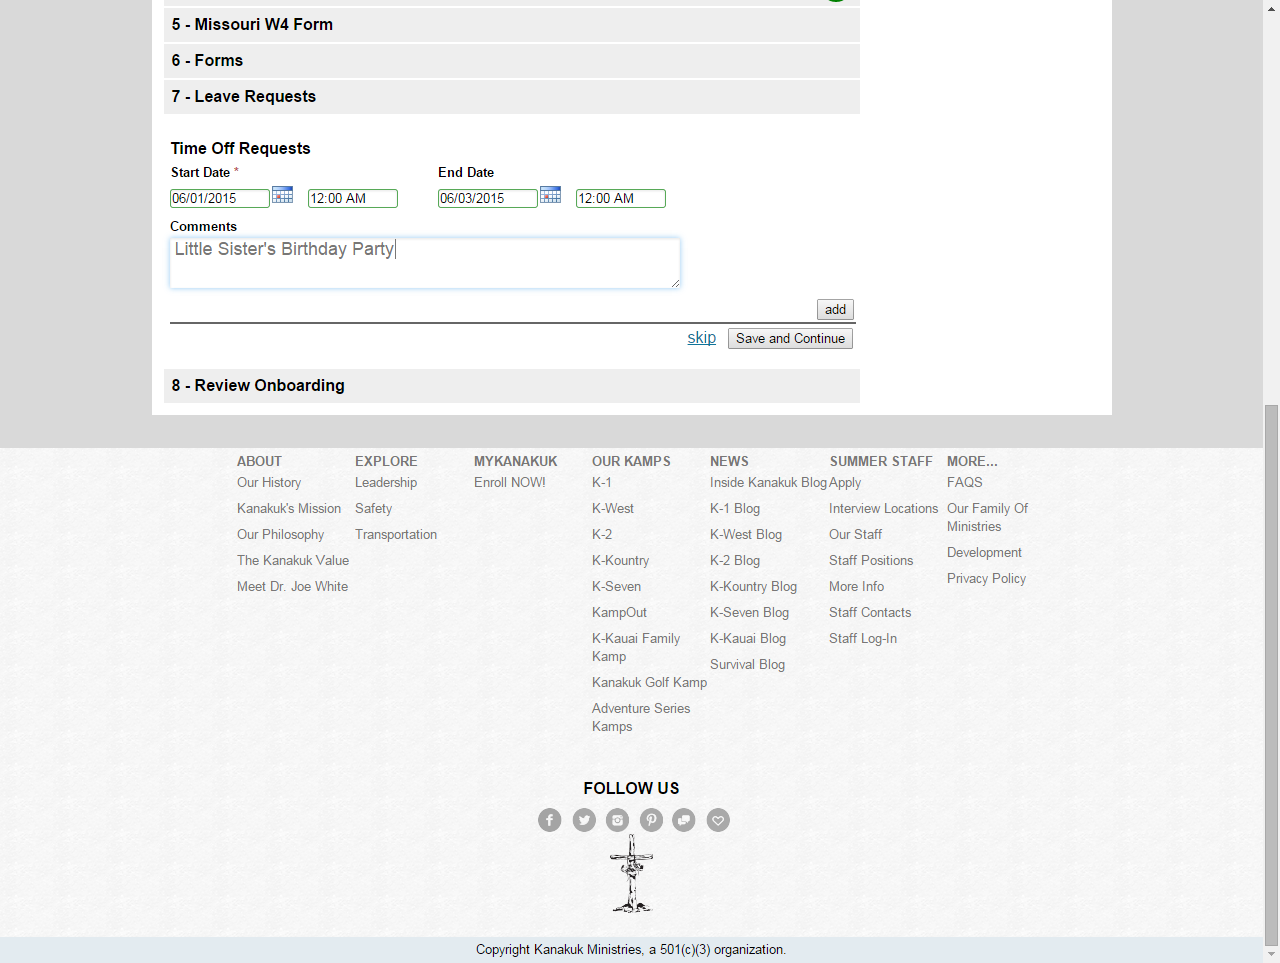
Here is where employees can request time off.
Finally, staff must review and submit their Onboarding. If they’ve missed or skipped a step, a red alert will appear in this section and they will not be allowed to submit.

After submission, employees will be taken back to the staff dashboard.