Let’s take a look at the different form sections that are available on the staff application. Below, I’ll show you what the form looks like when it’s being set up, as well as how it looks online to your applicants!
Submission
Applicants can save their information and move to a different section or come back to the application later, but they cannot submit the form until all required information has been entered and saved. They also cannot edit the form after it’s been saved.
New Account Email
When your applicants create a new account on the website, they will receive the “New Account Confirmation” email automatically. You may want to edit that email so it is appropriate for staff as well as campers. Learn how to edit your automated email here.
Form Sections
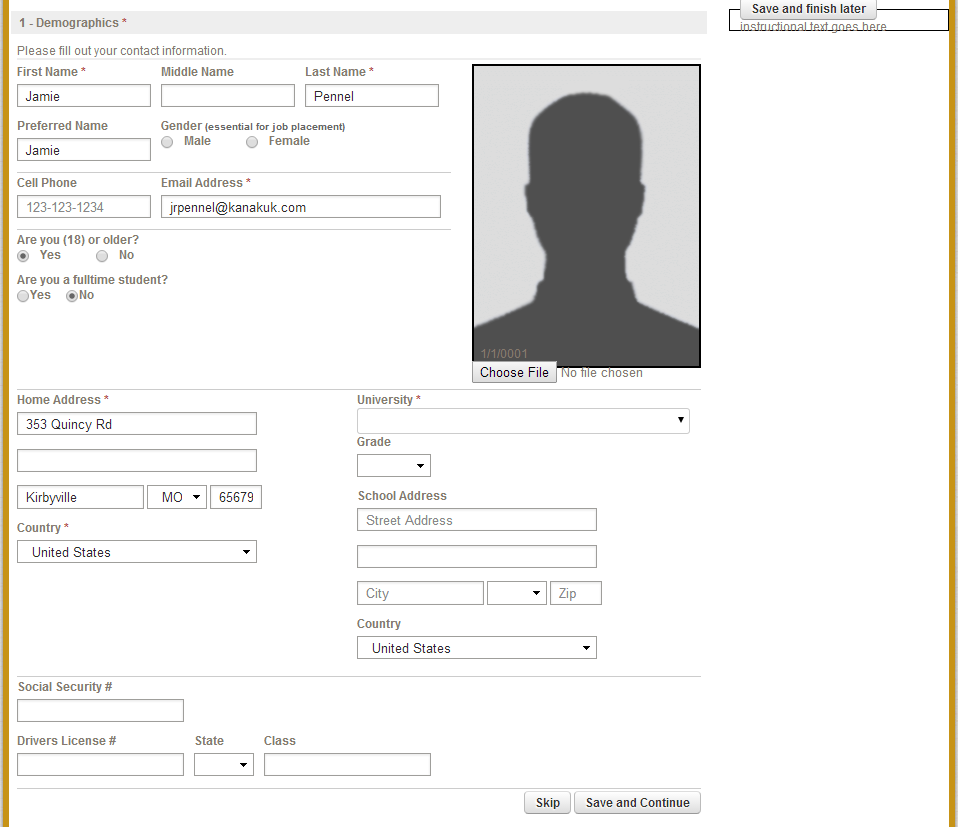
Demographical Info
In this form, applicants will fill out their contact information and other basic info about themselves. Please note, on each section, you can add attribute sets as well, so the application is fully customizable!

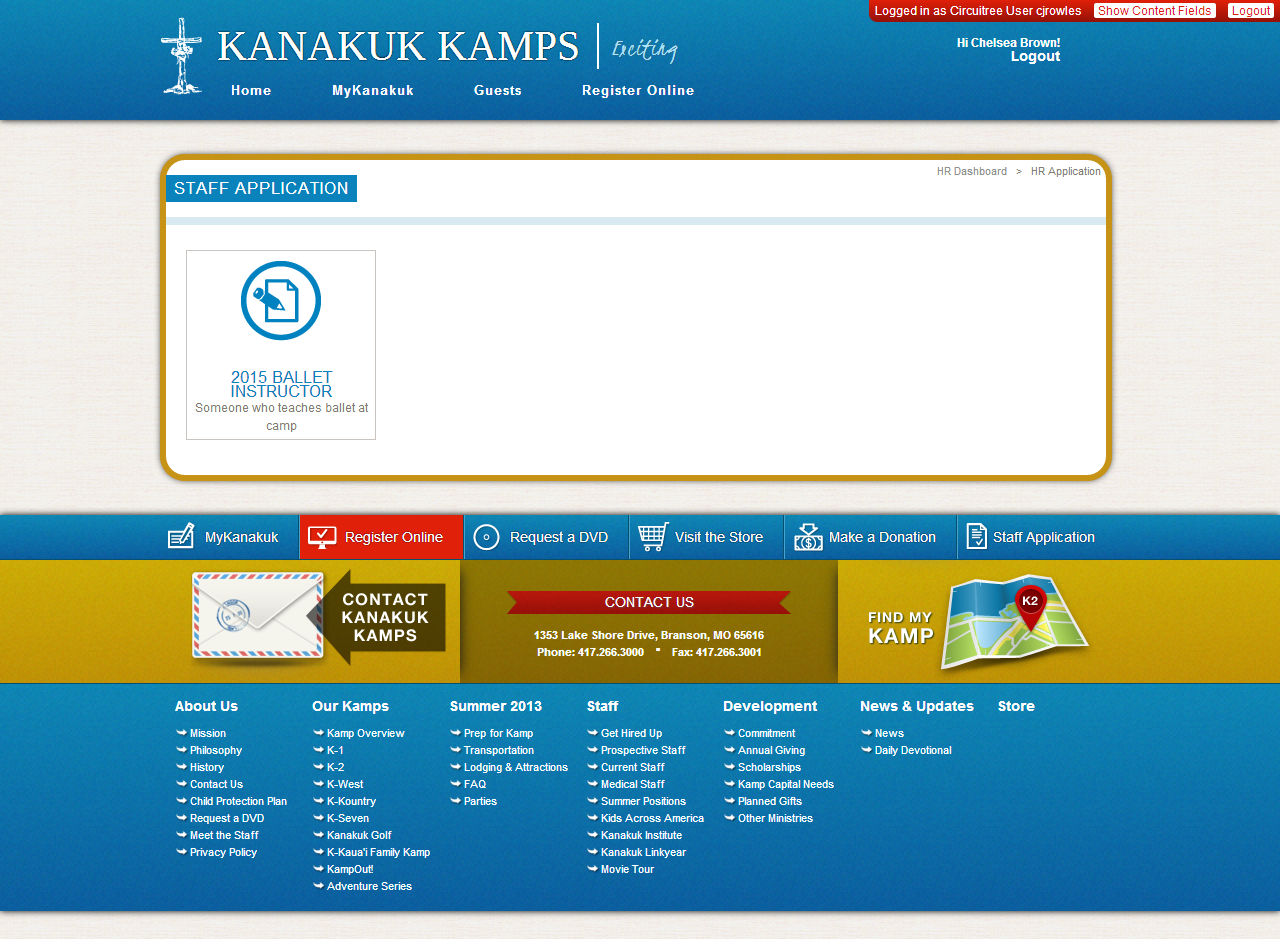
And here’s what it will look like online! First, select the job posting.
And below, you can see the school, driver’s license, and social security info you requested.
Position Selection
Here’s where your applicants can choose which positions they want to apply for.

If you have more than one option on this job posting, they can select as many as you allow them to.

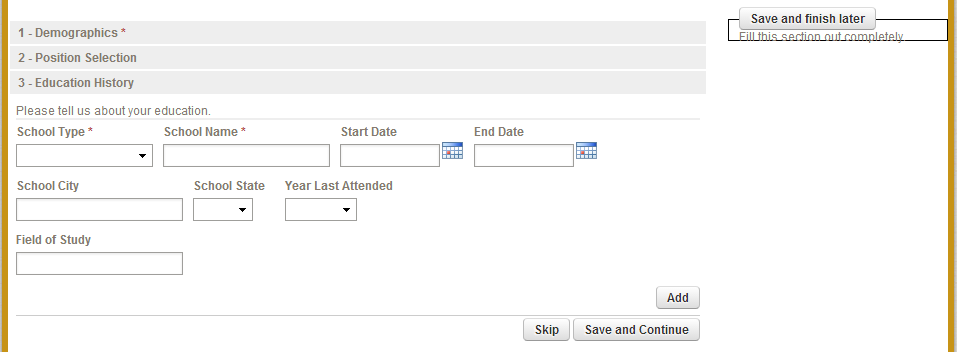
Education History
Your applicants can tell you about their education history.
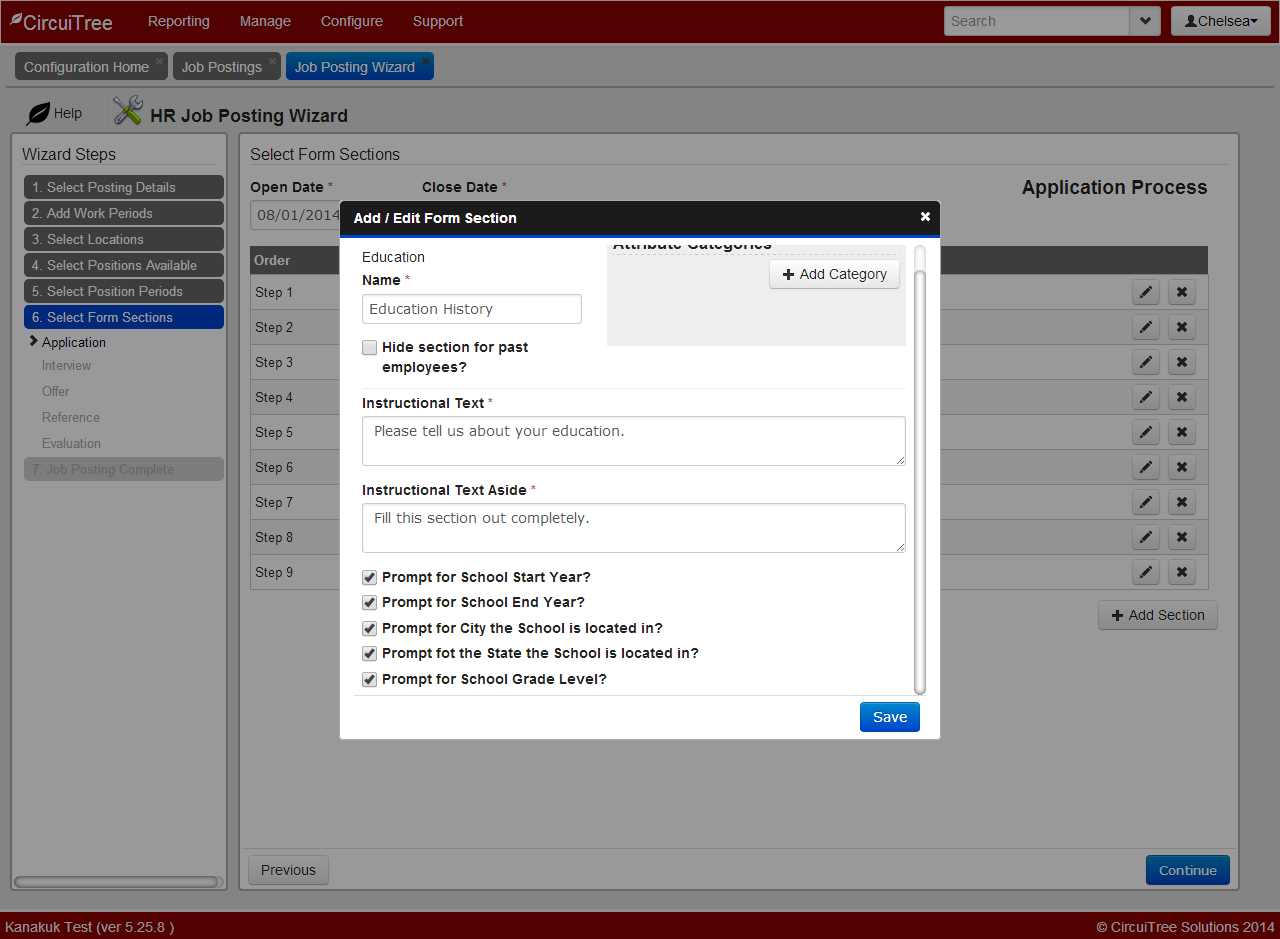
And here’s the education section online! If they have more than one school, they can easily select “Add” at the bottom and more fields will become available.
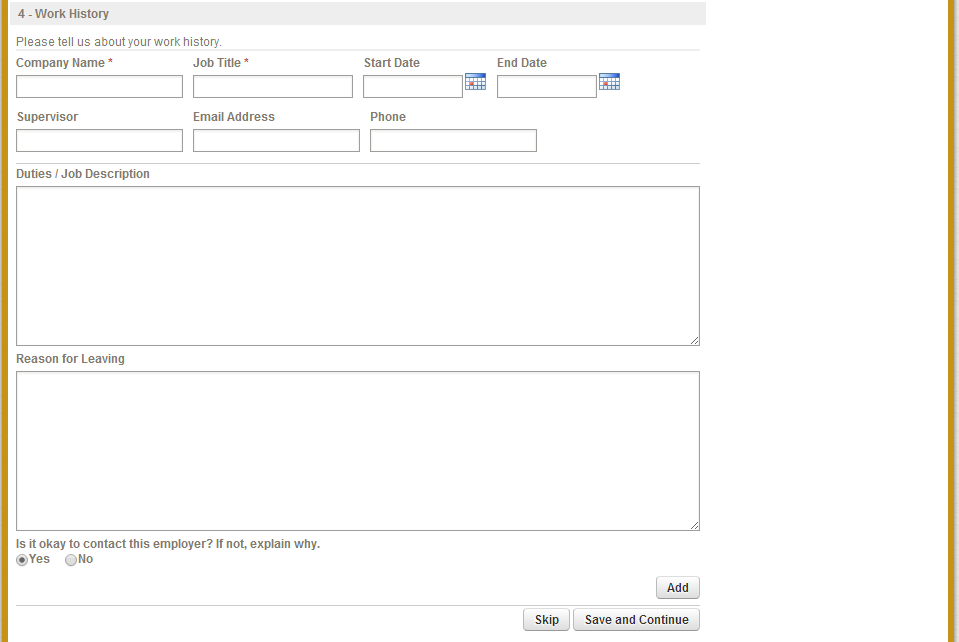
Work History
When you’re hiring, you probably want to know what work experience your staff has. Well, you can collect that information here!
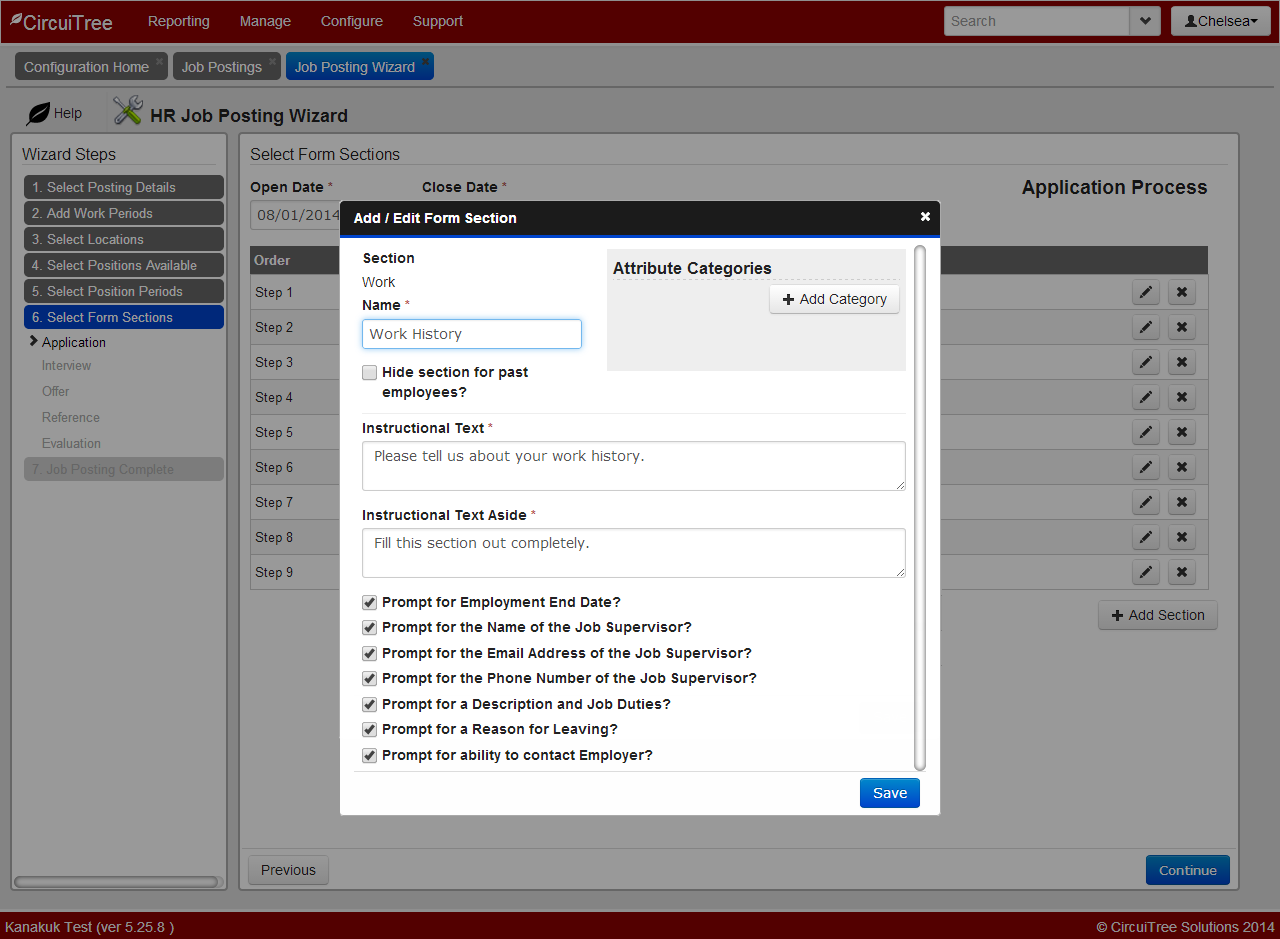
Again, applicants can just select “Add” to be able to add multiple work experiences.
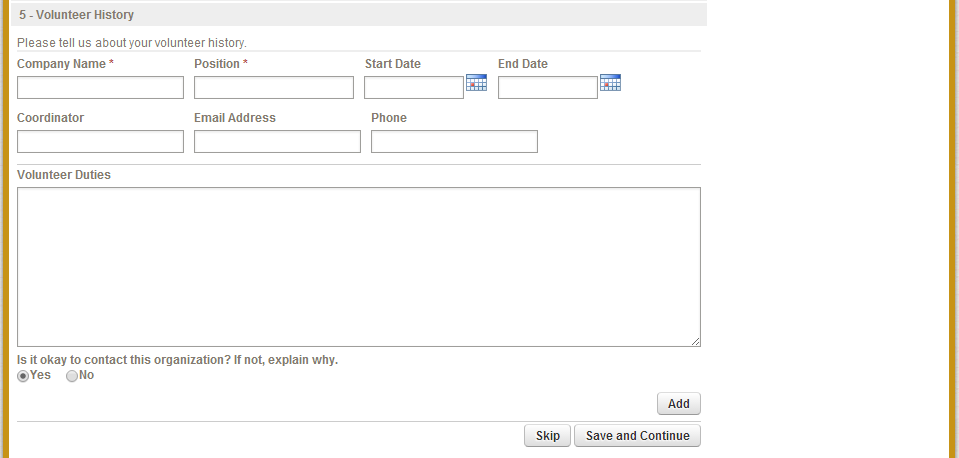
Volunteer History
The volunteer section is very similar to the work section.
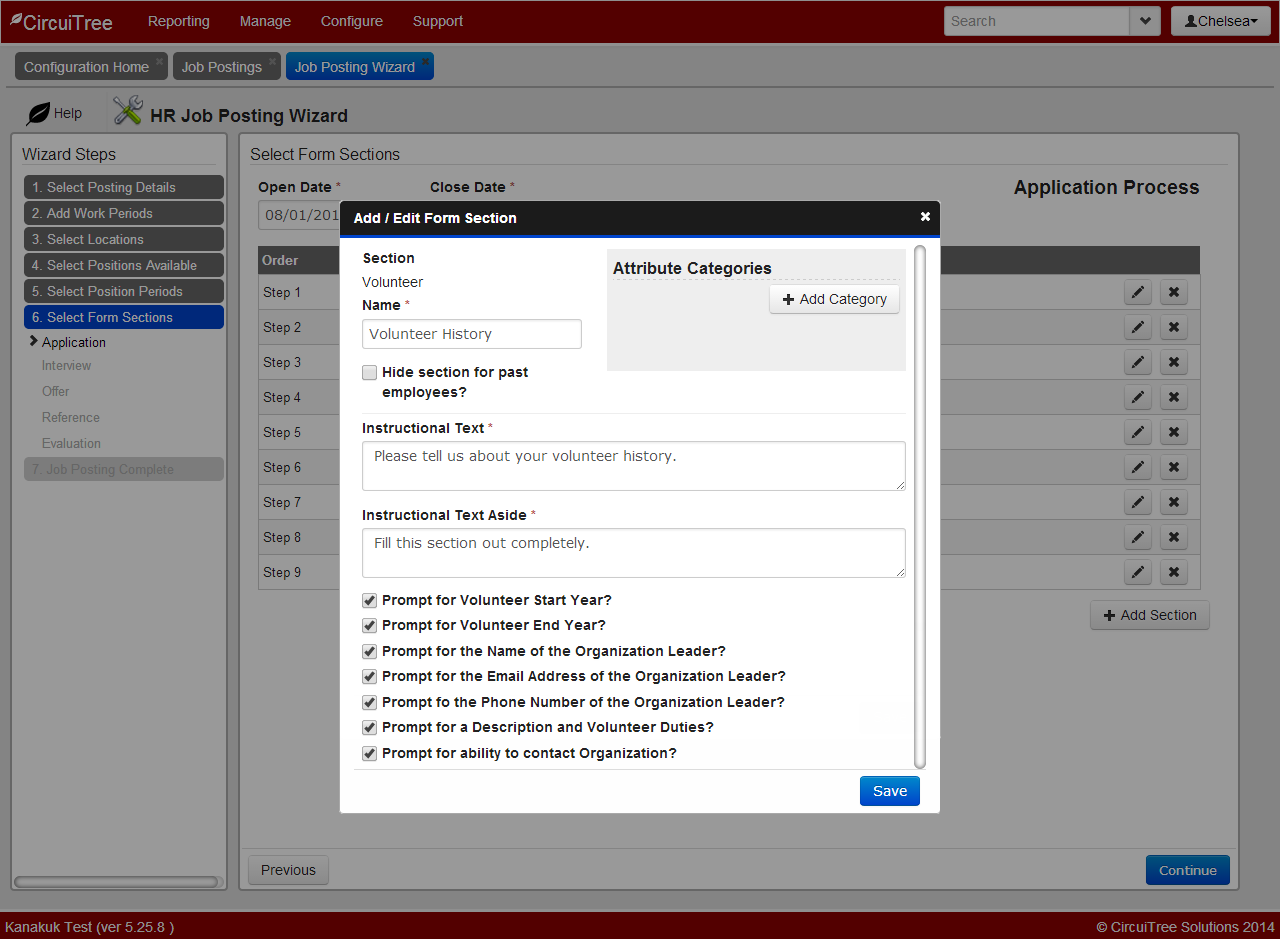
It’s another way for you to learn more about your applicants!
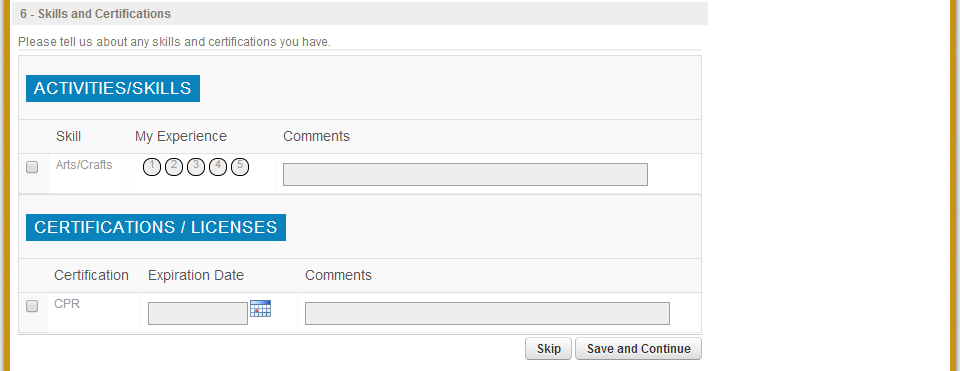
Skills and Certifications
When you add this section to your application, all skills and certifications that you attached to the positions contained in this job posting will appear.
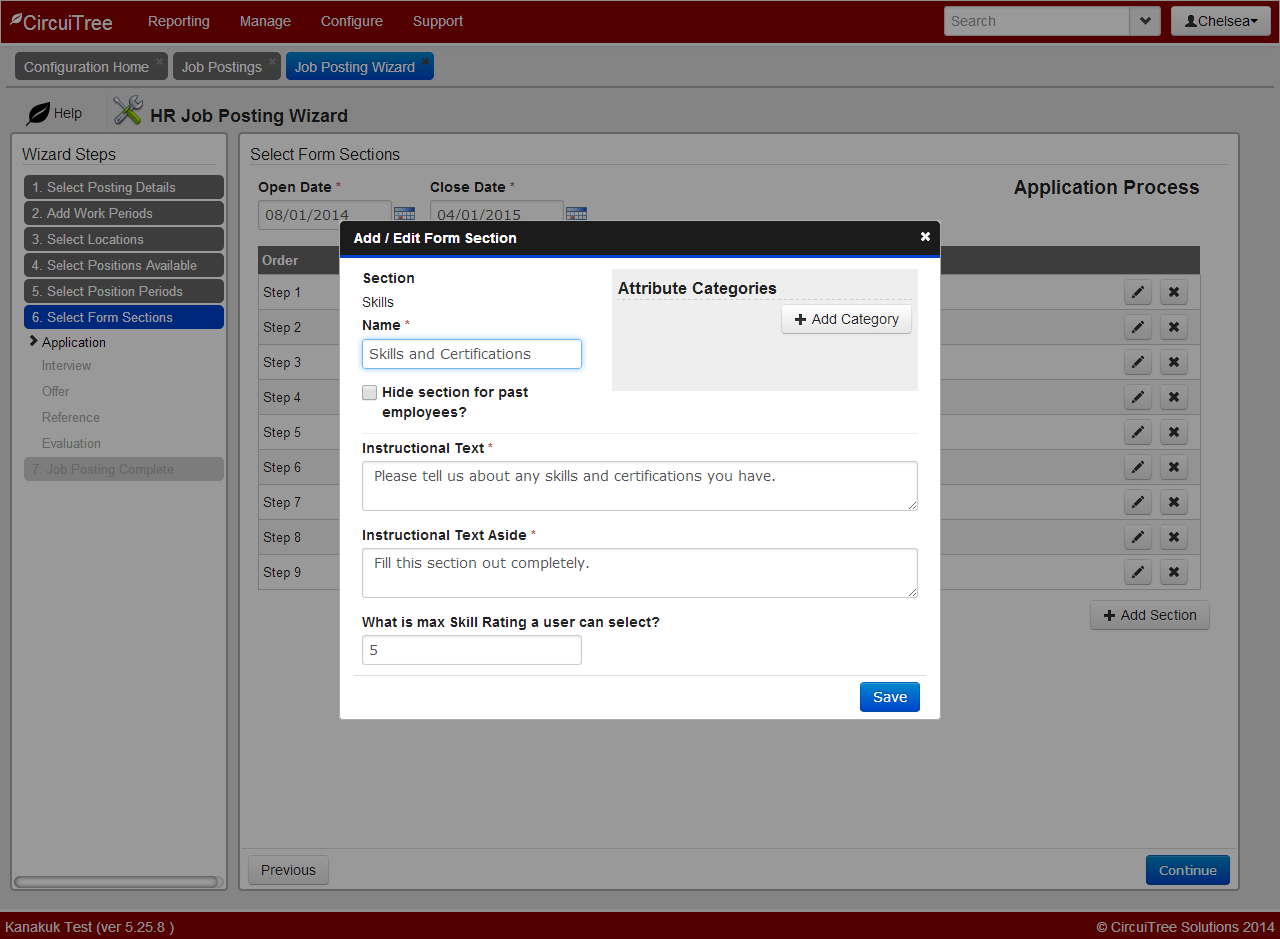
And below, you see the skill is one that can be ranked. This was set up in the skill configuration.
Reference List
To add the Reference List section, follow these steps:
- Select Add Section and under Form Section Type select Reference List.
- Fill out the information then select Save.
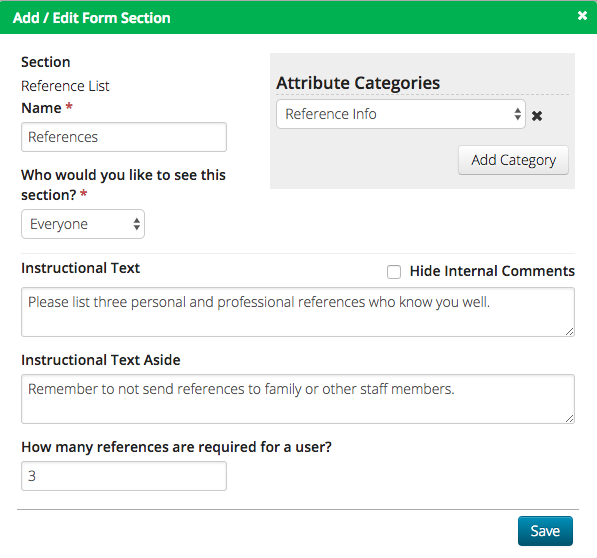
- Name – Enter the name of the section that will appear on the HR Site.
- Who would you like to see this section? – Select between New Applicants, Past Employees or Everyone.
- Attribute Categories – Select Add Category to add an Attribute Category attached to Staff. Attributes will be asked to Applicant.
- Hide Internal Comments – Select to hide comments that are added to references by internal users.
- Instructional Text – Enter text that will appear above where applicants will add their references on the HR Site.
- Instructional Text Aside – Enter text that will appear in the right hand column of the section on the HR Site.
- How many references are required for a user? – Enter the number of references the Applicant must submit.
Applicant View
An Applicant will see the following as they fill out their Application.
- Enter the information for the minimum number of references set on the Reference List step.
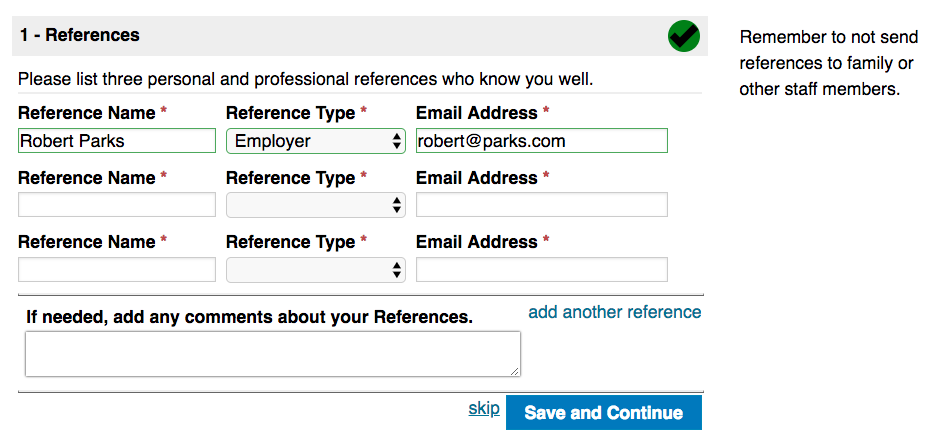
- Reference Name – Enter the name of the Reference.
- Reference Type – Select from a list of Reference Types.
- Email Address – Enter the email address of the Reference.
- Add Another Reference – Select link to add a line for another reference.
- Attributes – If there are any Attributes, enter information.
- Select Save and Continue.
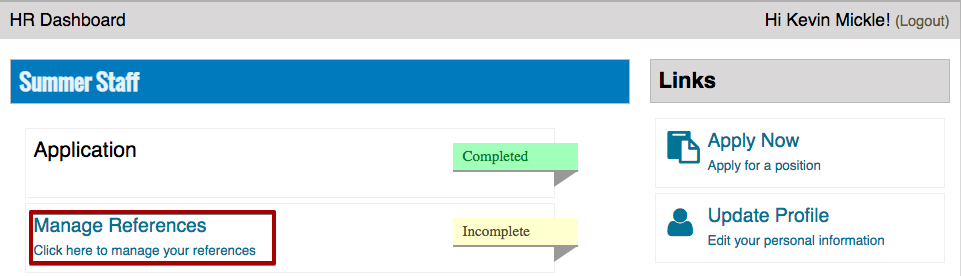
Once an Applicant submits their application, the HR Reference Request Automated Email will be sent.
Manage References
After references have been sent, Applicants can manage them from the HR Dashboard.
- On the HR Dashboard, select Manage References.
- References that have already been sent will be displayed and additional ones may be added.
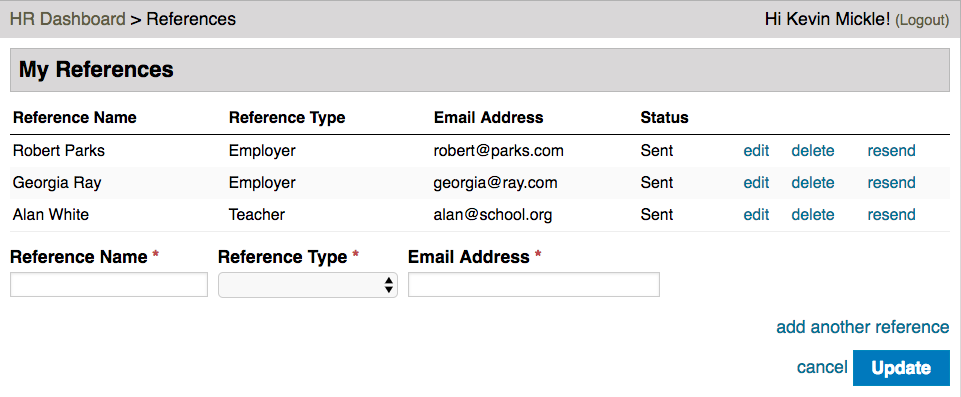
- Status – Will display either Sent or Completed.
- Edit – Select to edit the References name, type or email address.
- Delete – Will remove the Reference from the Application. The Reference will not receive any notification that their reference form has been removed. If they open the link in the HR Reference Request Automated Email after the reference has been deleted, the text will inform them that their reference is no longer needed.
- Resend – Resends the HR Reference Request Automated Email to the Reference.
- Add Another Reference – Select link to add a line for another reference.
- Once any changes have been made, select Update. Any new References will be sent the HR Reference Request Automated Email.
Related Articles
- References Overview
- How do I configure References?
- How does a Reference complete a Form?
- How do I copy the HR Reference Request email?
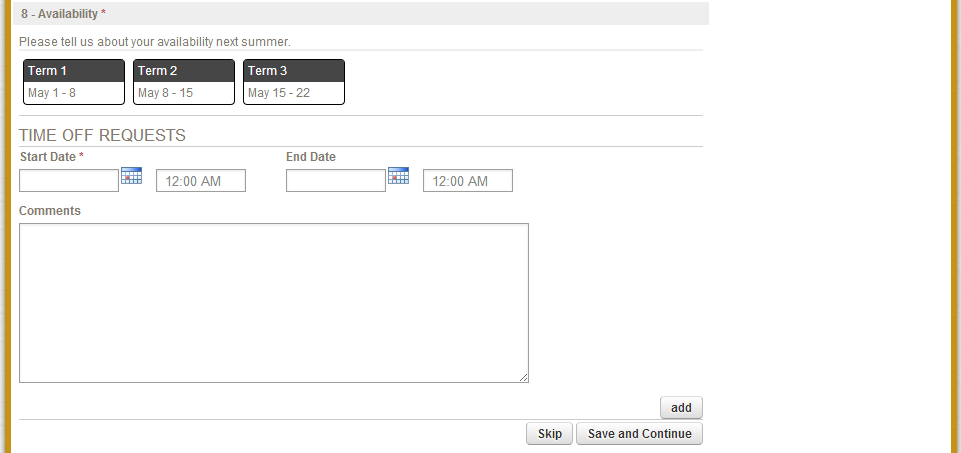
Availability
One of the most important pieces of information in selecting staff is their availability!
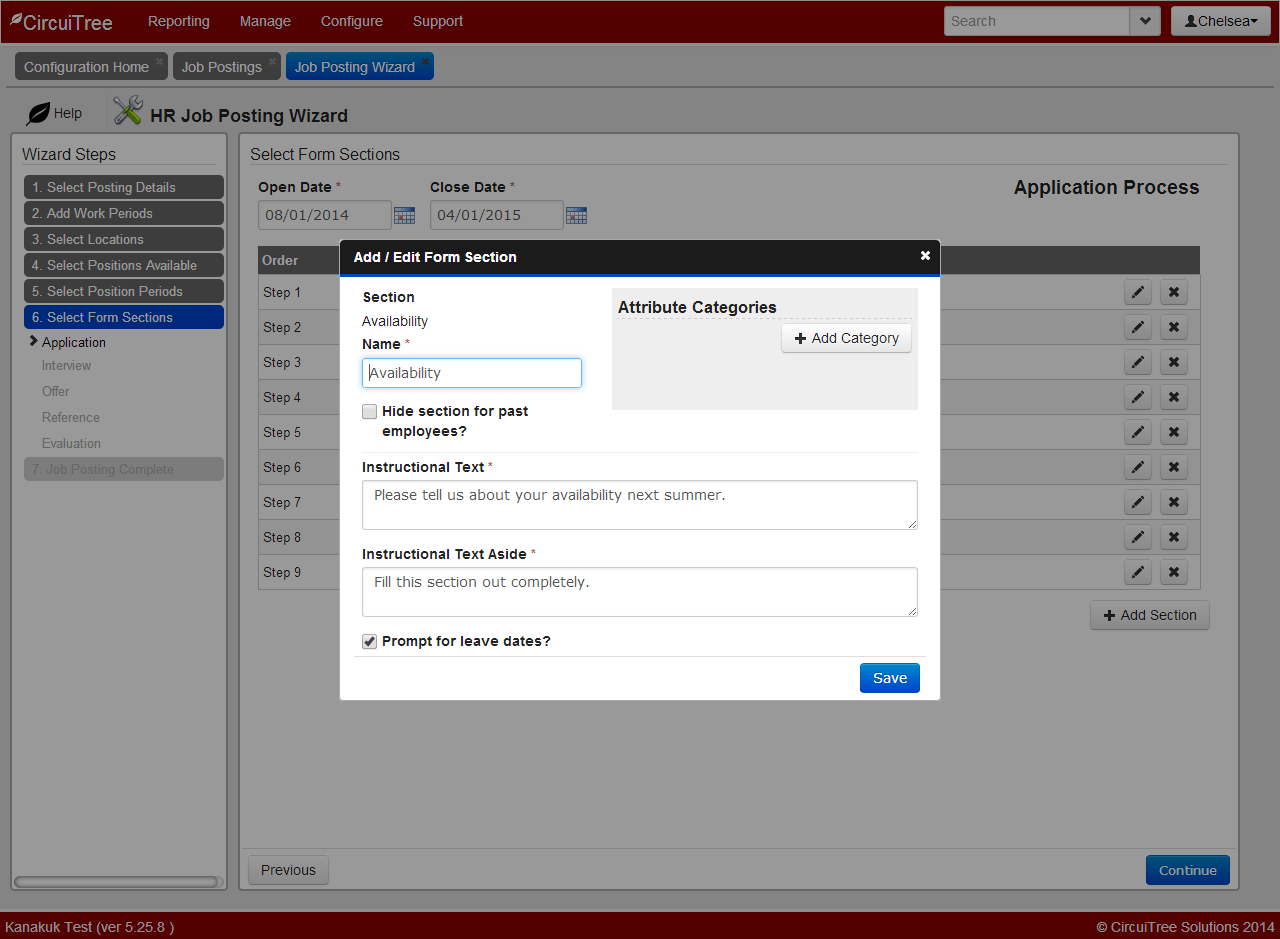
You can easily find out what their availability is with this form!
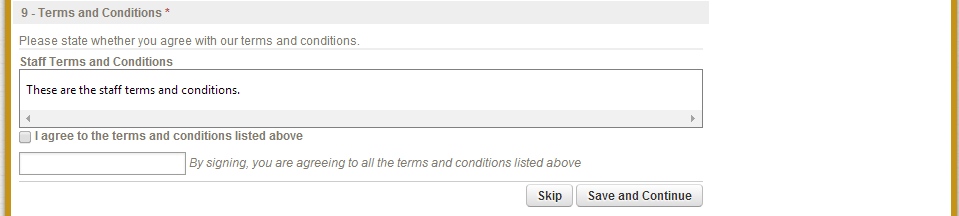
Terms and Conditions
You can also require your applicants to sign terms and conditions, just like event attendees! Just select the terms and conditions you want to add from the drop-down at the bottom. Also, this is only one of two sections that can be added to the application multiple times (for different terms and conditions).
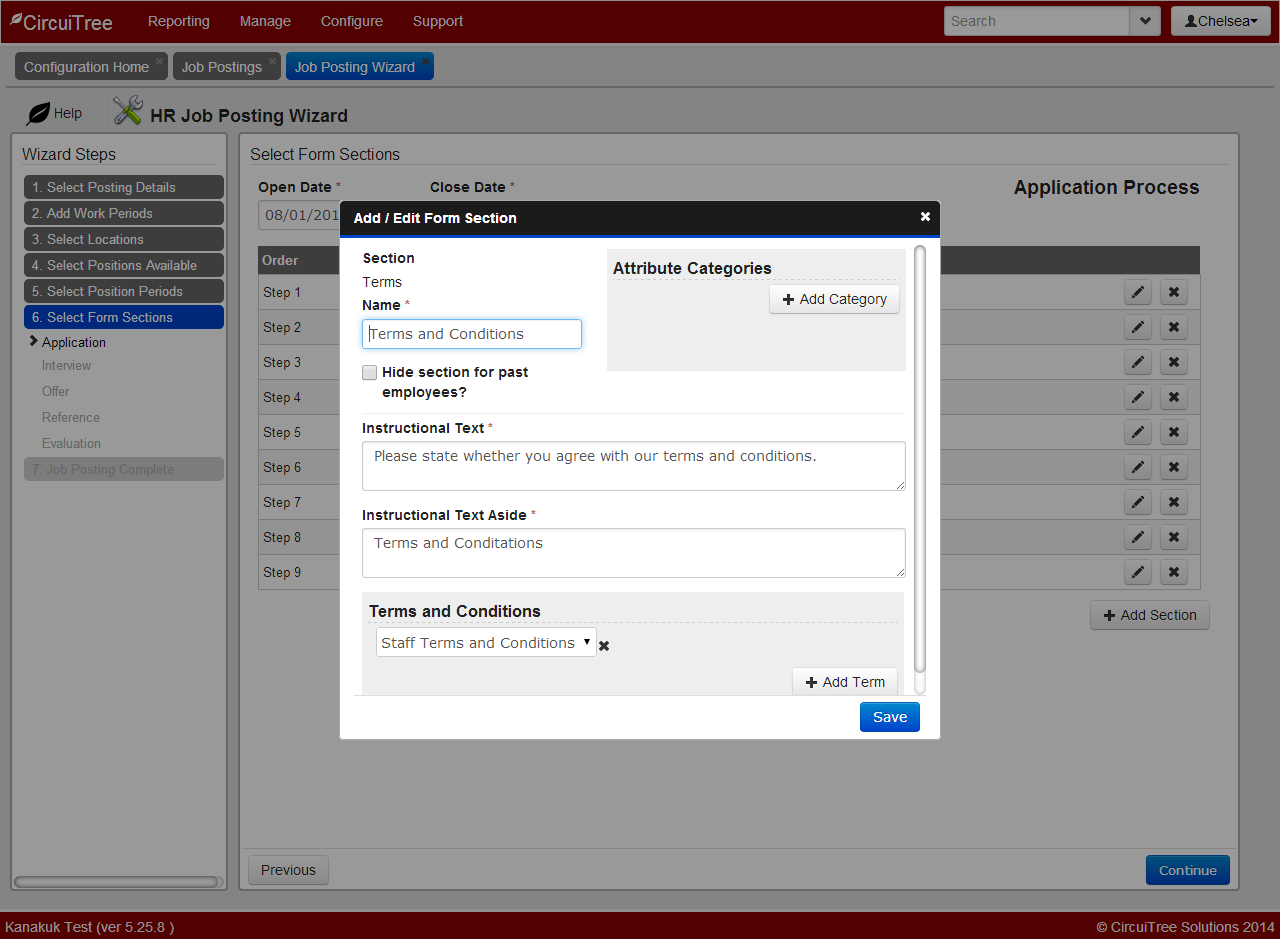
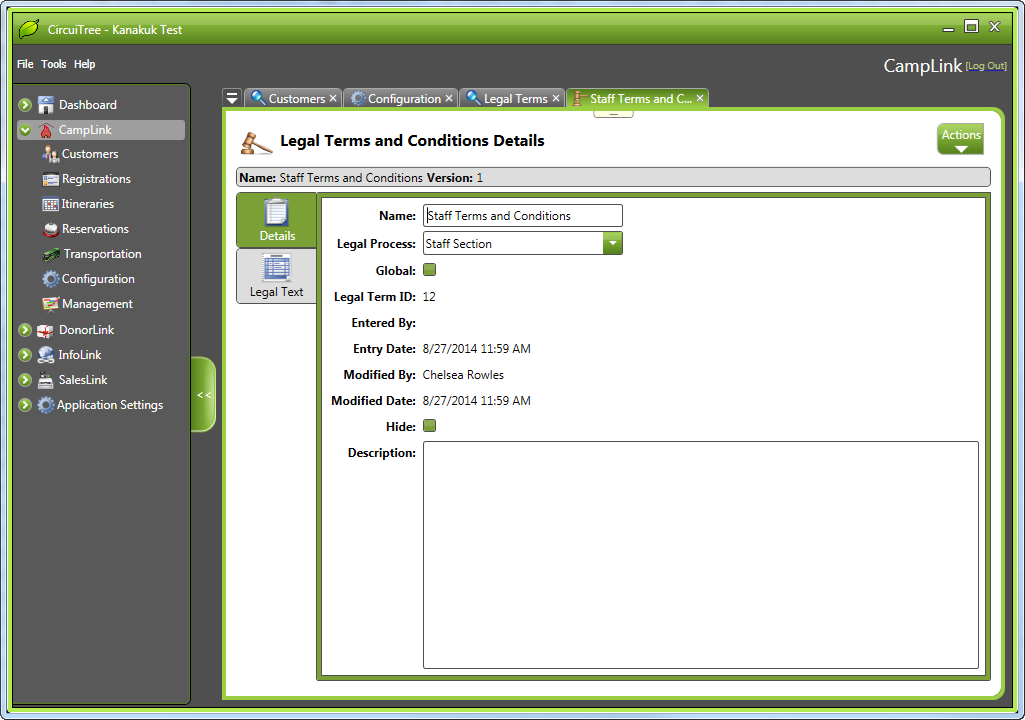
These terms and conditions are configured in the internal app. Just make sure their “Legal Process” is set to “Staff Section”.
And we accept electronic signatures for them online.
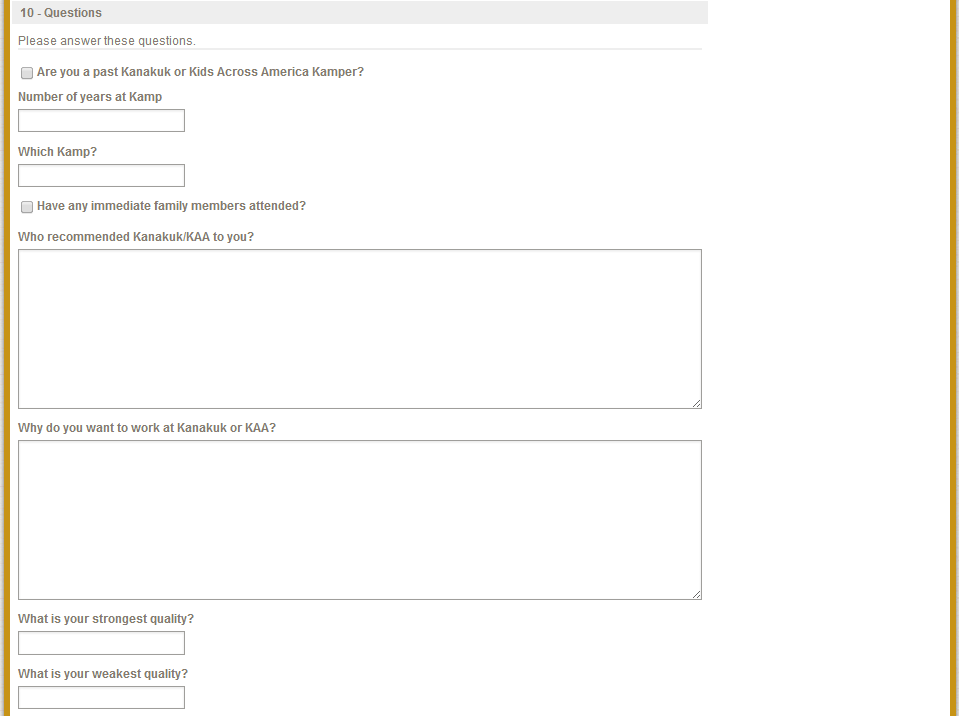
Custom Questions
This section is specifically for any attributes you’d like to add to the application. If you don’t want to ask for those attributes in any of the other sections, you can add them to the “Custom Questions” section. This is the other section that can be added multiple times on the application.

And here they are online!
Location Selection
Here, applicants can select which location they’d like to work at (if there is more than one).
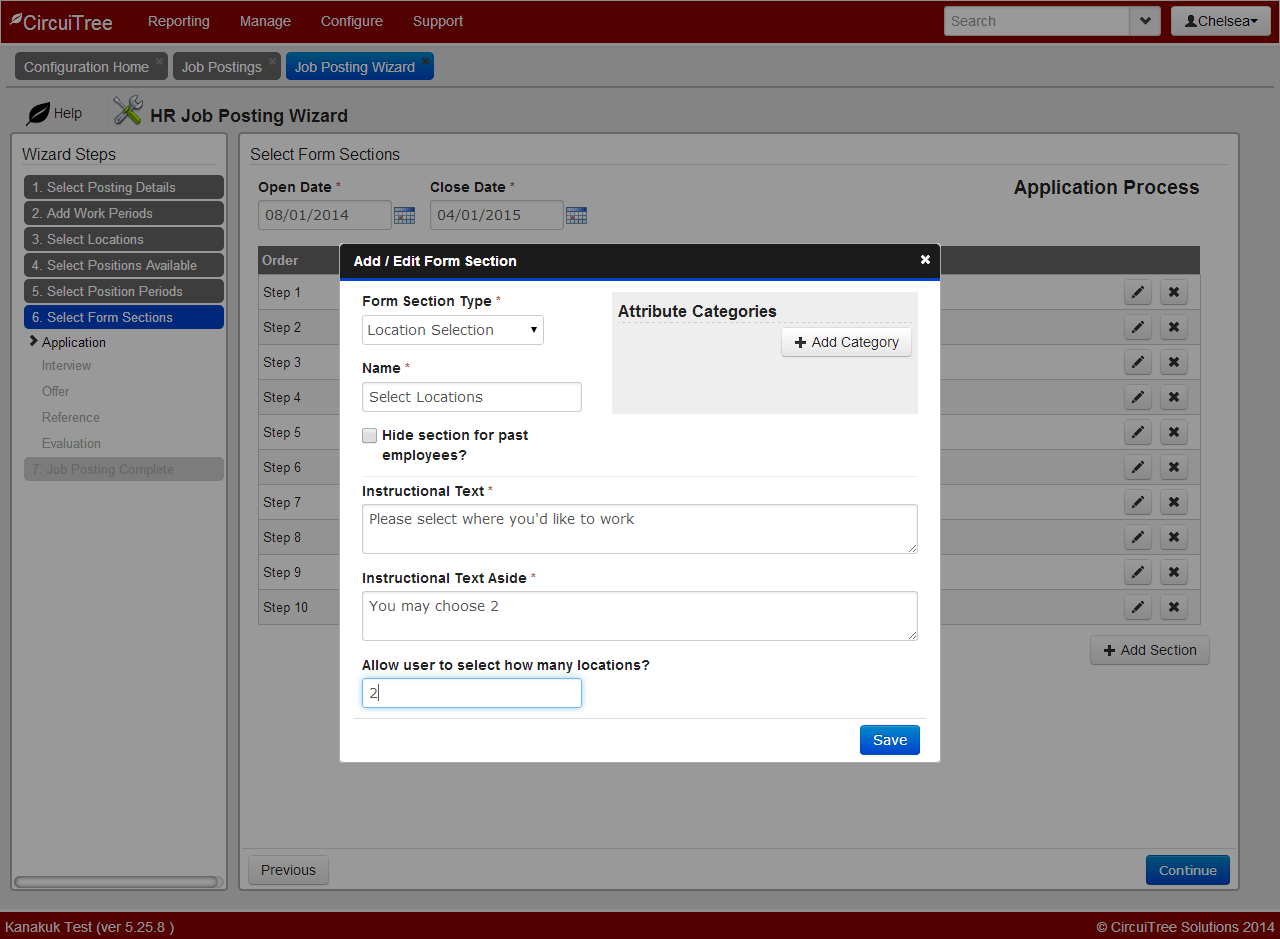
They can also rank them, if you made the locations available for ranking in configuration.

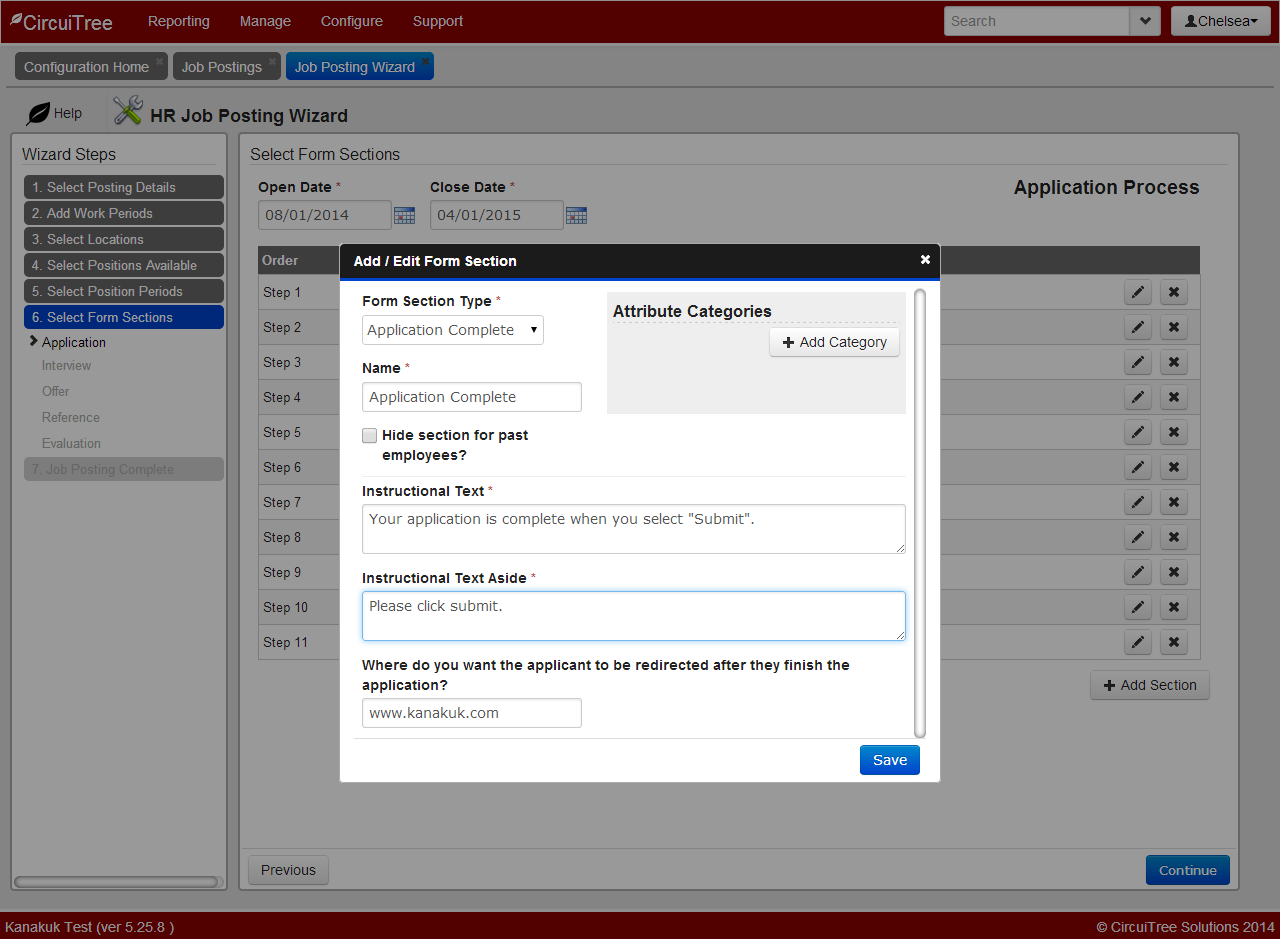
Application Complete
And finally, you must add the Application Complete section so the candidate can submit their application!