Scheduled Emails are useful in sending tailored messages that are sent based on a specific set of criteria. These emails will be sent before or after a Trigger has been fulfilled.
Examples
A few examples include:
Create Email
The following are the steps to create your own Scheduled Emails:
- In CT6, go to Manage > Camp > Scheduled Emails.
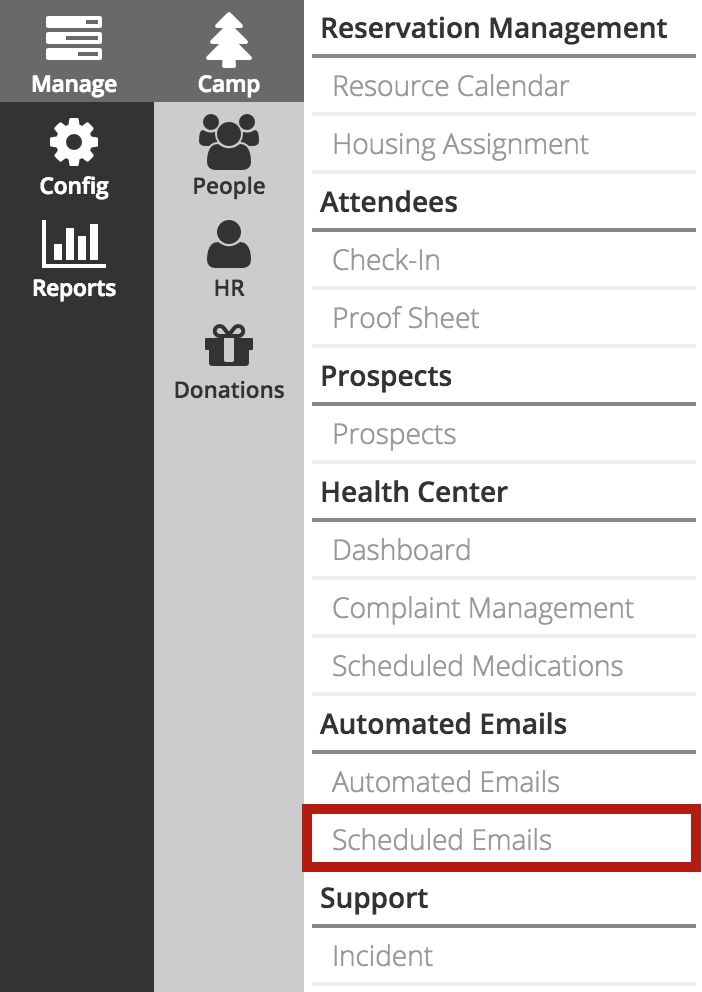
- In the lower right hand corner, select Add Scheduled Email.
- Fill out the following fields and select Create.
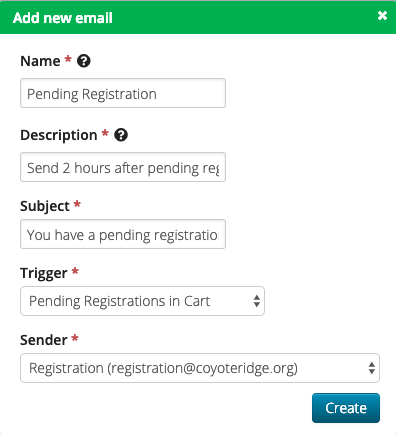
- Name – Name of the email used internally only.
- Description – Description of the email used internally only.
- Subject – Subject line used in the email when sent to customers.
- Trigger – Select a Trigger that is used to send the email.
- Sender – Select the email address to send from.
Triggers
Triggers are used to initiate the sending of a Scheduled Email and are based on the date of a specific action. Emails with Attendee or Itinerary in the name are sent to different groups of people based on the type of Trigger.
- Attendee – Sends one email per Registation to the email address of the Admin who registered the Attendee.
- Itinerary – Send one email per Itinerary to the email address of the Admin who created the Itinerary.
Determine which Trigger is by taking a look at this article:
Configure Email
Once the email is created, you can configure the content.
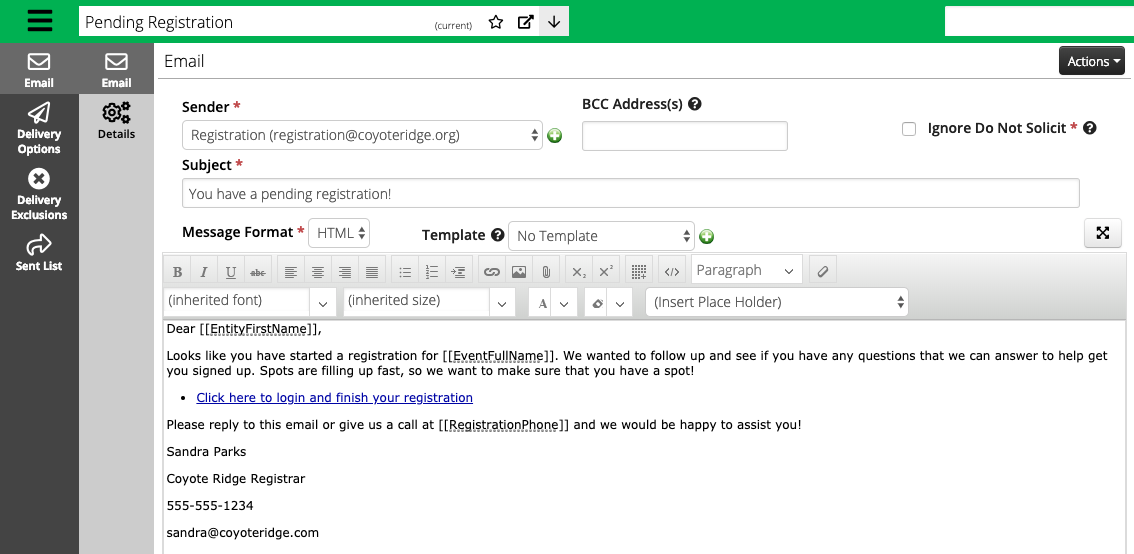
- Sender – Select from a list of Automated Email Address or create a new one. How do I configure outgoing emails?
- BCC Address(s) – Add additional email addresses to send the email to when triggered using a semicolon in between each address.
- Subject – Update the Subject line. Placeholders can be used in the Subject as well.
- Ignore Do Not Solicit – If this option is selected, then the email will be sent to all customers. Any “Do Not Solicit” flags on accounts will be ignored.
- Message Format – Select between HTML and Text.
- Template – Select a Template to use. How do I send an email using a MailChimp Template?
- WYSIWYG editor – Use options to change formatting, add photos and insert Place Holders.
Details
Update the Details of the email.
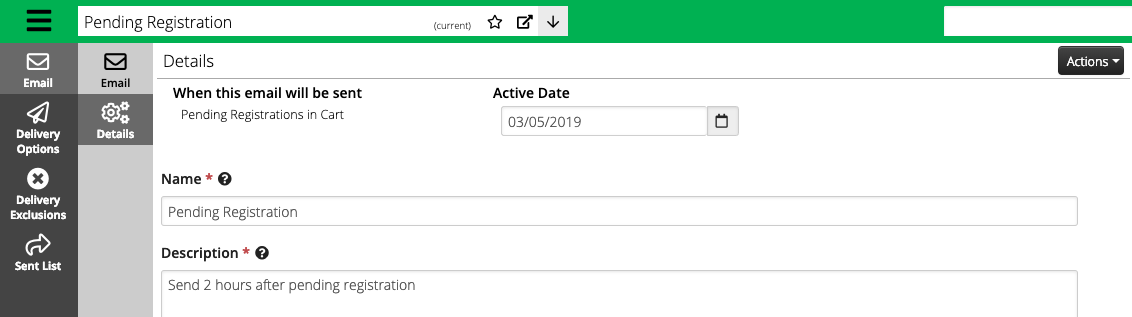
- When this email will be sent – The name of the Trigger being used.
- Active Date – The date used to determine when to start running the Scheduled Email process. Defaults to today’s date.
- Name – Name of the email used internally only.
- Description – Description of the email used internally only.
Delivery Options
Specify who the email will be sent to using the Delivery Options.
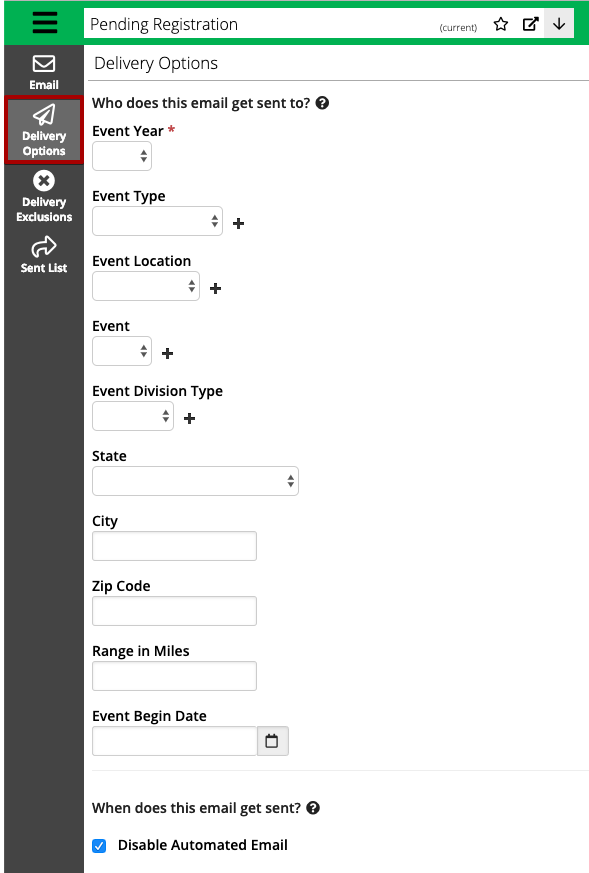
- Parameters – Enter the parameters to filter the Trigger to send to specific customers. Any parameter that is left blank won’t be used to filter.
- When does this email get sent? – When a Scheduled Email is created, it is disabled by default. To set the time when it is sent, uncheck disable.
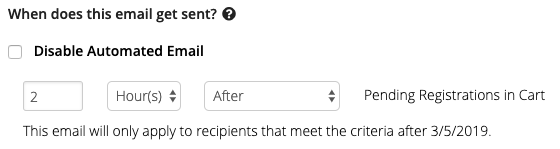
- Time – Enter the number of hours, days or weeks, in coordination with the Time Frame, to initiate the Trigger.
- Time Frame – Select a time frame of Before, After, or Immediately After, in coordination with the Time, to initiate the Trigger. Some Triggers do not have a Before option.
Disabled Emails
There are two scenarios where CircuiTree will automatically disable a Scheduled Email from sending:
- Past Event Year – Event Year parameter is in the past [i.e. The current Event Year is 2019, but the email is configured with an Event Year of 2018].
- Invalid Parameter – There is an parameter that is configured incorrectly. This can occur if the underlying query that triggers the Scheduled Email has changed.
A notification email with the subject of “Your Scheduled Email has been Disabled” will be sent to the following people:
- The user that created or last modified the email.
- Any email addresses included in the BCC field of the email.
After you receive the email, there are two ways to proceed:
- Continue Sending
- Past Event Year – Update the Delivery Options to remove the past Event Year and add an Event Year in the future.
- Invalid Parameter – Review the Delivery Options to confirm that they are correct and contact Support to remove the flag that is preventing the email from sending.
- Remain Disabled – No action is needed on your part.
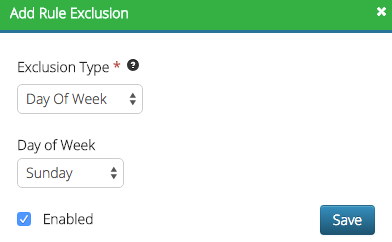
Delivery Exclusions
If there are any times or dates when you do not want to send the email, set them here. For example, you may want to set a Delivery Exclusion to not send a Pending Registration in Cart email on the weekend if there is no one in the office to answer questions. If you have questions on if you should use this feature, please contact your Business Analyst.
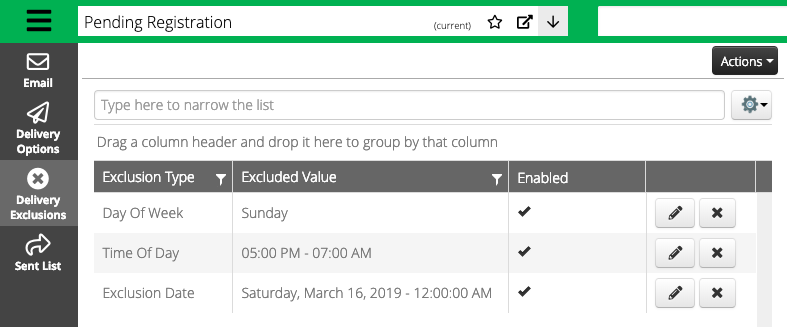
- Select the
 icon and select Add Exclusion. There are three different types of exclusions to choose from.
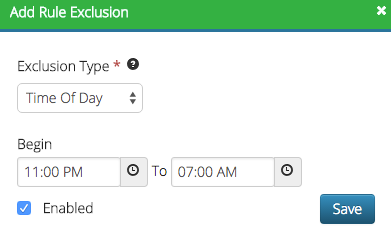
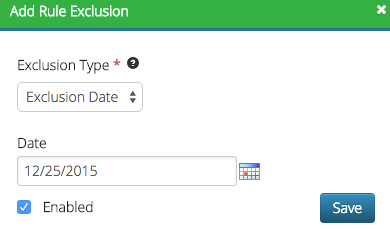
- After adding an Exclusion, select Save.
- After all changes are made, select Actions > Save.
Sent List
To see a list of customers that the Scheduled Email was sent to, select the Sent List.
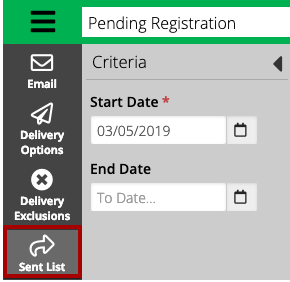
- Enter a Start Date and optionally an End Date and then select Find.
- The results will return the following:
- Link to customer
- Name of customer
- Email address
- Sent Date with link to content of email
Actions
There are three options under the Actions menu.
Save
Once all changes on your email have been made, select Actions > Save.
Copy
Have a similar email to one you have already created? Select Actions > Copy to create a new one. Copied emails are disabled by default.
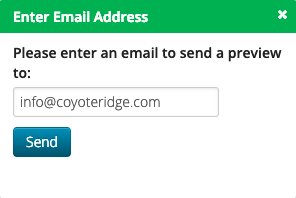
Preview
- To see a preview of the email, select Actions > Send Preview.
- Enter your email address and select Send.