Contents
The culmination of the application and interview process is to offer employment to a potential staff member. The following article will walk you through the process of sorting through qualified applicants and creating an Offer.
Hire
There are multiple spots where you can select Hire to extend an Offer to an Applicant.
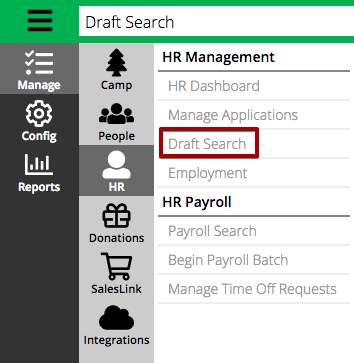
- Draft Search
- Employment
- Application Management
- Application
Draft Search
The Draft Search screen is used to find qualified applicants, review recommendations from interviews and make hiring decisions. Learn how to use Draft Search.
- In CT6, go to Manage > HR > Draft Search.
- Set the Draft Criteria and then select Find.
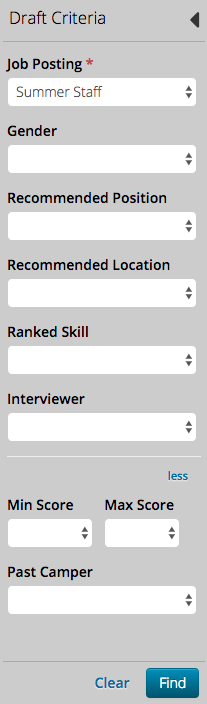
- Job Posting – Select from a list of Job Postings.
- Gender – Select either Male or Female.
- Recommended Position / Location – Filter from recommendations made on Interviews.
- Ranked Skill – Select from a list of Skills that were ranked.
- Interviewer – Includes anyone who completed an Interview for the Applicant.
- Min / Max Score – Come from Interview rating.
- Past Camper – Choose between Never Attended or Former Camper.
- Select an Applicant and the Summary will appear.
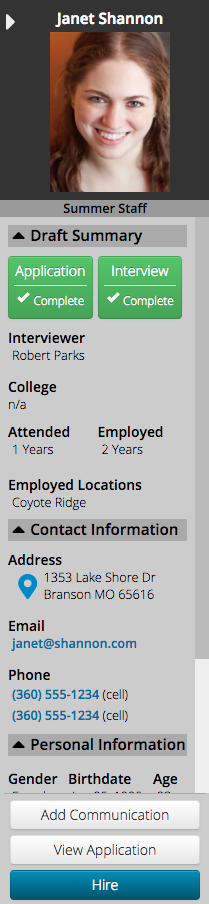
- Select Hire to open the Offer.
Employment
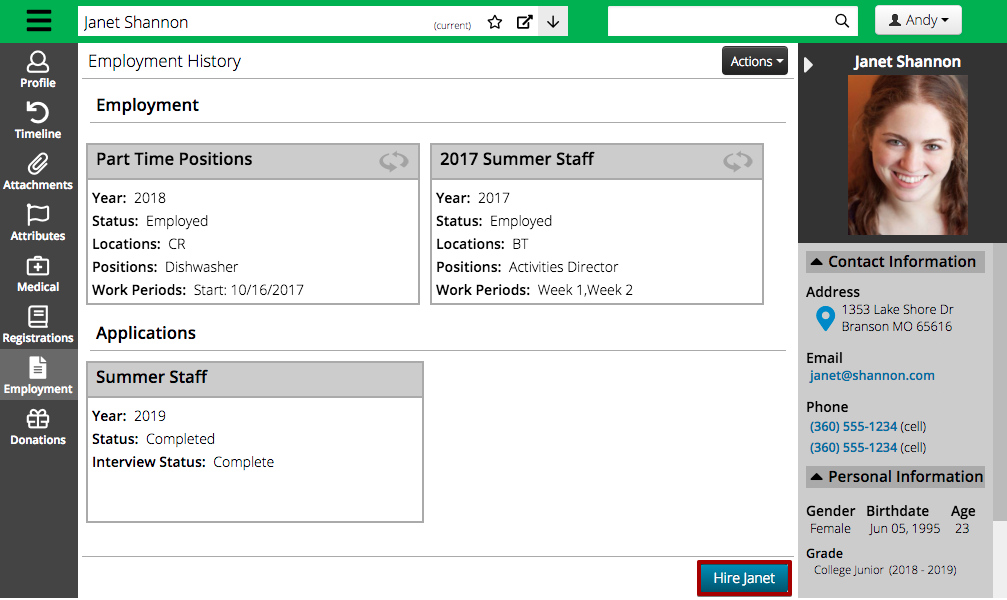
You can also extend an Offer from any Individual’s profile. An Individual does not need to have an Application in order for you to extend an Offer.
- In CT6, go to the Individual’s Profile > Employment and select Hire.
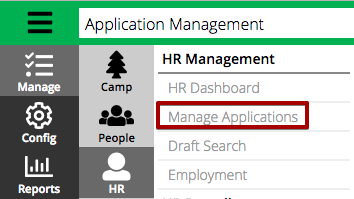
Application Management
- Go to Manage > HR > Manage Applications.
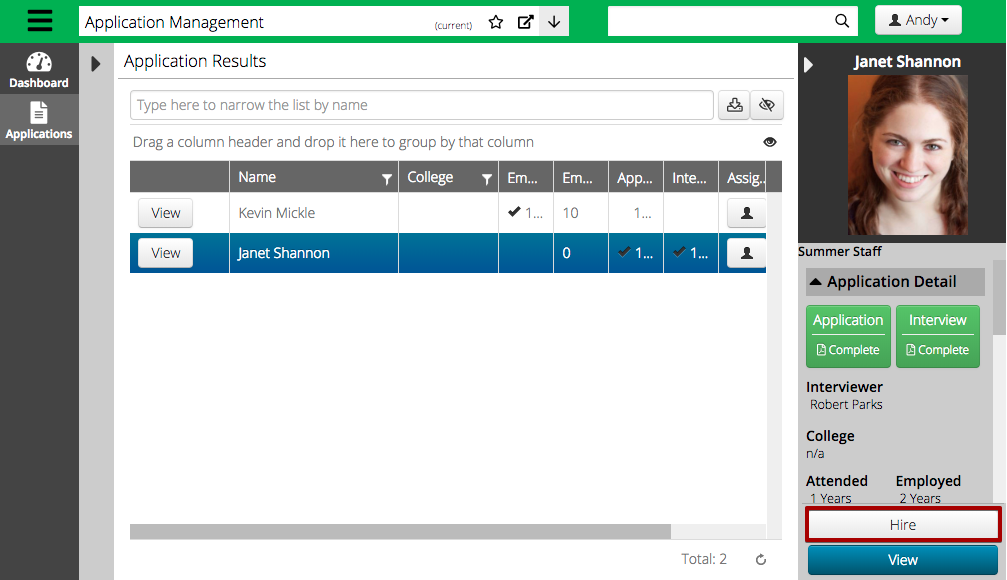
- Select the name of the Applicant and then in the Summary select Hire.
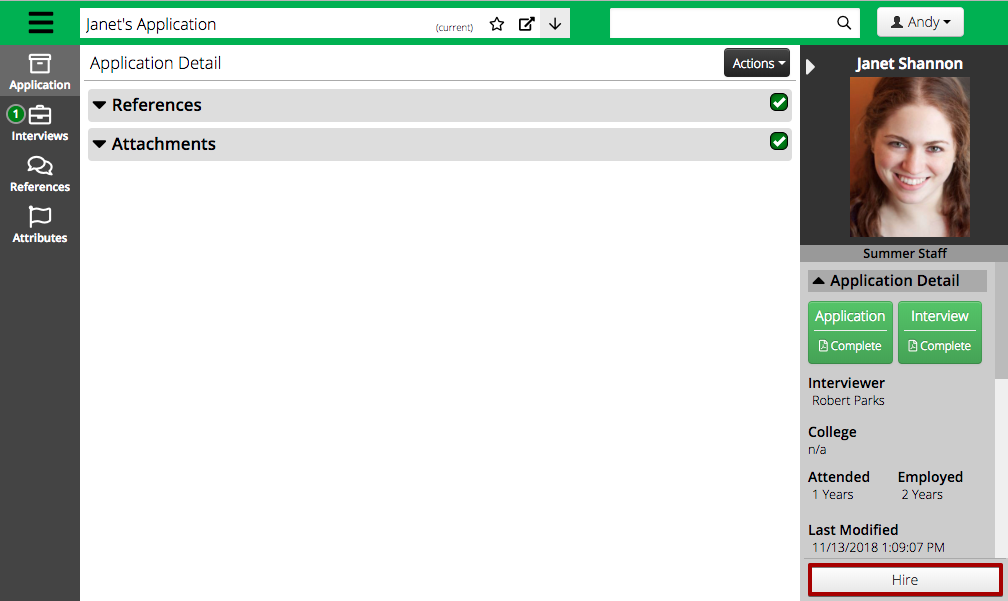
Application
- Open any Applicant’s Application and in the Summary select Hire.
Offer
The Offer screen allows you to customize the position, work periods and pay rate to send to the applicant.
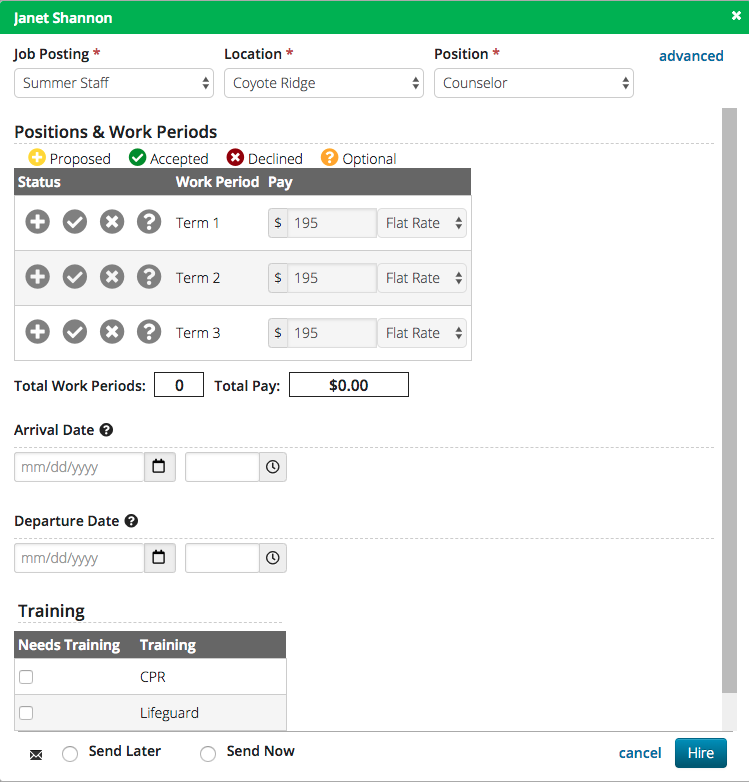
Positions and Work Periods
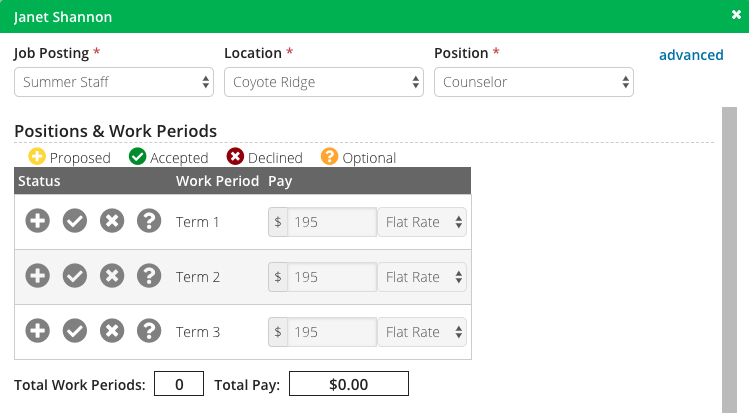
Basic
By default, the Basic Offer is shown. Use this option if the Applicant will be working at the same Location and Position for their entire employment. Any Location and Position recommendations from the Interview will pre-populate.
- Job Posting – Select from a list of Job Postings.
- Location – Select from a list of Locations from the given Job Posting.
- Position – Select from a list of Positions from the given Location.
- Status – Select from one of four statuses for each Work Period.
 When Offer is sent, Applicant can choose to Accept, Decline or selct Modifications
 Work Period Offer is accepted.
 Work Period Offer is declined.
 Applicant has choice to Accept or Decline Work Period Offer.
- Pay Rate – Defaults from the rate entered in the Positions section of the Job Posting. Override if needed.
- Pay Frequency – Defaults from the frequency entered in the Positions section of the Job Posting. Select from Hourly, Daily, Bi-Weekly, Annually or Flat Rate.
- Total Work Periods – Totals the number of Proposed or Accepted Work Periods.
- Total Pay – Totals the pay for Proposed or Accepted Work Periods for Daily, Annually or Flat Rate options.
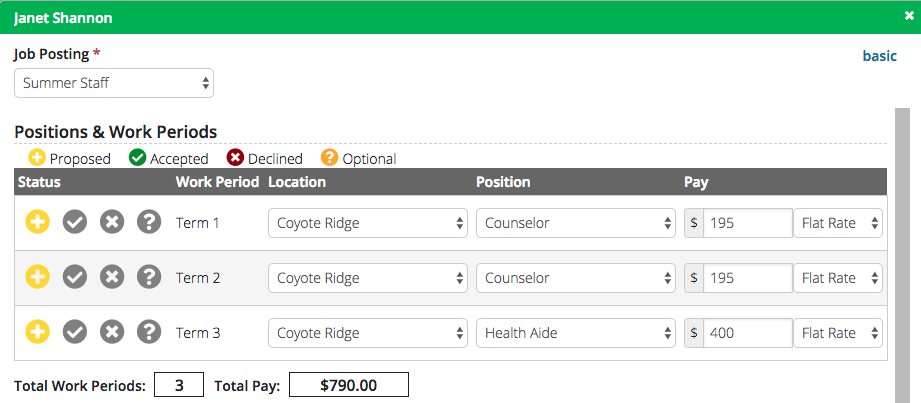
Advanced
Select Advanced if the Applicant will be changing Locations or Positions during their Employment. For each Work Period, you can select a different Location or Position.
No Work Periods
If the Job Posting is configured without Work Periods, follow these steps.
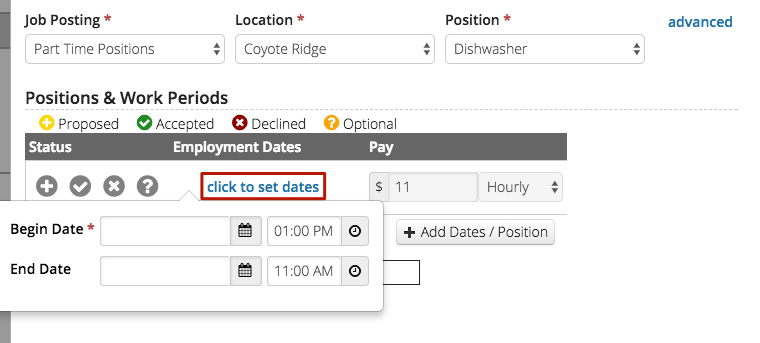
- Click to set dates – Enter a Begin and End Date for employment.
- Pay Rate – Defaults from the rate entered in the Positions section of the Job Posting.Override if necessary.
- Pay Frequency – Defaults from the frequency entered in the Positions section of the Job Posting. Select from Hourly, Daily, Bi-Weekly, Annually or Flat Rate.
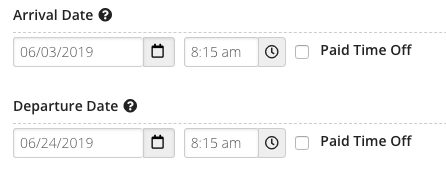
Arrival / Departure Dates
This section allows you to determine the Arrival and Departure Dates for the Applicant. Note that any time before a Work Period is considered unpaid and will not be included in Payroll.
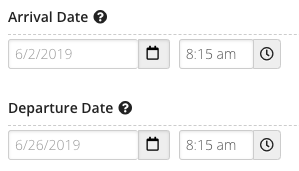
- Arrival Date / Time – Defaults to the date and time, configured under Schedule, from the first Work Period selected. Override if necessary.
- Departure Date / Time – Defaults to the date and time, configured under Schedule, from the first Work Period selected. Override if necessary.
If the employee is arriving after or leaving before the start or end date of the Work Period, you can choose to mark the time as Paid Time Off. In this example, the Arrival Date is one day after the Start Date of the Work Period and the Departure Date is one day before the End Date of the Work Period.
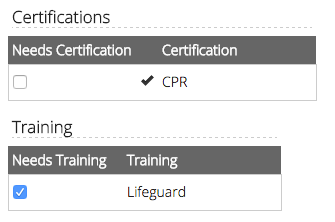
Certifications / Training
Select any Certifications or Trainings that the applicant will need if the Offer is accepted. There will be an option to upload files for these during Onboarding if the Certification Upload section is included.
Email Options
Select an option of when to send the Employment Offer Automated Email to applicants about their pending Offer.
![]()
- Send Later – Emails are batched and sent out at a later time. How do I send Offer emails later?
- Send Now – Email is sent immediately. Option will be not be selectable if the open date for the Offer Form Section is in the future.
- Once an email option is selected, select Hire.