Contents
Managing Group Registrations is a breeze in CT6. See all the detail from individual registration on the Roster, to tracking a payment under Accounting, or adding specific Reservations for the group.
Look up a Group and select Itineraries > Group Registrations to see the Events that the group has or will be attending.
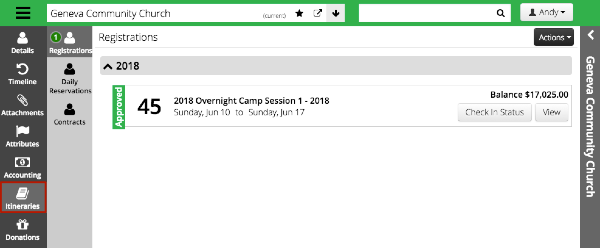
- Status – Shows either Approved, Cancelled, Pending or Wait Listed
- Quantity – Displays the number of registrations for the group.
- Event Name – Name of the Event that the group is attending.
- Dates – The dates of the Event.
- Balance – The current balance due for these registrations.
- Checked-In Status – Displays either Checked-In or Not Checked-In.
- View – Select to open up the group registration.
Detail
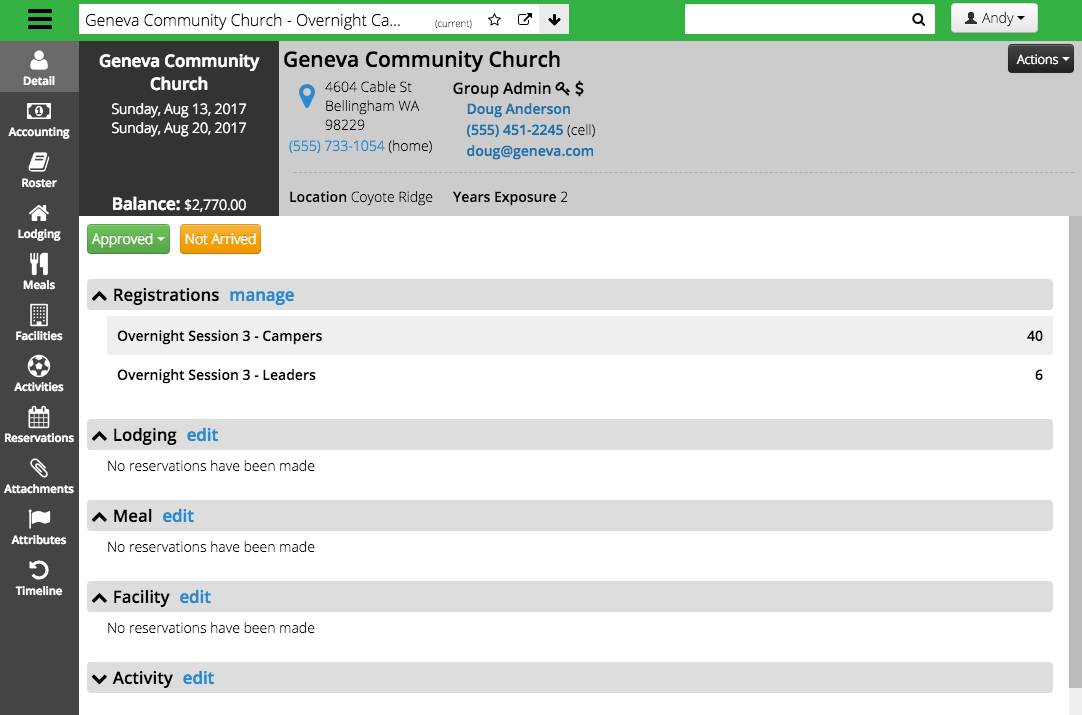
On the Detail screen you can see an overview of some of the important information about the registrations. To jump to the Roster, select Manage. To add reservations, select Edit next to one of the sections.
Accounting
Summary
See a breakdown of the Payments, Scholarship, Discounts and Charges for the registration.
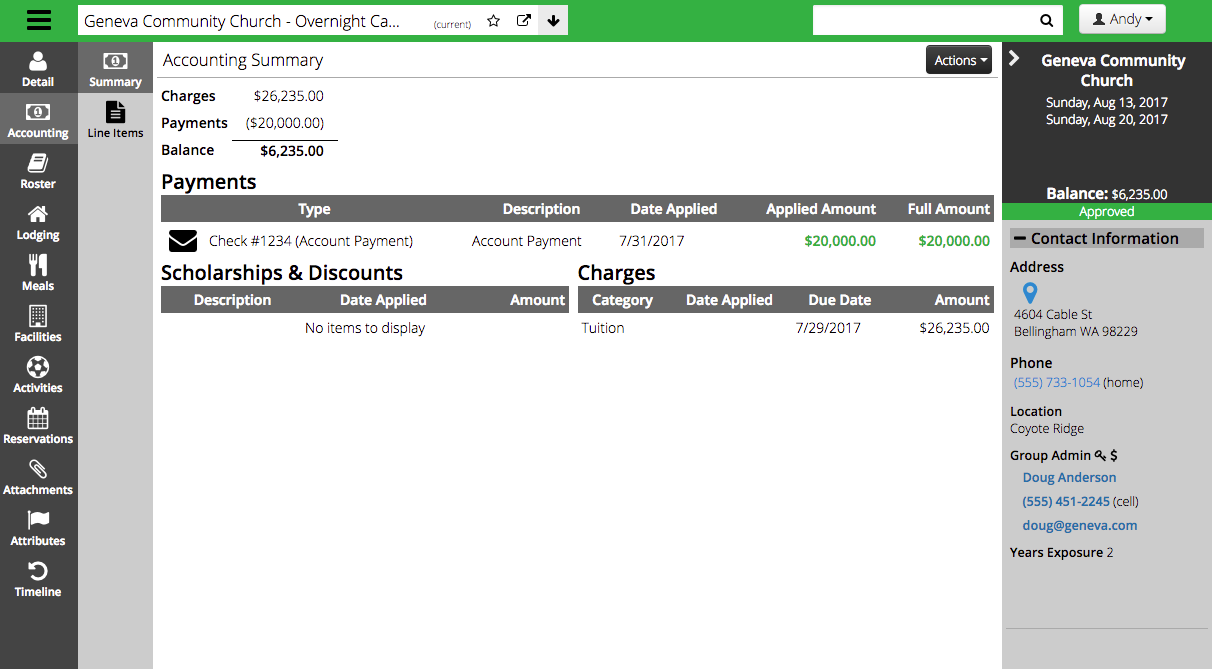
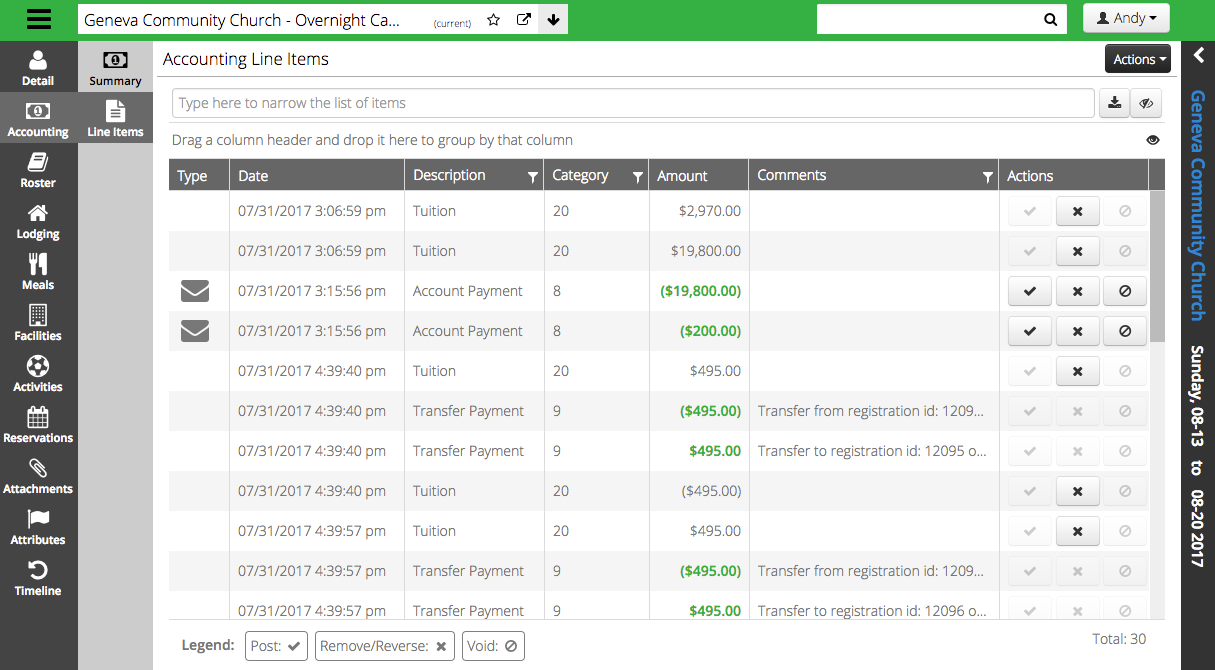
Line Items
To view more detail, select Line Items to see the different AR entries for the registration.
Roster
The Roster allows you to see a list of Registrations for Attendees coming with the Group.
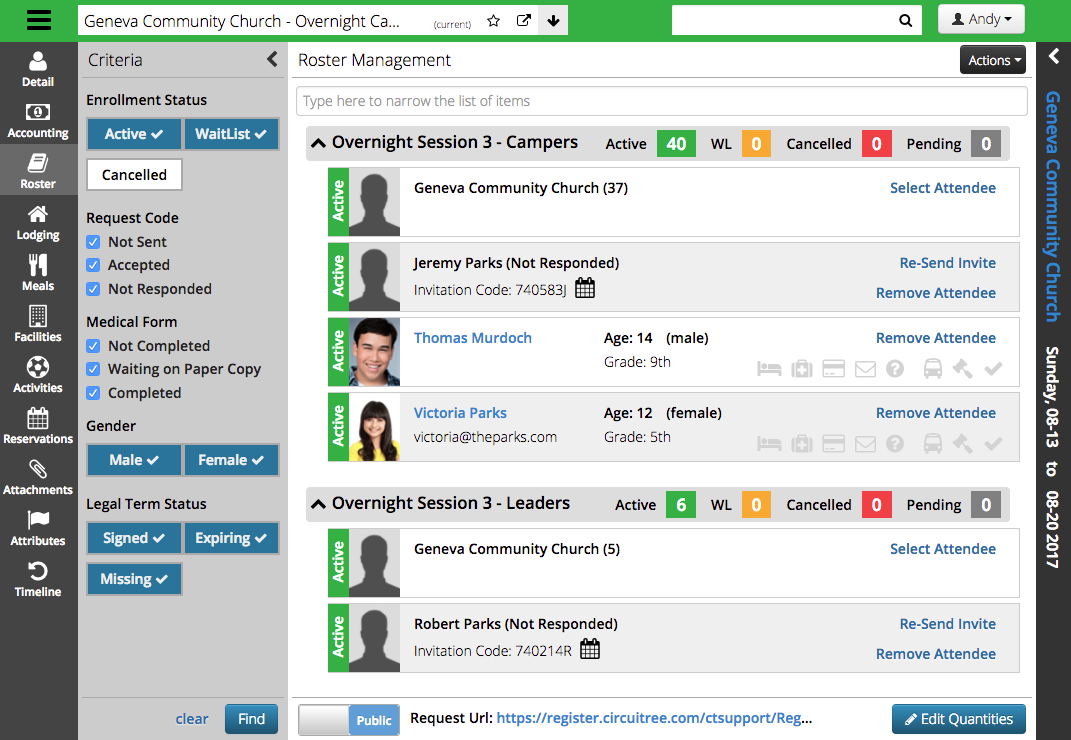
- Criteria – To filter the results, select the criteria and select Find.
- Filter – Look up a specific registration by entering a name at the top of the Roster Management section.
- Registration Counts – View the number of Active, Cancelled, Pending and Wait List registrations grouped by Event Division.
- Itinerary Status – Change the status from Public to Private at the bottom of the screen. Switching to public displays a link that Group Leaders can distribute to allow attendees to register for the Event.
- Edit Quantities – Add or remove registrations in bulk.
Registrations
For each Registration, you can see different statuses and dive in to perform actions on the registration.

- Status – Displays Active, Cancelled, Pending or Wait List.
- Name – Select the name to open the Individual registration. How do I manage a Registration?
- Demographics – Age, gender and grade of Attendee.
- Workflow Steps – Icons represent the different workflow steps configured for the Event. Completed steps will display darker grey.
Remove Attendee
If you need to cancel or unname a registration select Remove Attendee. After selecting, you will be given a choice to Cancel or Unname.
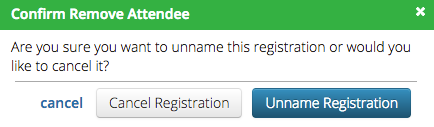
- Cancel will reduce the number of registration for the group.
- Unname will keep the registration count the same, but open up that spot for it to be named by someone else.
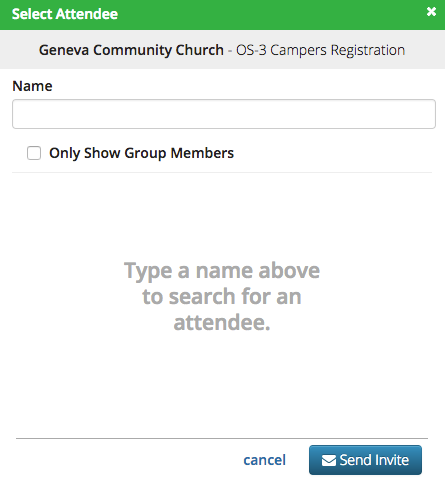
Select Attendee
To name an Attendee or send an email Invite, choose Select Attendee.

Search
Search for existing Attendees by entering their name. To search for Group Members, select Only Show Group Members.
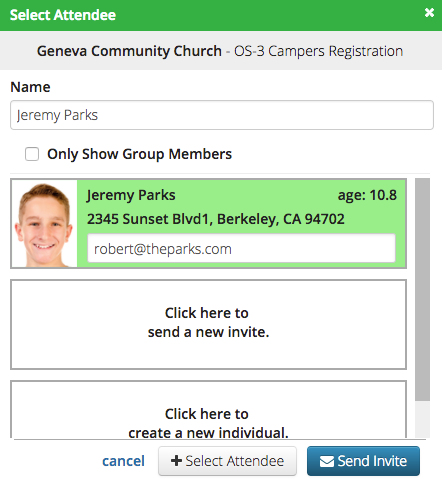
Select Existing Attendee
Select the Attendee and choose Send Invite and the Group Attendee Request Code Automated Email will be sent. To name the person on a registration, choose Select Attendee.
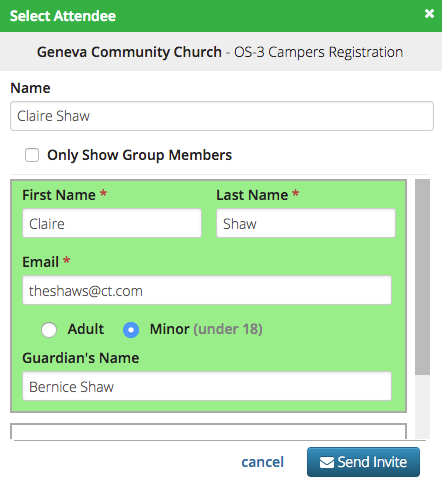
Send a New Invite
To send an Invite to a person not in the database, select Send a New Invite. Enter the first and last name of the Attendee as well as who should receive the invite email. Select Send Invite and the Group Attendee Request Code Automated Email will be sent.
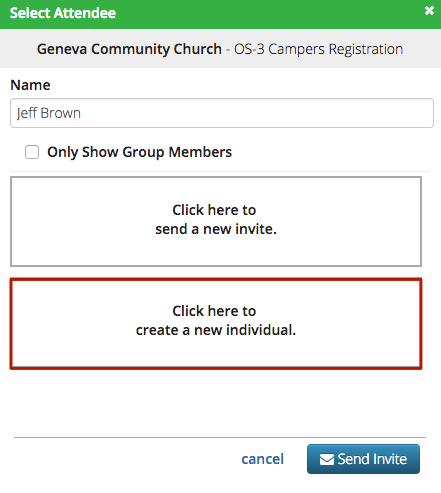
Create New Individual
Click Create a New Individual to enter a new person that is part of the group and is registered for the Event.
Resend Invite
To send the Group Attendee Request Code again, select Resend Invite.

Edit Quantities
If you need to add or remove registrations in bulk, select Edit Quantities in the lower right hand corner. Update the number of Active or Wait List registrations and select Save Quantities.

Lodging
- Select Lodging to see what Lodging Resources are available. Use the Criteria on the left to filter the list if needed.
- Only Show Allocated – Select to only see Lodging that has been allocated to this Event.
- Only Show Reserved – After reserving Lodging, select to view those resources that have been reserved.
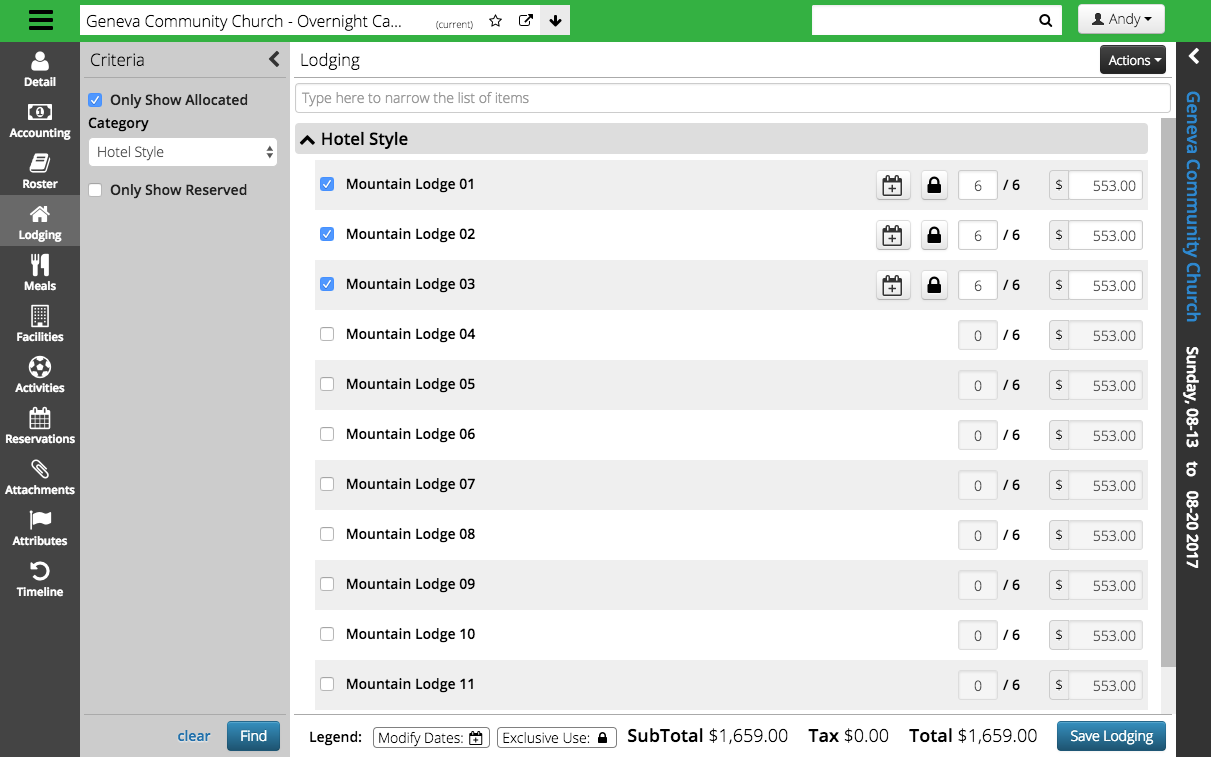
- Check the box next to the Lodging you want to reserve and an option to enter a quantity as well as the default charge will appear. Make any changes and then click Save.
Meals
- Select Meals to see which are available. Use the Criteria on the left to filter the list if needed.
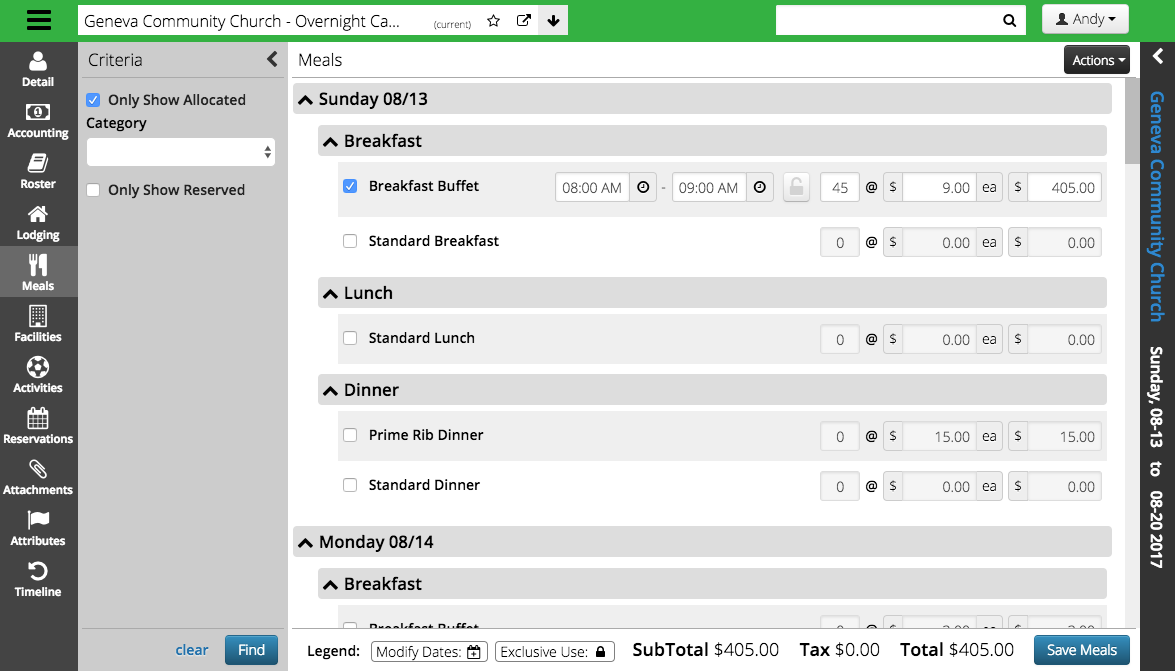
- Check the box next to the Meal you want to reserve and an option to enter a quantity will display. The default time and charge will appear as well. Make any changes and then click Save.
Facilities
- Select Facilities to see what Facility Resources are available. Use the Criteria on the left to filter the list if needed.
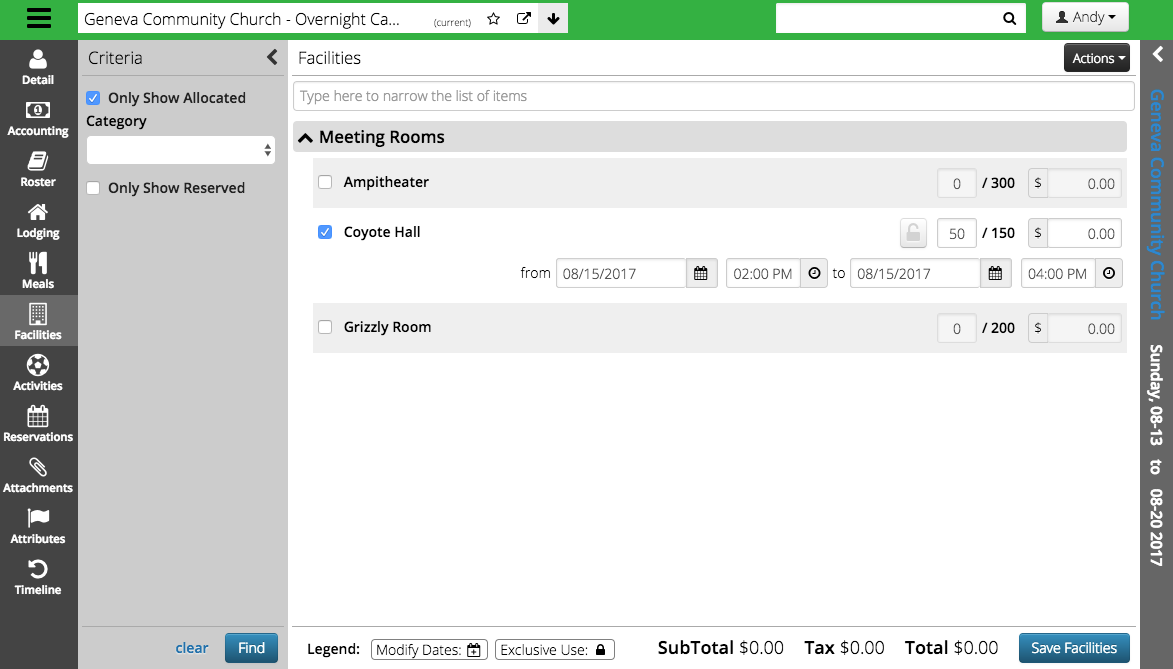
- Check the box next to the Facility you want to reserve and an option to enter a quantity as well as the default charge will appear. Make any changes and then click Save.
Reservations
Resource that fall under the following Resource Categories can be reserved under Reservations:
- Person
- Equipment
- Amenity
- Amenity (Capacity-based)
Attachments
Upload contracts, insurance forms or any other needed paperwork under Attachments.
- In the lower left hand corner, select
 .
. - Fill out the information and then click Save.
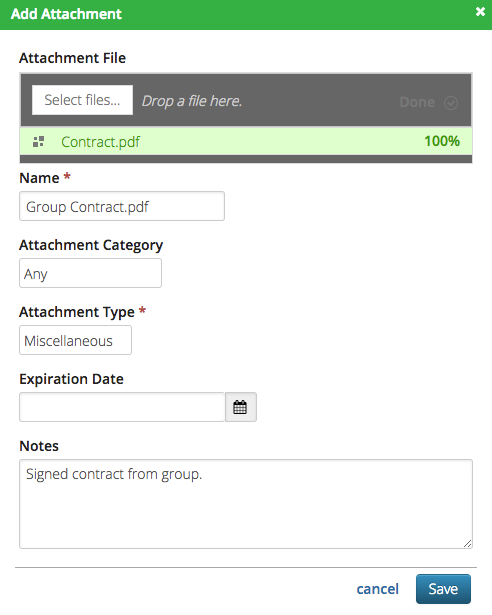
- Attachment File – Either click Select File or drag and drop file to upload.
- Name – Pulls from name of file that is uploaded. Update as needed.
- Attachment Category – Select the Attachment Category to filter the available Attachment Types.
- Attachment Type – Select from the list of Attachment Types.
- Expiration Date – Set the date that the Attachment expires.
- Notes – Add any comments for internal reference.
- Once uploaded, you can view details on the card.
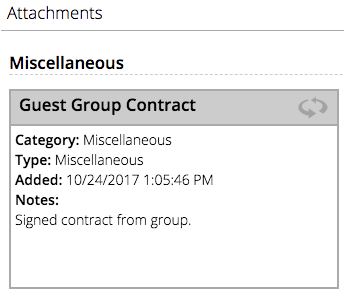
- Flip the card by clicking on the header for available actions.
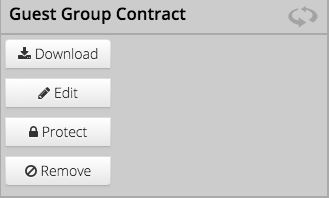
- Download – Choose to download the Attachment.
- Edit – Open the Attachment to edit.
- Protect / Un-protect – Takes out the option to Remove.
- Remove – Remove the Attachment from the Itinerary.
Attributes
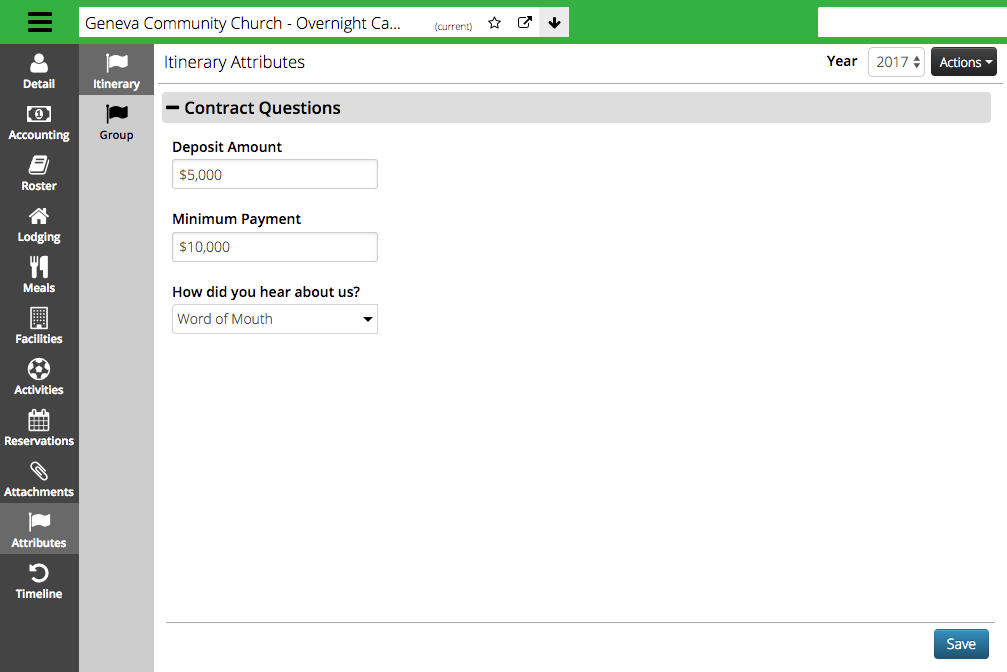
- Attribute Type – Select the type of Attribute that you want to fill out: Itinerary or Group.
- Year – For year based Attributes, select the Year next to the Actions menu.
- Save – Once you have made updates, select Save.
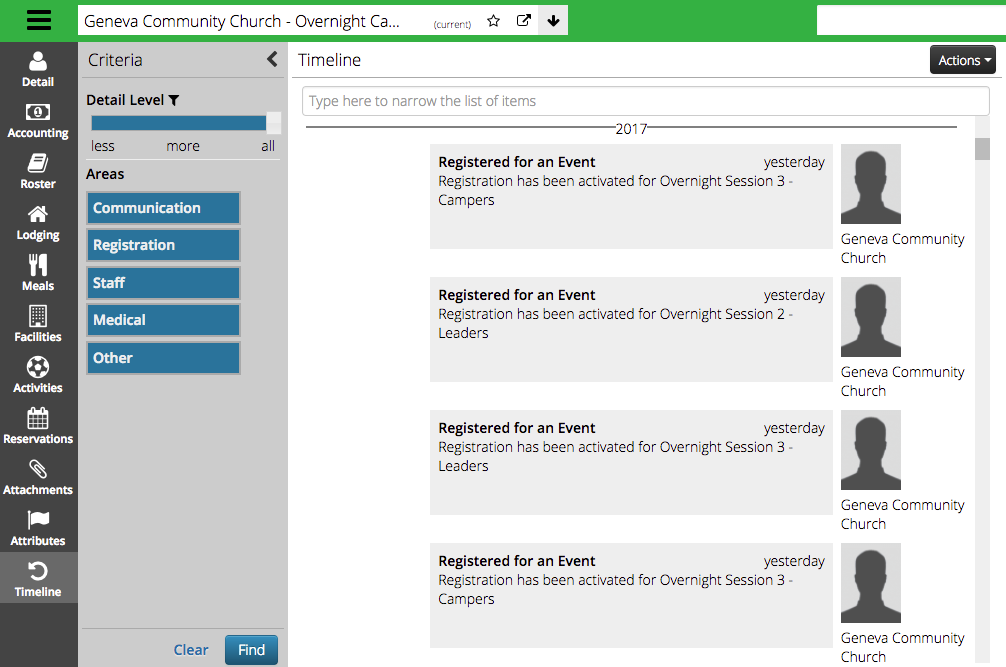
Timeline
Keep track of all that is going on with the Group Registration from the Timeline.