With the ability to reserve Lodging resources through the Registration Site, there are some things to consider when configuring.
Application Settings
There are several Application Settings that can be changed to customize the online reservation process. Update by going to Application Settings > Guests.
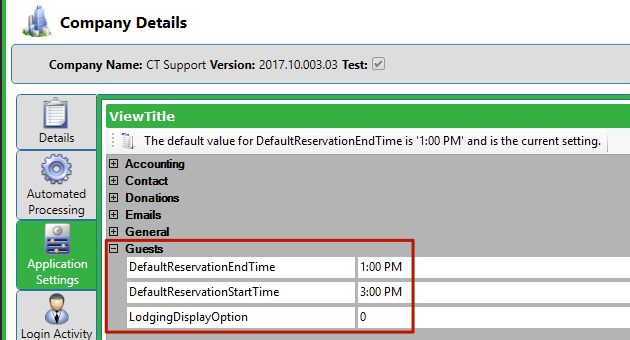
- DefaultReservationEndTime – Set the default end time that is set when the reservation is made.
- DefaultReservationStartTime – Set the default start time that is set when the reservation is made.
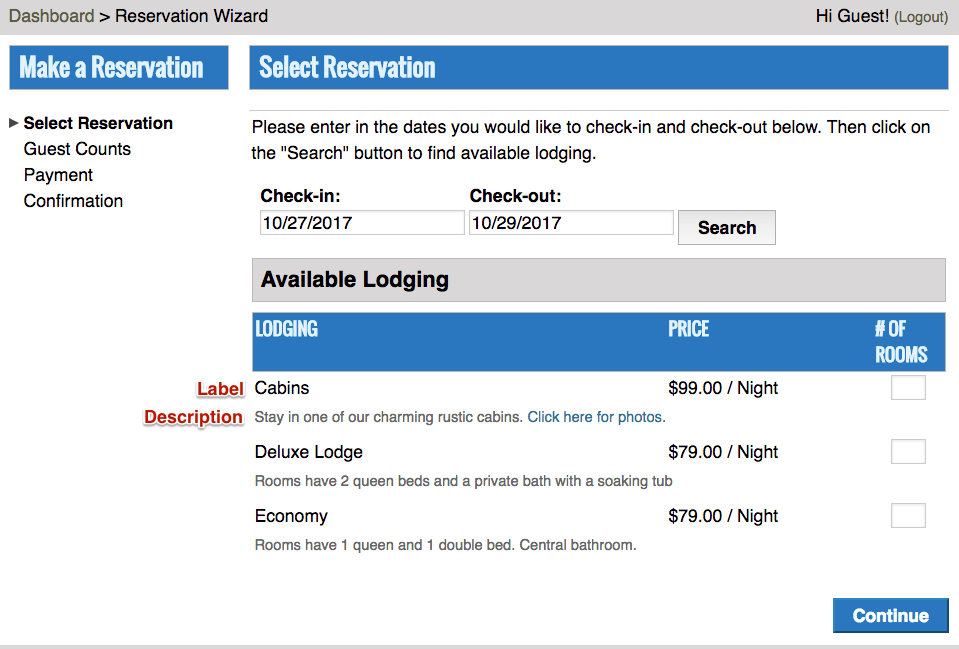
- LodgingDisplayOption – Change the way that Lodging is grouped for display. For Category, enter 0 and for Room enter 1.
After making any changes, reset the Application Settings on the Registration Site.
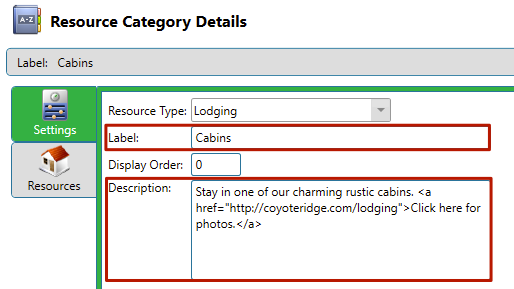
Resource Categories
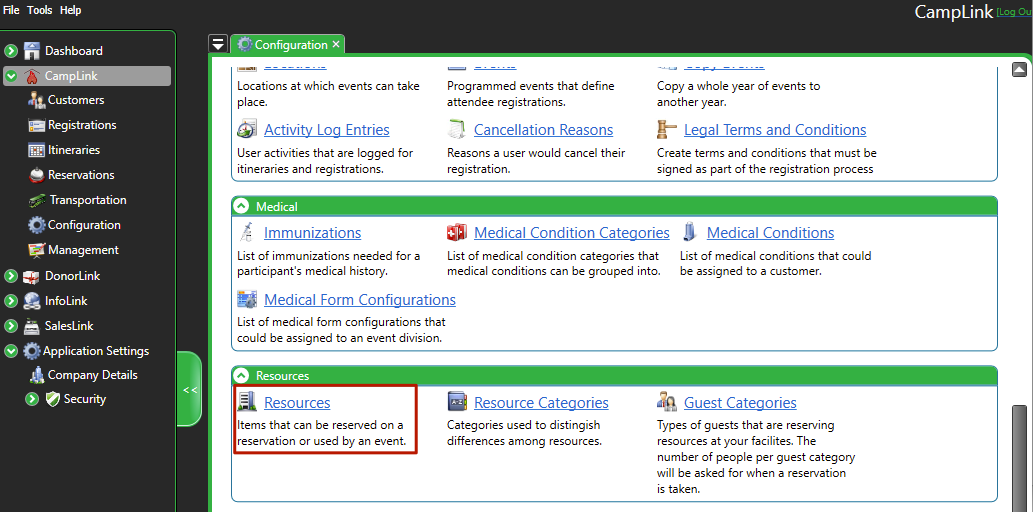
- Go to CampLink > Configuration > Resources > Resource Categories.
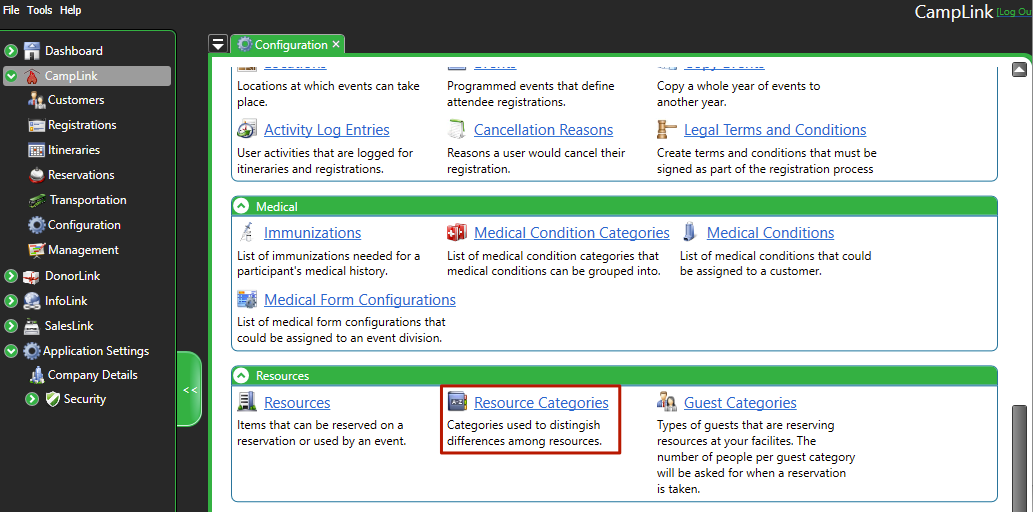
- Go to Actions > Add Category > Lodging.
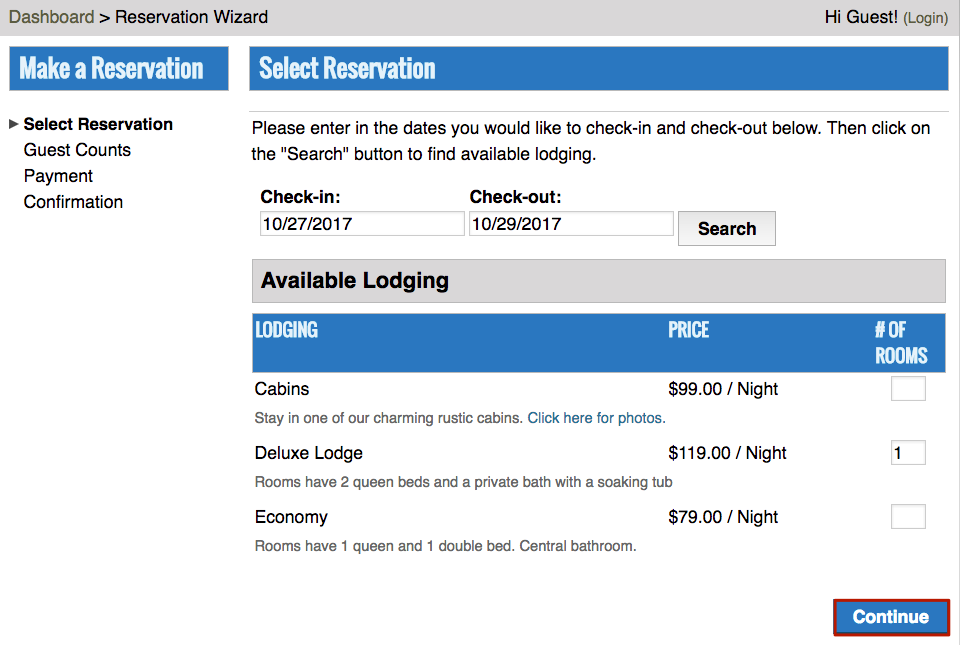
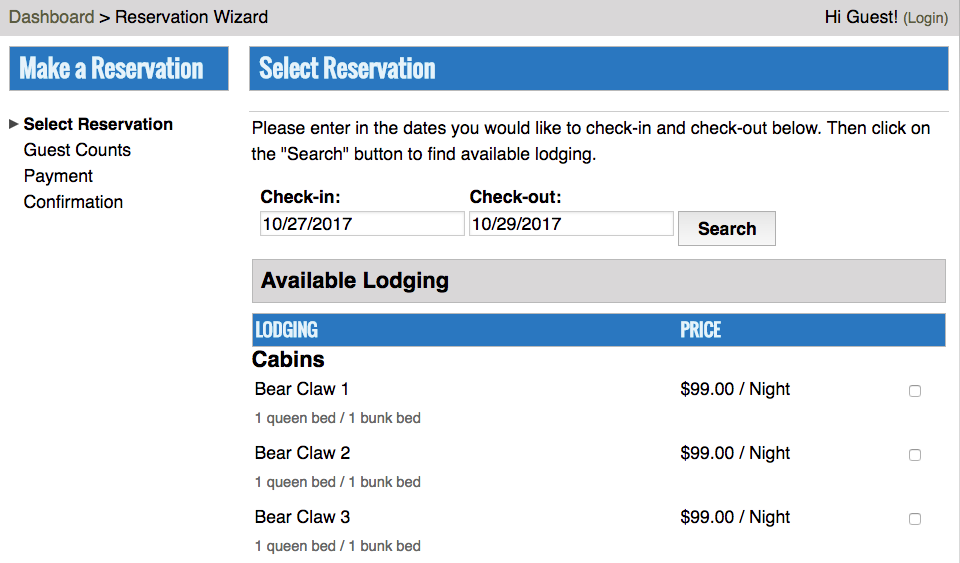
- If you have the Application Setting set to display Category, the Label and Description of the Resource Category will display.
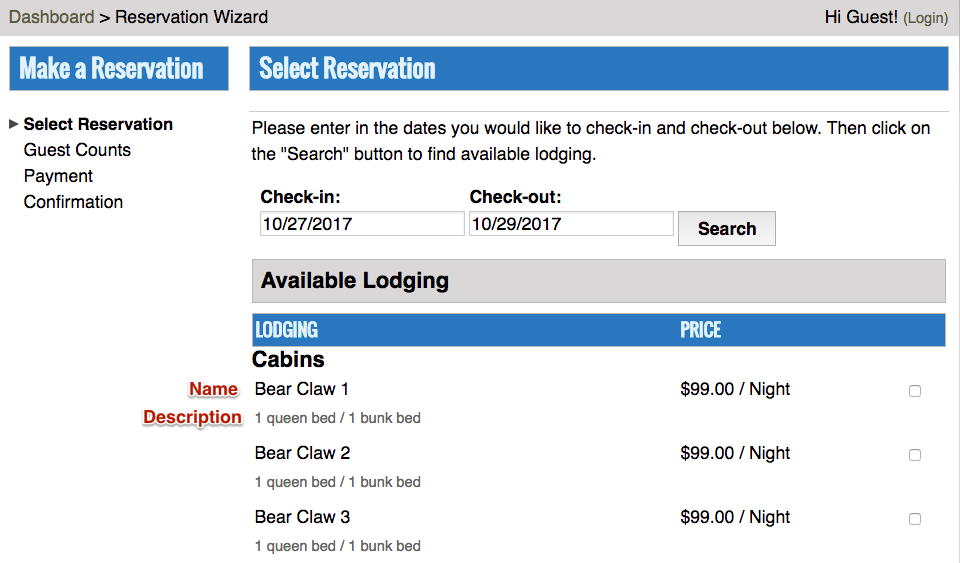
Lodging
When creating Lodging resources, here are some things to consider.
- Go to CampLink > Configuration > Resources > Resources.
- Go to Actions > Add > Lodging.
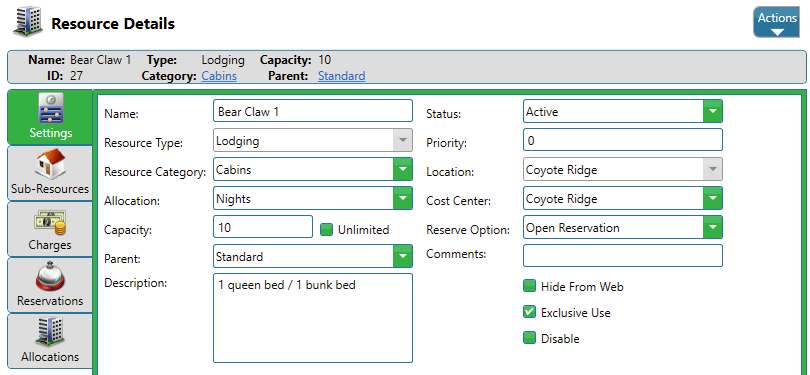
- Name – If Application Setting is set to Room, this will display to customer.
- Resource Type – Only Lodging Resources are available for online reservations.
- Allocations – Choose to display either Night or Day.
- Capacity – The number of people who can stay in the Lodging.
- Parent – Can optional display Parent if needed. Submit a Ticket to get this option.
- Description – If Application Setting is set to Room, this will display to customer.
- Status – Set to Inactive to hide the resource online.
- Priority – Not used in relation to online reservations.
- Location – Not used in relation to online reservations.
- Cost Center – When reservation is made, the Itinerary will use the Cost Center of the first reservation.
- Reserve Option – Set to Open Reservation to allow for online reservation.
- Comments – Internal use only.
- Hide From Web – Check option to hide the resource online.
- Exclusive Use – Recommend to check option to only allow one reservation at a time.
- Disable – Not used in relation to online reservations.
Charges
There are several ways to configure charges for Lodging resources.
- On the Resource, select Charges.
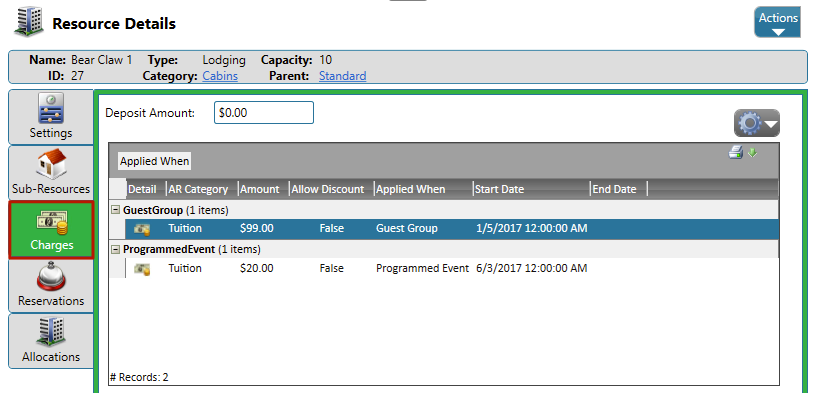
- If needed, enter a Deposit Amount.
- To add a new Charge, click the
 icon and select Add.
 - Fill out the information and click Save and Exit.
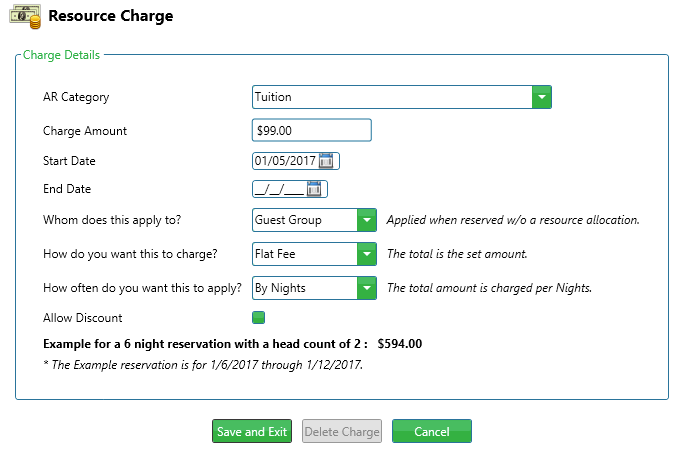
- AR Category – Select an AR Category where the charge should be applied.
- Charge Amount – Set the amount of the charge.
- Start Date – Set the date that the charge goes into effect.
- End Date – Optionally set when the charge does not apply.
- Whom does this apply to? – Select Guest Group.
- How do you want this to charge? – Select either Flat Fee or By Person.
- How often do you want this to apply? – Select either By Reservation or By Nights.
- Allow Discount – Select to allow the charge to have a discount applied to it.
There are four options of how you can set up pricing for online reservations.
- Flat Fee / By Night

- Flat Fee / By Reservation

- By Person / By Night

- By Person / By Reservation

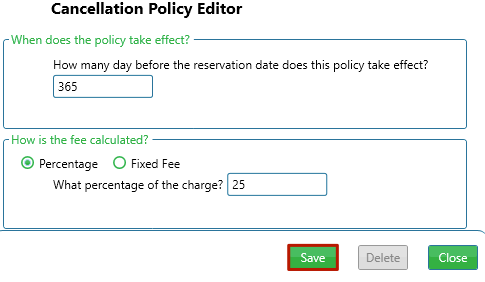
Cancellation Policy
- Under Cancellation Policy, click Add.
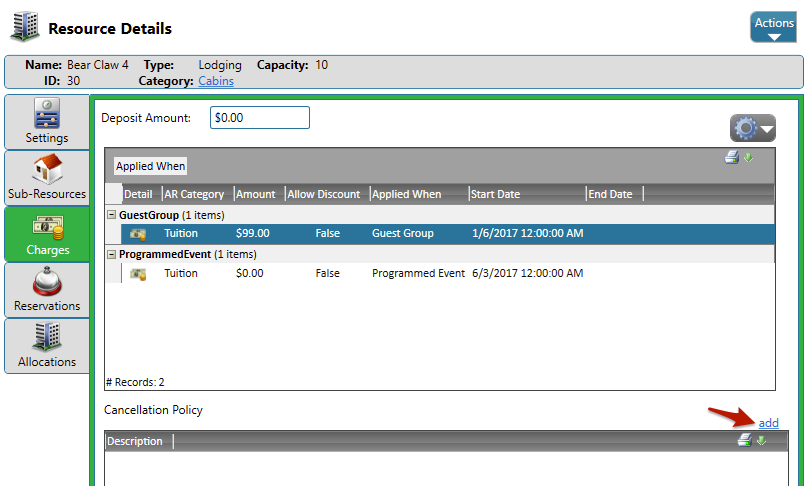
- Enter the number of days before the reservation start date that the policy takes effect and select either Percentage or Fixed Fee and then click Save.
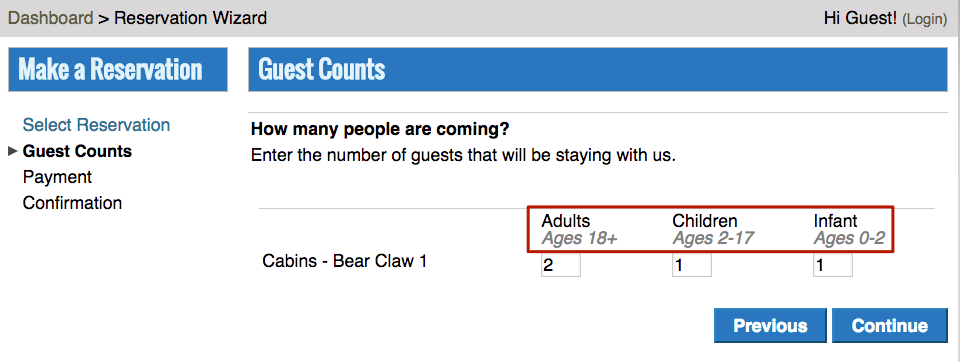
Guest Categories
Once a customer selects their reservation, the next step takes them to Guest Counts. This allows them to specify how many people are coming as part of the reservation. Configure Guest Categories to give the customer different options.
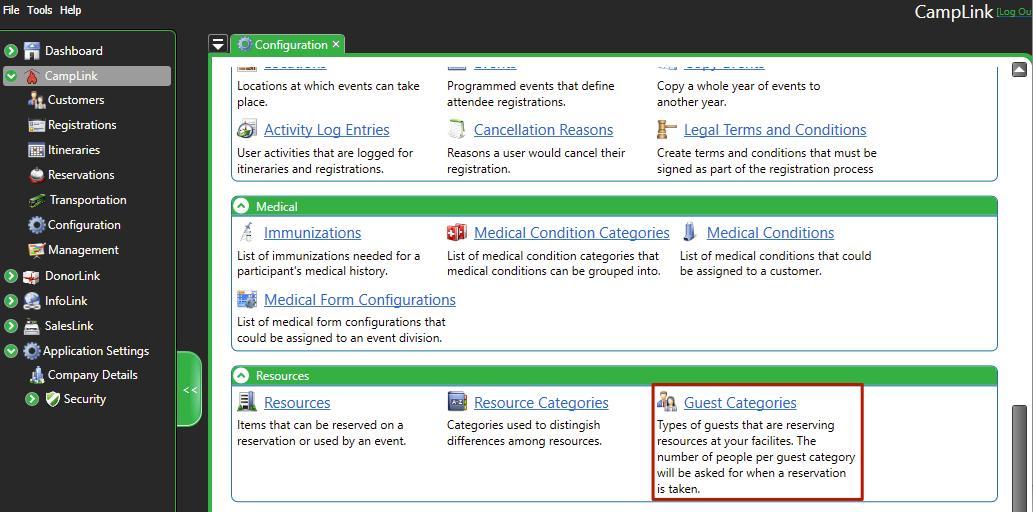
- To update, go to CampLink > Configuration > Resources > Guest Categories.
- Click Actions > Add New Guest Category.
- Enter the information and then click Save and Exit.
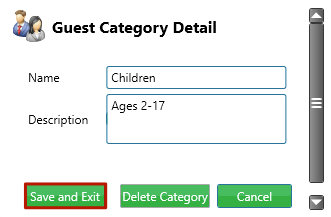
- Name – The name of the Guest Category.
- Description – Displays online under the Name.