Daily Reservations are a great way to make reservations for resources for a specific date and time. Some examples include reserving lodging for a family for the weekend or a church who reserve a facility for their Sunday service.
What is an Itinerary?
These reservations are contained within an Itinerary, which is simply just a collection of reservations with a specific date and time. An Itinerary allows you to manage these reservations as a whole. Another way to think about an Itinerary is when you are going on vacation, you may have airline tickets, hotel reservation and a car rental. All of these reservations would be part of your travel itinerary.
New Reservation
There are two places where you can start creating a Daily Reservation.
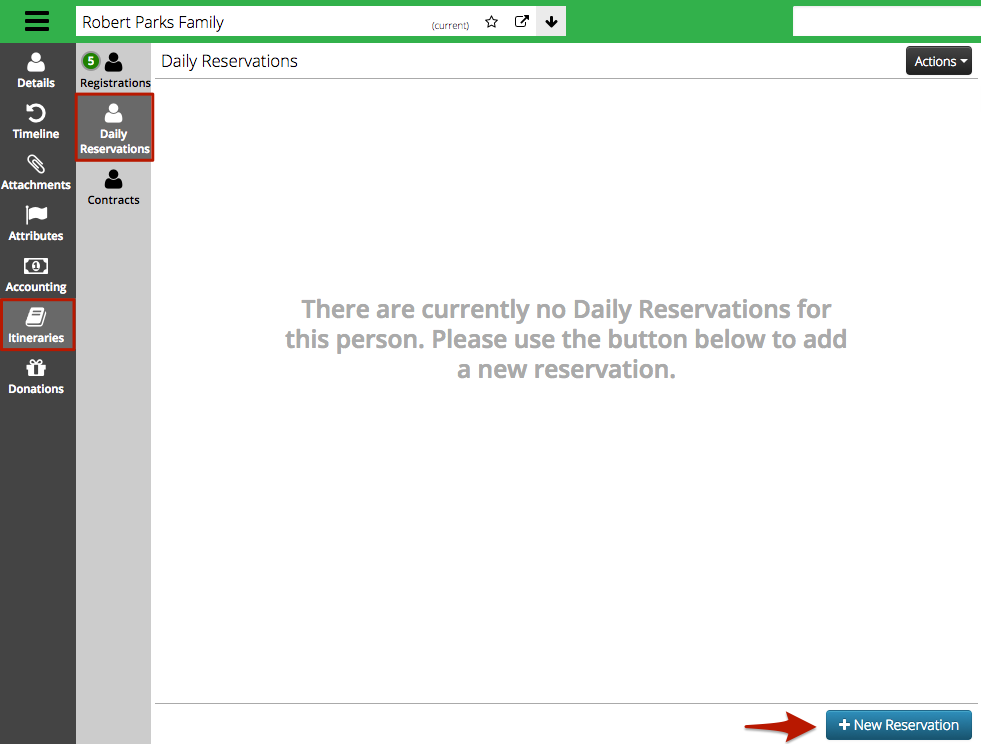
Option A – Itineraries
Go to Family or Group > Itineraries > Daily Reservations and click New Reservation.
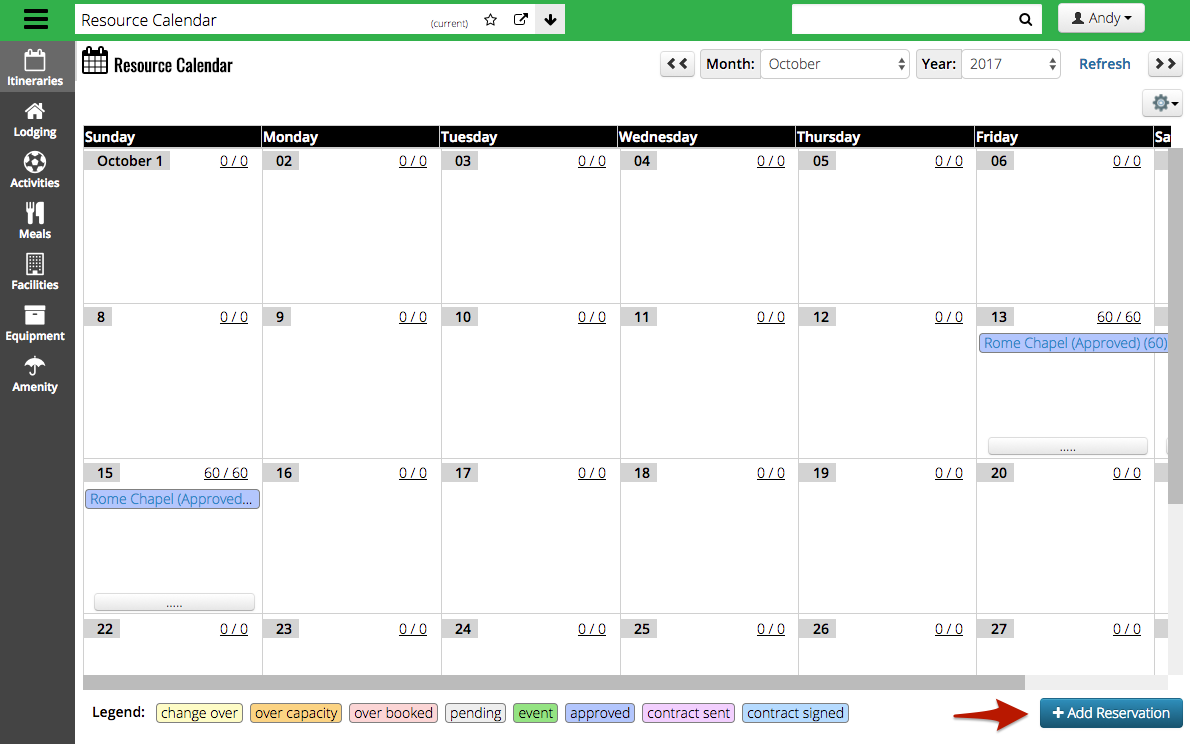
Option B – Resource Calendar
- Go to Manage > Camp > Resource Calendar and click Add Reservation.
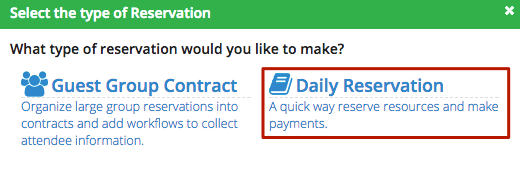
- Select Daily Reservation.
Create Itinerary
- Fill out the fields to create the Itinerary. Once complete, click Save Itinerary.
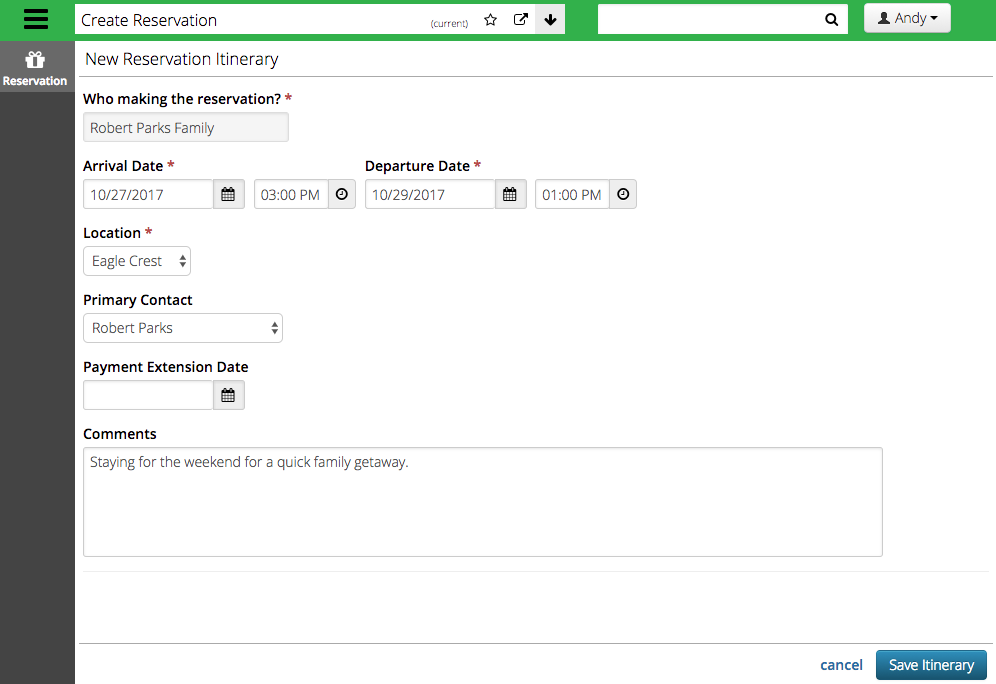
- Who is making the reservation? – If starting from a family or individual, this will populate with their name. If starting from Resource Calendar, type in the box to search for an account or create a new one.

- Arrival / Departure Date – Set the date and time of the Itinerary.
- Location – Choose the location.
- Primary Contact – Select from the list of Administrators on the account to be the primary contact for the Itinerary.
- Payment Extension Date – Optionally set a date to extend when payment is due. The default due date is set to the first day of the Itinerary.
- Comments – Add comments to the Itinerary for internal reference.
- The Itinerary is now created and the status is Pending. This allows you to make reservations and then Activate once the Primary Contact is ready to book.
- To update any of this information, go to the Reservations tab.
Change Dates
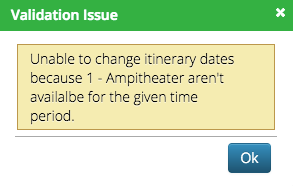
Ever had someone change their mind on what dates work best for them? Once an Itinerary is Activated, you are able to go back to Reservation to change the dates. Any Reservations that are not able to be transferred, will be displayed in a warning message. Remove the Reservation that are causing the issue from the Itinerary and then you can successfully change the dates.
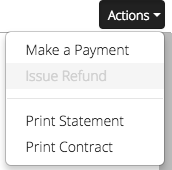
Print Statement or Contract
- To print either a Statement or Contract, click Actions and select from the list.
Detail
The Detail screen allows you to see an overview of the Itinerary with information from the account as well as any reservations that have been made.
Activate Itinerary
- To activate an Itinerary and the reservations that it contains, under Details click on Pending and choose Activate.
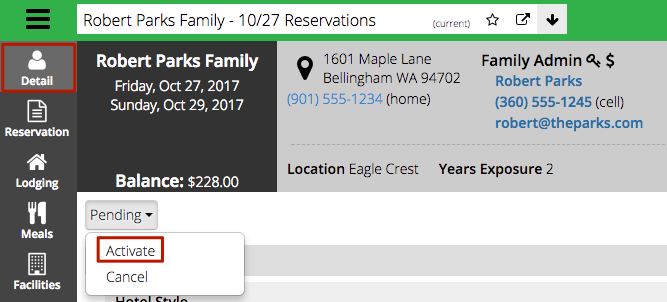
- Once the Itinerary is Activated, the status will change to Approved.
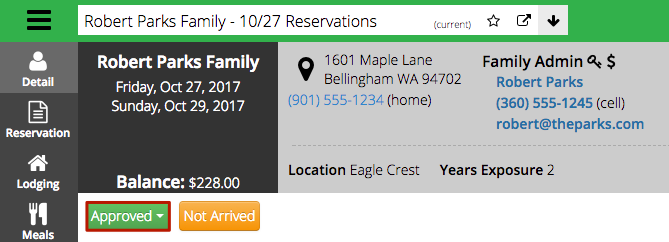
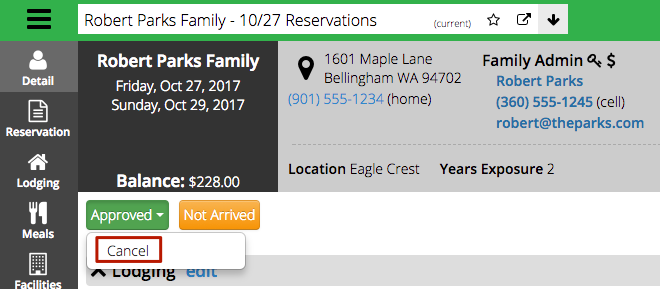
Cancel Itinerary
- To cancel an Itinerary and the reservations that it contains, under Details click on Approved and choose Cancel
 .
.
Lodging
- Select the Lodging tab.
- Update the Criteria if needed and then click Find.
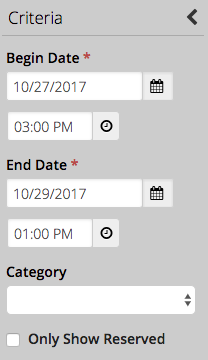
- Begin / End Date – Set the time of the Reservation, defaults to Itinerary Arrival and Departure.
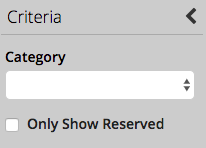
- Category – Select from a list of Resource Categories.
- Only Show Reserved – Once Reservations are made, select to only show those.
- Select Lodging to reserve by checking the box next to it. Enter the number of people in the room and update the price if needed.
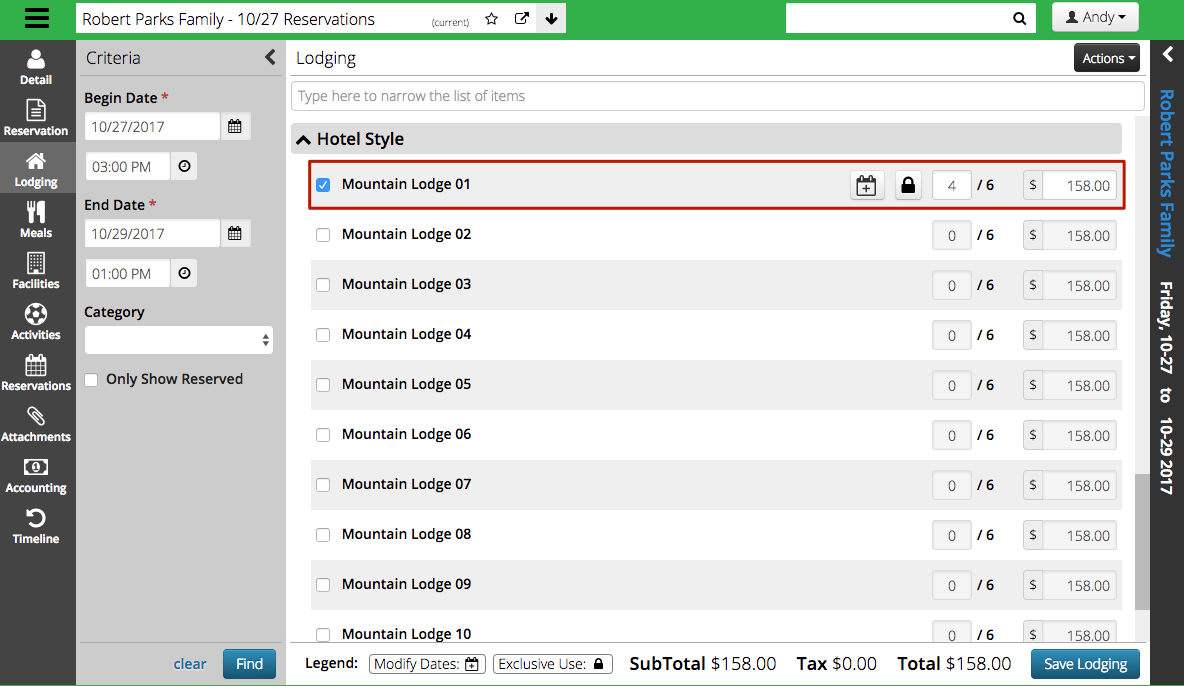
- Click Save Lodging.
Meals
- Select the Meals tab.
- Update the Criteria if needed and then click Find.
- Category – Select from a list of Resource Categories.
- Only Show Reserved – Once Reservations are made, select to only show those.
- Select Meal to reserve by checking the box next to it. Enter the number of people for the meal and update the price if needed.
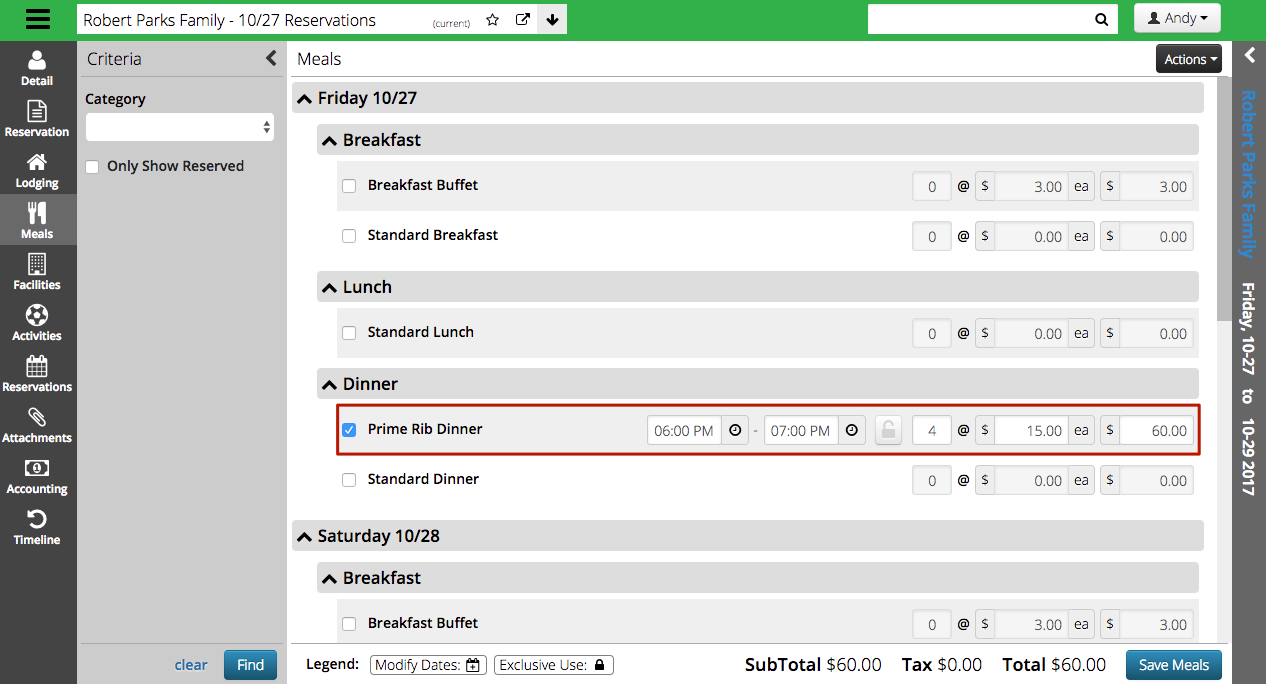
- Click Save Meals.
Dietary Concern
Track food allergies or other special food needs through Dietary Concerns.
- Go to Actions > Add Dietary.
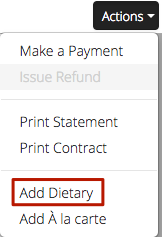
- Enter the information and then click Save.

- Quantity – Enter the number of people with this dietary concern.
- Dietary Concern – Enter the name of the concern. For consistency, a drop down menu of previously used concerns will appear once you start typing.
- Severity – Select from:
- Life-Threatening
- Moderate
- Preference
- Comments – Add any comments for internal reference.
- A notification will appear at the top of the screen to allow you to edit or remove.

A la Carte
Add items such as snacks that are outside of your typical meal times by using the a la carte option.
- Go to Actions > Add A la carte.
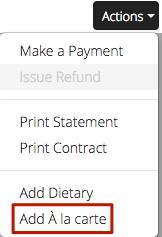
- Enter the information and select Save or Save and add another.
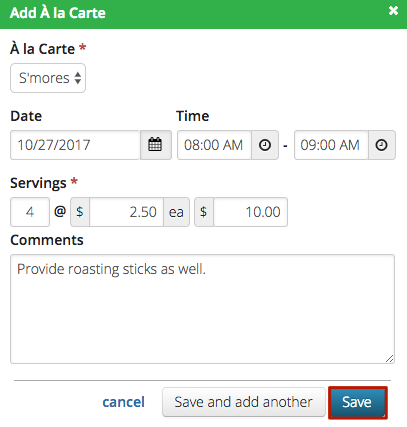
- A la Carte – Select from list of available items.
- Date / Time – Set the date and time for the reservation.
- Servings – Enter the number of items.
- Price / Total – Enter the price per item and the total will calculate.
- Comments – Add any comments for internal reference.
Facilities
- Select the Facilities tab.
- Update the Criteria if needed and then click Find.
- Category – Select from a list of Resource Categories.
- Only Show Reserved – Once Reservations are made, select to only show those.
- Select Facility to reserve by checking the box next to it. Enter the number of people for the meal and update the price if needed.
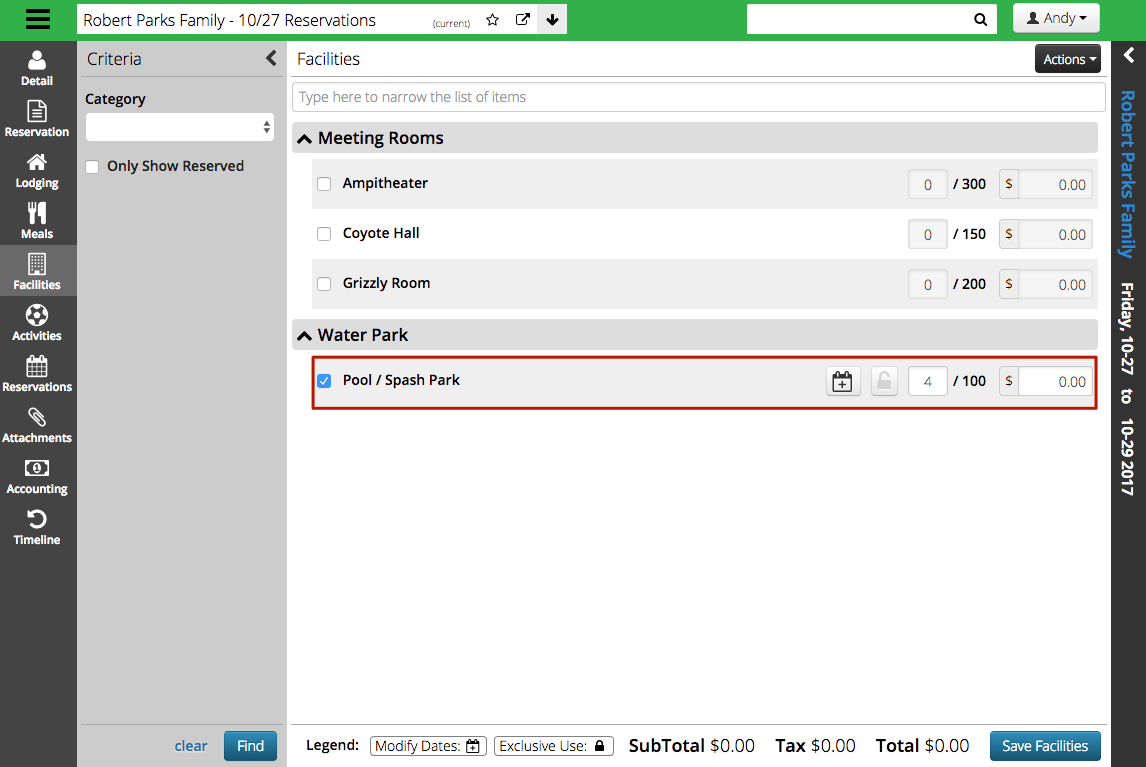
- Click Save Facilities.
Activities
- Select the Activities tab.
- Update the Criteria if needed and then click Find.
- Category – Select from a list of Resource Categories.
- Only Show Reserved – Once Reservations are made, select to only show those.
- Select Activity to reserve by checking the box next to it. Enter the number of people for the meal and update the price if needed.
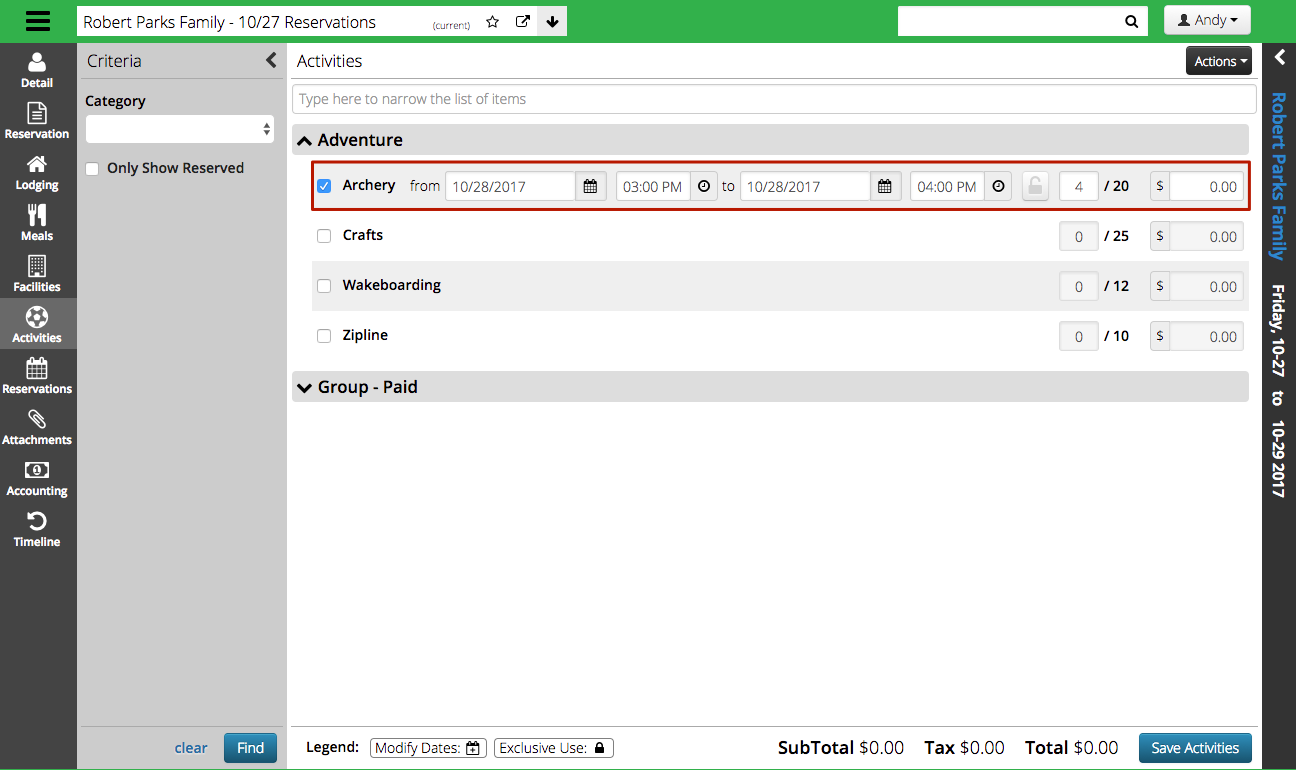
- Click Save Activities.
Reservations
- Select the Reservations tab.
- Update the Criteria if needed and then click Find.
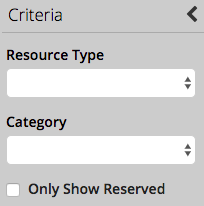
- Resource Type – Select from:
- Person
- Equipment
- Amenity (Capacity-Based)
- Transporation
- Amentiy
- Team
- Category – Select from a list of Resource Categories.
- Only Show Reserved – Once Reservations are made, select to only show those.
- Select Resource to reserve by checking the box next to it. Enter the number of people for the meal and update the price if needed.
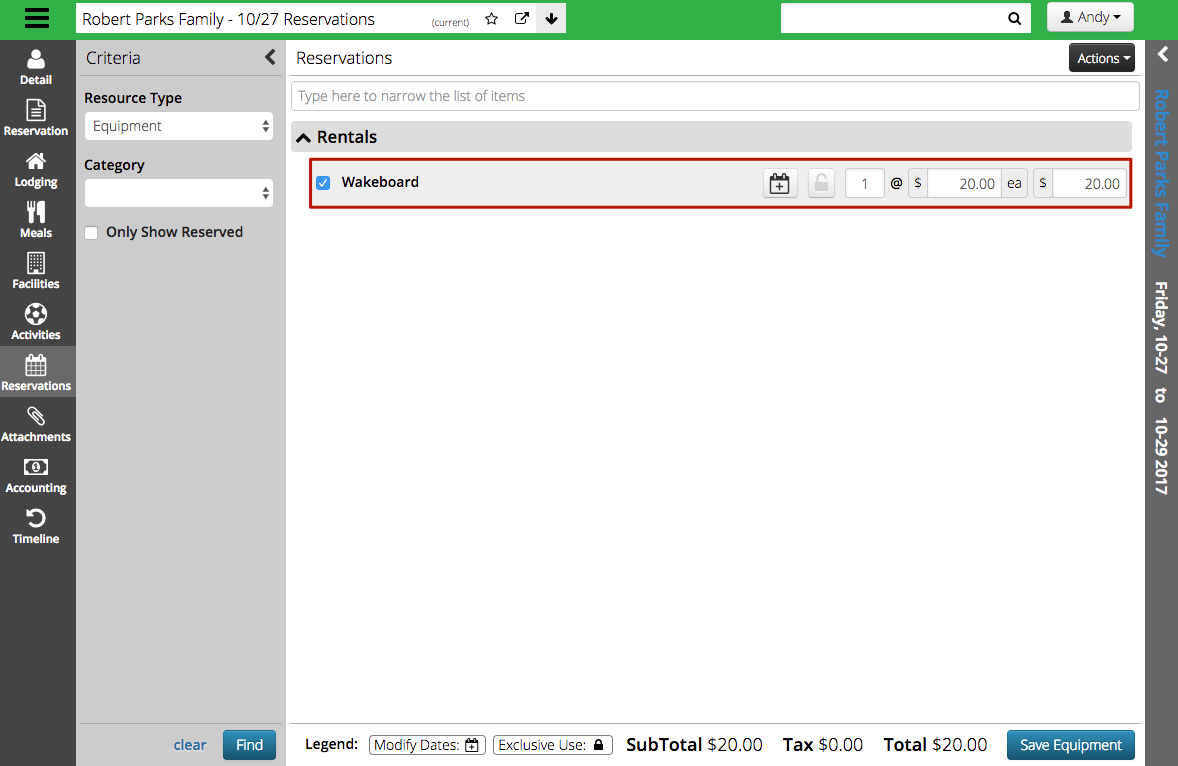
- Click Save Reservations.
Attachments
Upload needed attachments to the Itinerary.
- Select the Attachments tab and then click Add Attachment.
- Fill out the information then click Save.
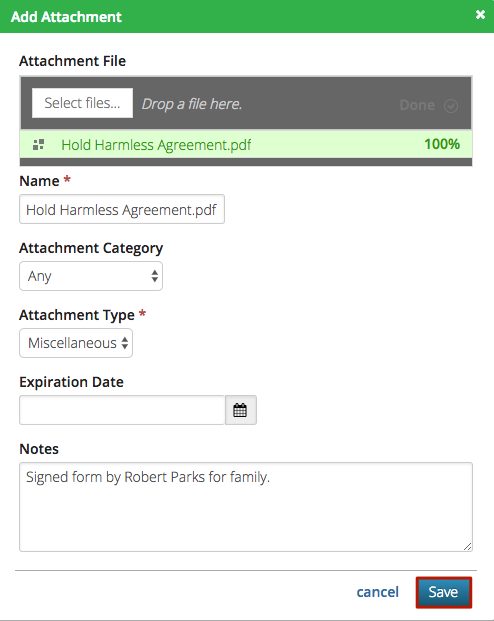
- Attachment File – Either click Select File or drag and drop file to upload.
- Name – Pulls from name of file that is uploaded. Update as needed.
- Attachment Category – Select the Attachment Category to filter the available Attachment Types.
- Attachment Type – Select from the list of Attachment Types.
- Expiration Date – Set the date that the Attachment expires.
- Notes – Add any comments for internal reference.
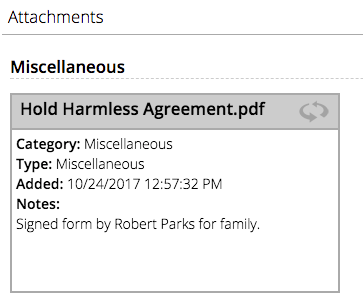
- Once uploaded, you can view details on the card.
- Flip the card by clicking on the header for available actions.
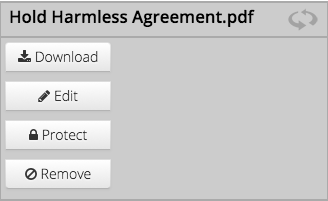
- Download – Choose to download the Attachment.
- Edit – Open the Attachment to edit.
- Protect / Un-protect – Takes out the option to Remove.
- Remove – Remove the Attachment from the Itinerary.
Accounting
View a Summary of charges, payment and any outstanding balance or dive into the Line Items to see something specific.
- Select the Accounting tab and choose either Summary or Line Items.
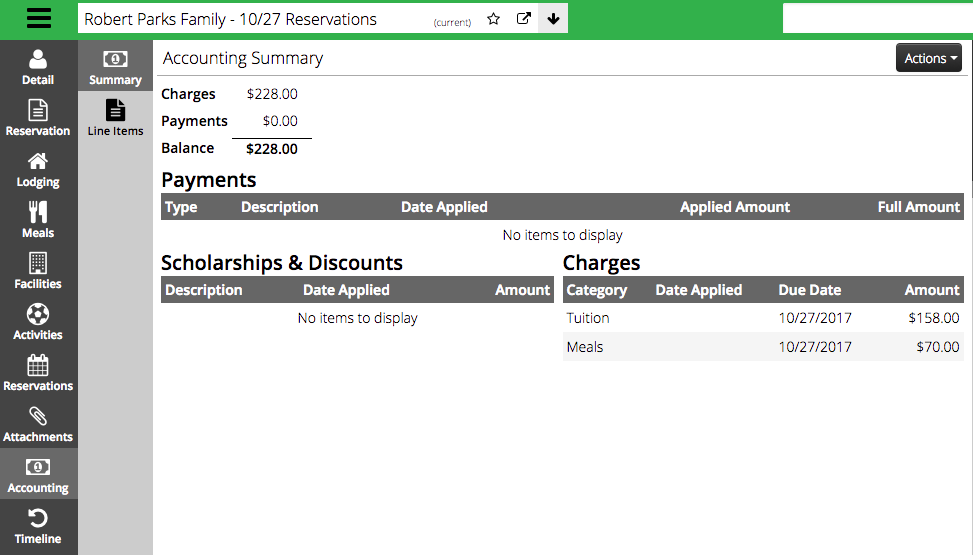
- Click Actions to be able to complete the following tasks:
- Make a Payment
- Issue Refund
- Reprice Itinerary
- Add Line Item
- Apply Manual Discount
- Apply Scholarship
- Cancel Scholarship
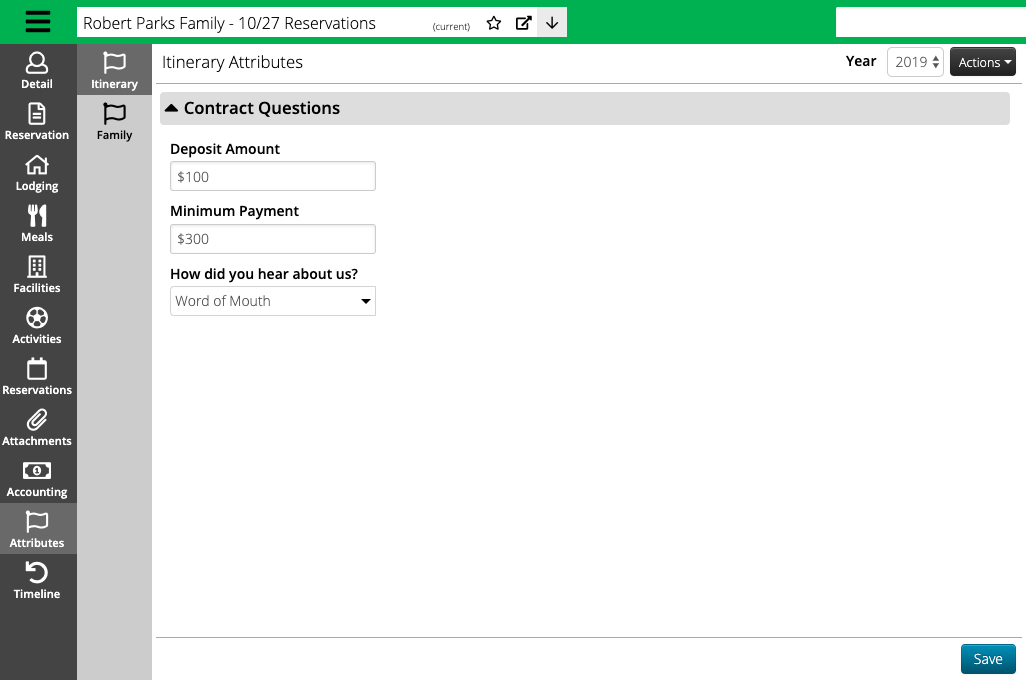
Attributes
View and edit Attributes for the Itinerary or Group from the Attributes tab.
- Select the Attributes tab.
- Enter values and then select Save.
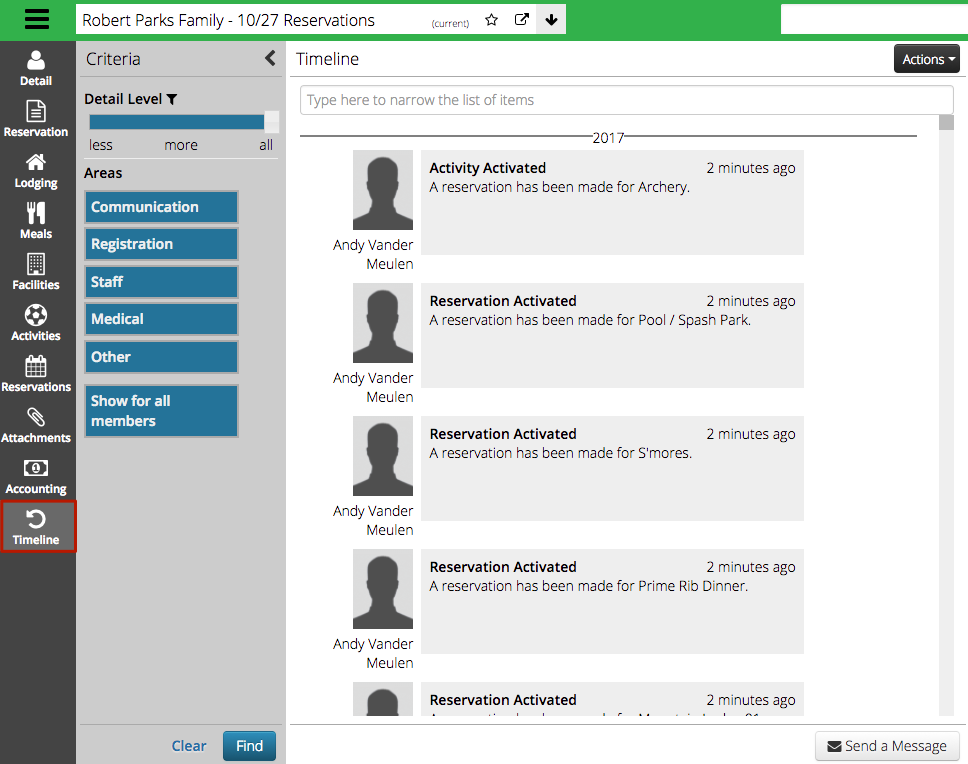
Timeline
Keep track of when different reservations were made and communication with the group under the Timeline.
- Select the Timeline tab.
- Update the Criteria if needed and then click Find.
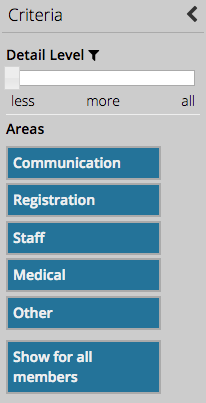
- Detail Level – Choose between Less, More or All. Click on Detail Level to see what is included under each.

- Areas – Select the Areas that you want to view. Areas highlighted in blue will display.
- Show for All Members – On a family, select to display all of the Timeline entries for family members.
- View the Timeline entries and filter if needed.
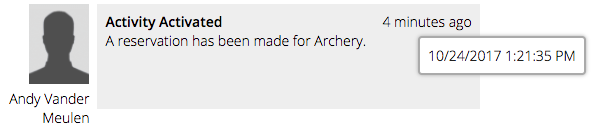
Other Features
- Some entries allow you to see more detail. Click on the
 icon to view more.

- Hover over the time to see the time stamp.
- Send an email directly to an Admin.