Inventory items are items that you are able to sell at your Store Location or Webstore.
Navigation
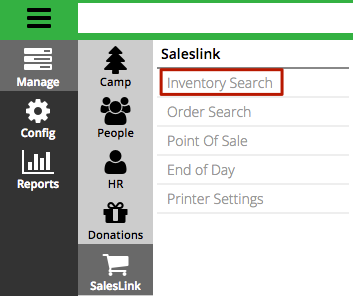
- Go to the menu and select Camp > SalesLink > Inventory Search.
Add Item
- From the Inventory Search screen, select Add Item.
- Enter information in the required fields.
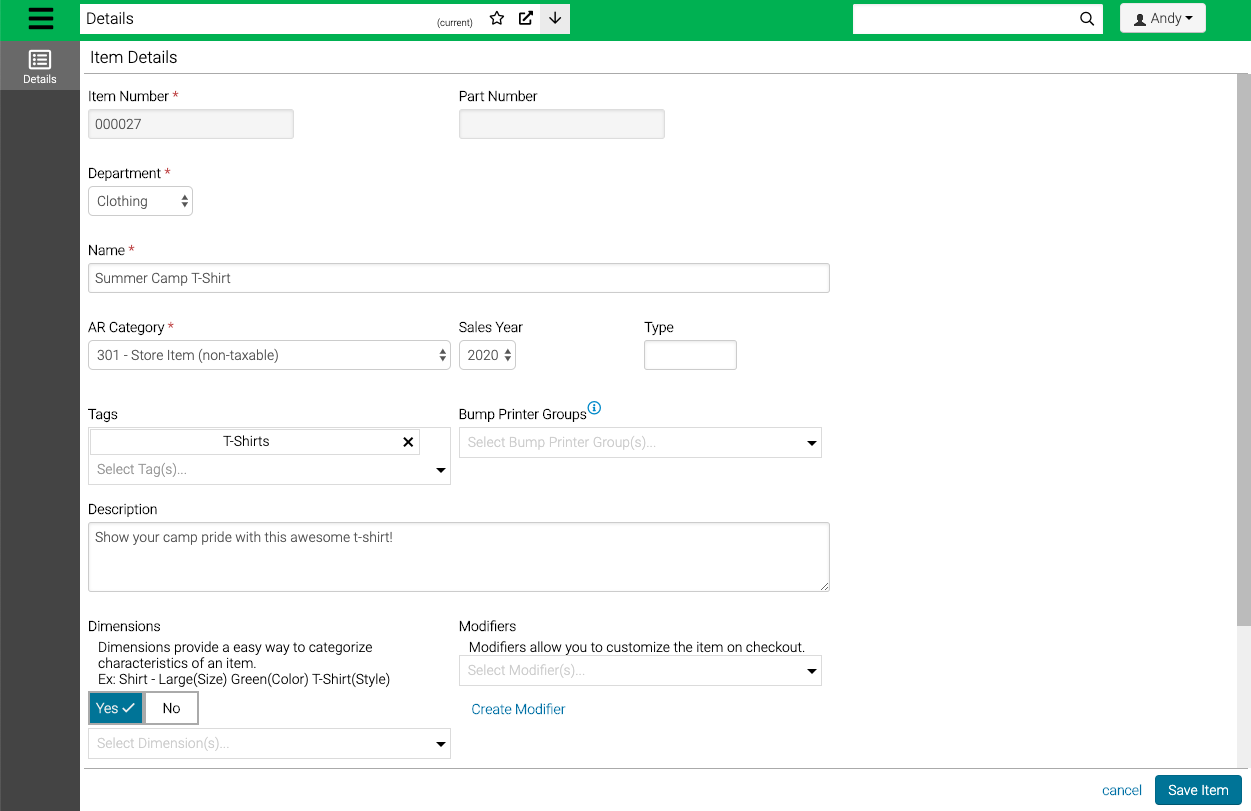
- Item Number – Automatically generated.
- Department – Select the Department that the item is categorized under.
- Name – The name of the item.
- AR Category – Select the AR Category for the item.
- Sales Year – Useful in tracking different years of merchandise.
- Tags – Select multiple values from a list of Tags.
- Bump Printer Groups – Select a Bump Printer Group. How do I configure Bump Printers?
- Dimensions – Select multiple values from a list of Dimensions. How do I configure Dimensions?
- Modifiers – Select a Modifier. How do I configure Modifiers?
- Type – Start typing to narrow from a list of Types already in the system or enter a new one.
- Description – Enter a description for the item that will display on the Webstore.
Set Defaults
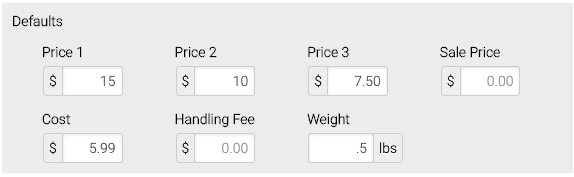
- Price 1-3 – Set three different price levels for items.
- Sale Price – Set the sale price to display on the Webstore.
- Cost – Enter the cost of goods sold for the item.
- Handling Fee – Enter the amount of the Handling Fee to be added to Webstore orders.
- Weight – Enter the weight of the item to be used as part of UPS Worldship integration with Webstore orders.
- Select Save.
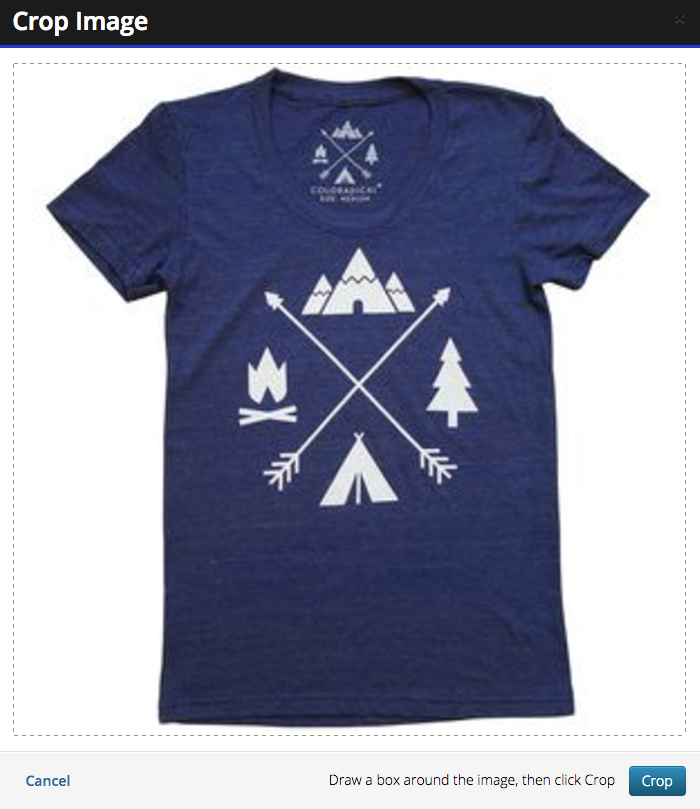
Upload Photo
Once an item is created, add a photo for reference and use on Webstore items.
- Select Edit Item.
- Select Upload and select the photo that you want to use.
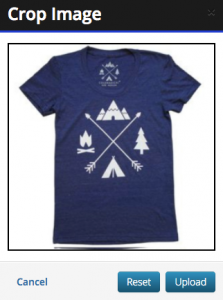
- Drag a box around the photo and select Crop.
- Select Upload.
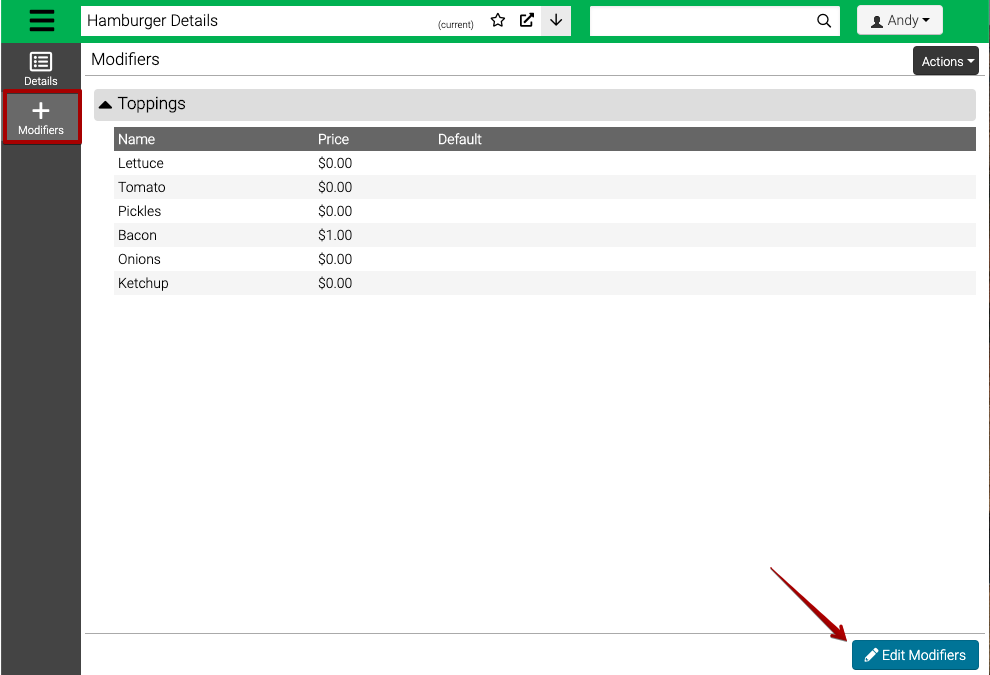
Modifiers
If you have added Modifiers to your Item, after you save, a Modifiers tab will appear on the left to allow you to make changes.
- Select Modifiers and then Edit Modifiers.
- Select the Options that should be available for the Item on the left and the Options to default on the right.
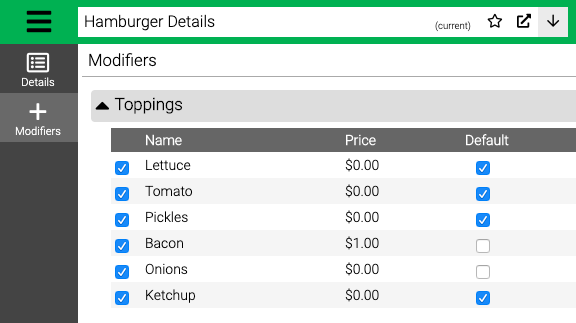
Quick Tip – When you assign a Modifier to an Item, all Options will be added, but none will be set as Default. If you need to update, make sure to do so after you add the Modifier.
- Select Save Modifiers.
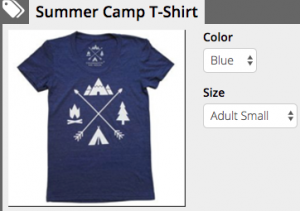
Dimensions
When creating an item, select one or more dimensions to allow for multiple combinations. This is useful when selling an item that combines two dimensions such as color and size [i.e. blue, small t-shirt].
- Select Dimensions and then Edit Item.
- A matrix of combinations will appear based on the Dimensions that were selected with the first Dimension displaying as a header and the second Dimension displaying as a row.
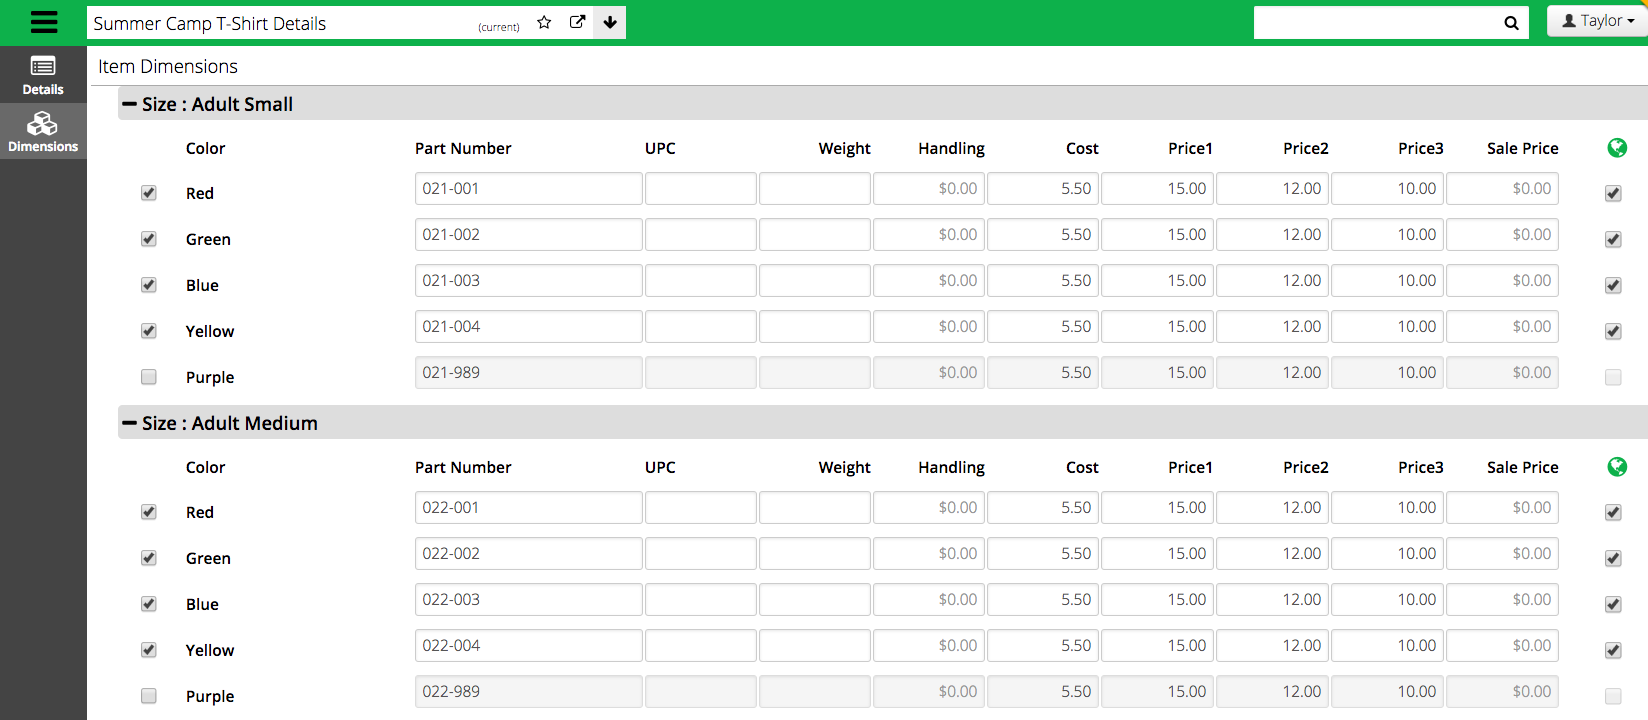
- Select a combination on the left to allow for updating the different fields. Select the
 to show the item on the Webstore.
 - When add the item to an order in Point of Sale, you can select from multiple Dimensions.