Attributes are custom questions that allow you to collect the information you need for your organization. Attributes may be associated with many different areas of CircuiTree, including the following:
- Entities
- Individual
- Family
- Group
- Registration
- Attendee
- Attendee – Additional Information
- Registation
- Itinerary
- Event
- HR
- Staff
- Interview
- Reference
- Evaluation
- Health Center
- Medical
- Incident
- Resources
- Resource Allocation
- Compliance
- Form Application
This gives you the flexibility to create a custom process for your customers or staff. You can also add Flags to Attributes to bring extra attention to a particular answer.
Navigation
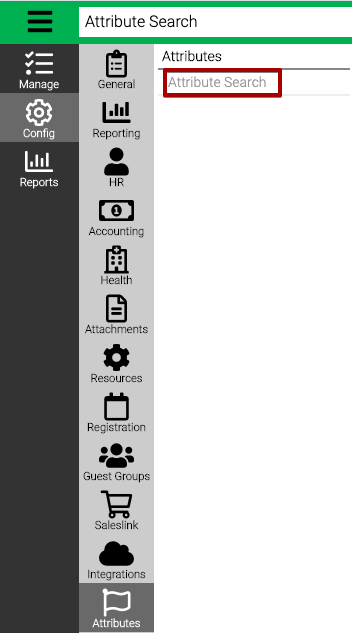
- In CT6, go to Config > Attributes > Attribute Search.
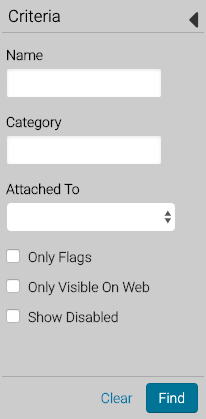
- To find an Attribute, update the Criteria on the left and select Find.
- Use the search bar to find a specific Attribute.
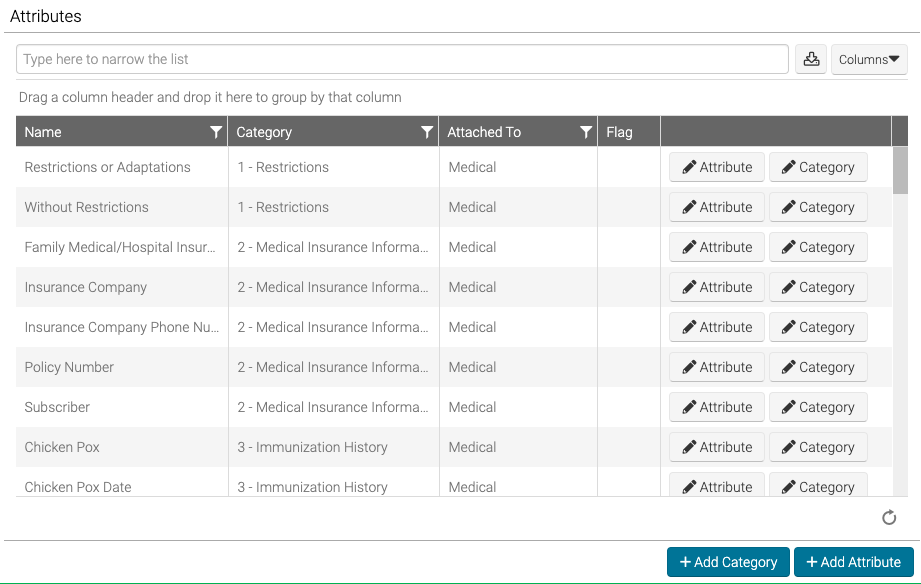
- Select Attribute to view the Attribute Details or Category to view the Attribute Category.
Create Attribute Category
Before you create an Attribute, you need to create an Attribute Category. An Attribute Category is where you set which area of CircuiTree that it shows up as well as an easy way to attach Attributes to an Event or Job Posting Form Section Steps.
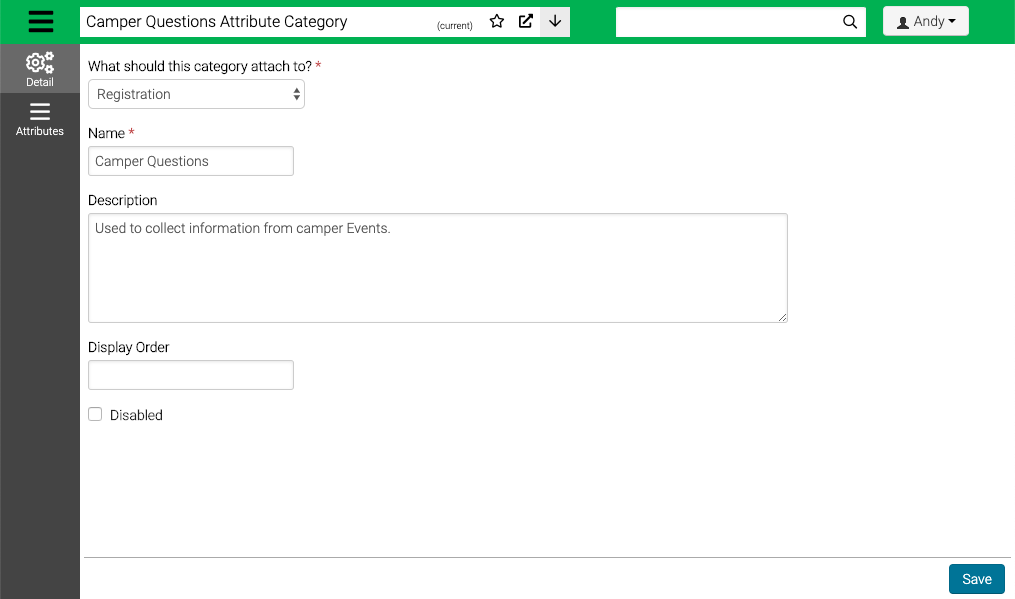
- Select Add Category to create an Attribute Category.
- Enter the information and select Save.
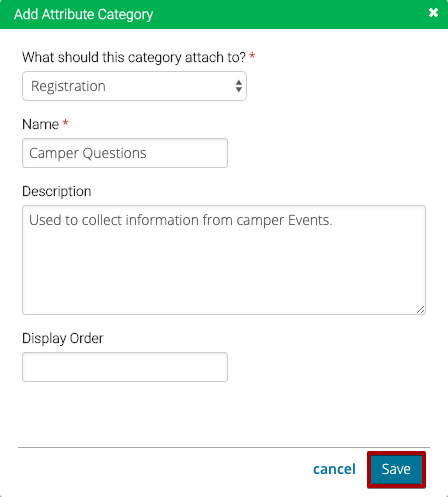
- What should this category attach to? – Select the area of CircuiTree where the Attribute Category should be available. Where are Attribute Categories displayed?
- Name – Enter the name of the Attribute Category.
- Description – Enter an internal description for the Attribute Category. This description shows up on when the Attribute Category is displayed on CT5 Registration Site.
- Display Order – Set the order in which the Attribute Category should be shown. By default, it will list them alphabetically.
- Once the Attribute Category is created, you can update the information and then select Save.
Create Attribute
- Under the Attribute Category, select Attributes and then select Add Attribute. You can also start from the Attribute Search screen and select Add Attribute.
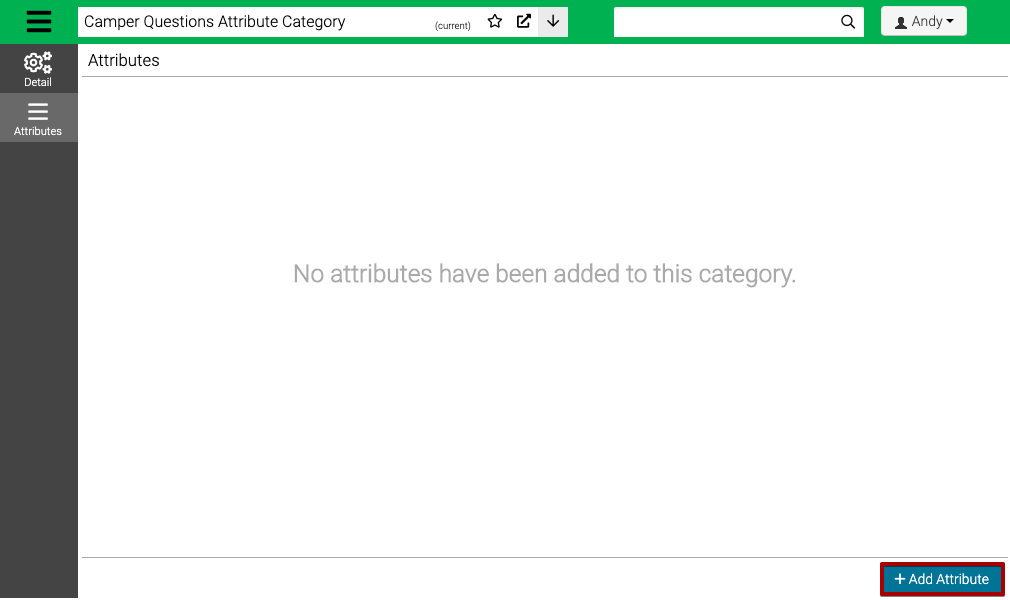
- Fill out the information and then select Save.
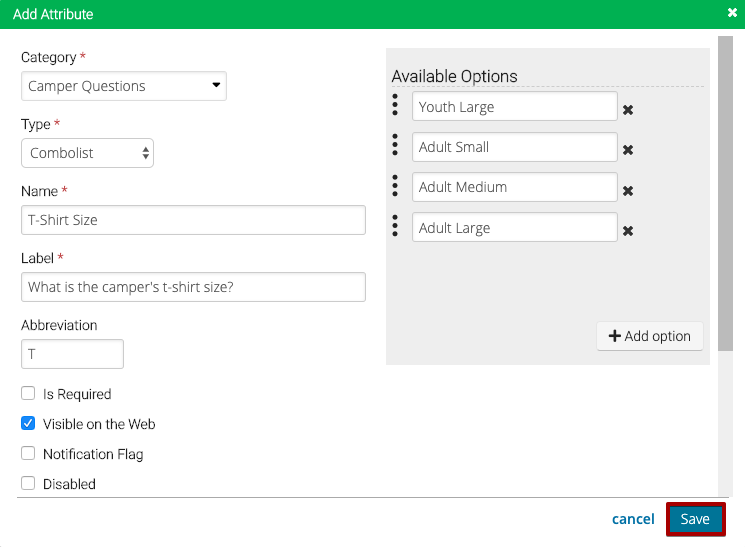
- Category – Select the Attribute Category. If you start in an Attribute Category, it will select that one by default.
- Type – Select the type of Attribute. What types of Attributes can I create?
- Name – Enter the name for the Attribute. Used internally to refer to the Attribute.
- Label – Enter the text that will be shown on the Registation Site.
- Abbreviation – Enter an Abbreviation to be used with a Flag.
- Is Required – Select to make the Attribute required to be entered on the Registation Site.
- Visible on the Web – Select to make the Attribute visible on the Registration Site.
- Notification Flag – Select to add a flag that is shown internally if the Attribute has a value. Where do Flags display?
- Disabled – Select to disable the Attribute.
- Available Options – If you select a type of the following, add options to select for the Attribute by selecting Add option.
- Combolist
- Combobox
- Checklist
- Radio Button List
- To update more settings, select More.
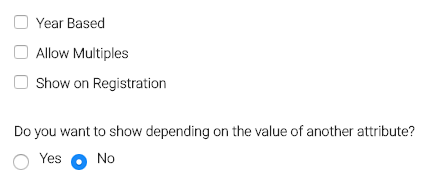
- Year Based – Select to store one Attribute value each year.
- Allow Multiples – Select to allow multiple values for the Attribute. Only available in CT6.
- Show on Registration – Select to show under Registration Details on CT5 Registration Site.
- Do you want to show depending on the value of another attribute? – Select Yes to add conditional logic to show or hide the Attribute based on the value of another Attribute. How do I create dependent Attributes?
- After you have created the Attribute, you can see a preview of what the Attribute will look like. Select
 to edit or
  to delete.

- If you have multiple Attributes in a Category, reorder by selecting
 and dragging to the correct location.
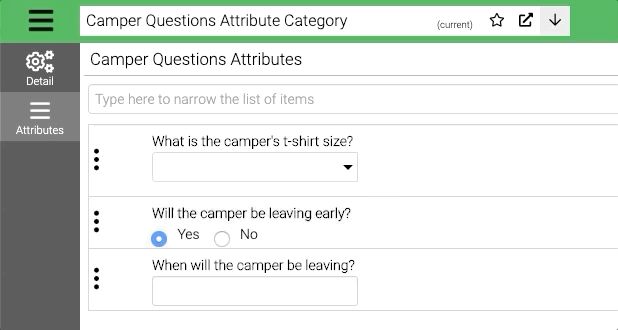
- To add additional Attributes to the same Attribute Category, select Add Attribute.
