The next step is to add an Event Division to our Event. An Event Division is what a customer registers for. Each Event must have at least one Event Division and they can be used in some different ways.
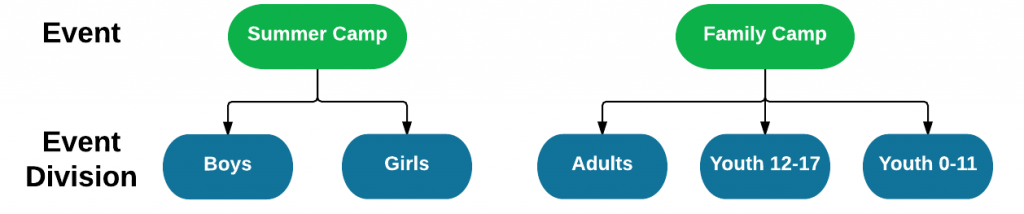
In this example, we will create a Boys and Girls division for our Event.
Let’s get started by going to Event > Divisions and clicking on the ![]() icon and selecting Add.
icon and selecting Add.
Details
Hover over the ![]() icons to learn more about each field.
icons to learn more about each field.
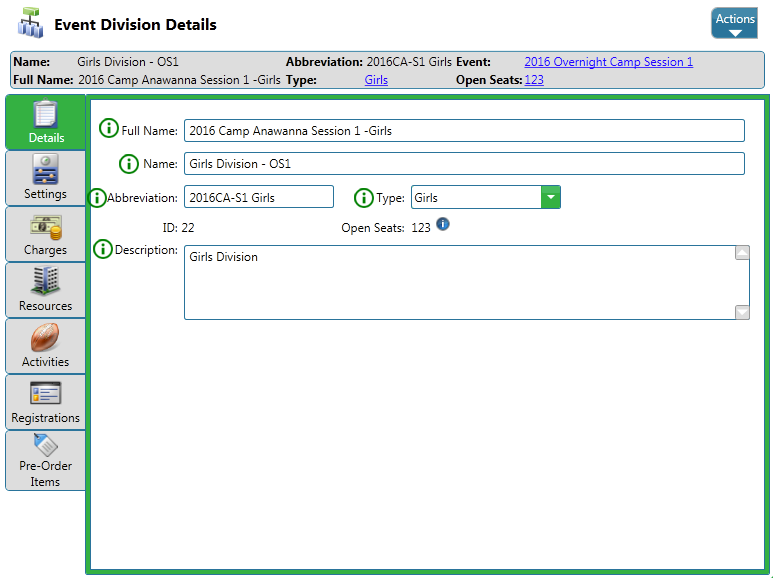
After you have filled out the required fields, click Actions > Save.
Settings
Next, we will configure the Settings for the Event Division. Click on the tabs below to learn more about each section. Hover over the ![]() icons to learn more about each field.
icons to learn more about each field.
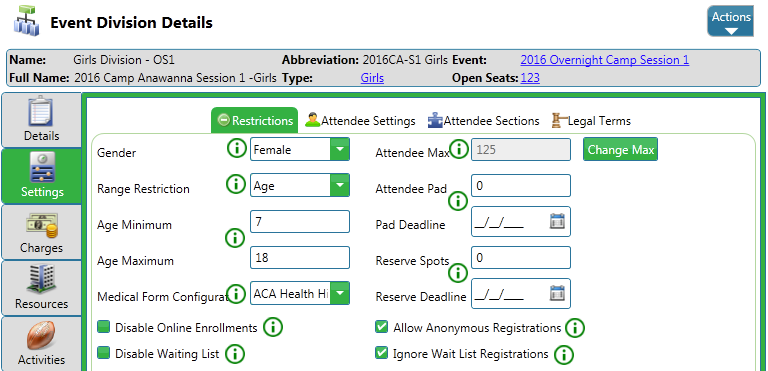
Restrictions
Set restrictions to specify the type of people that are eligible for this Event Division.
- College Freshman [Grade 13]
- College Sophomore [Grade 14]
- College Junior [Grade 15]
- College Senior [Grade 16]
- Graduate has been moved to Other [Grade 99]
For more about Grade Settings, click here.
Attendee Settings
These settings have to do with when returning and new attendees can register as well as Store Card Options.

Attendee Sections
You can customize the workflow steps that a customer takes during registration in Attendee Sections. To add a workflow step, click ![]() and select Add Workflow Step. See What Attendee Workflow Steps are Available
and select Add Workflow Step. See What Attendee Workflow Steps are Available
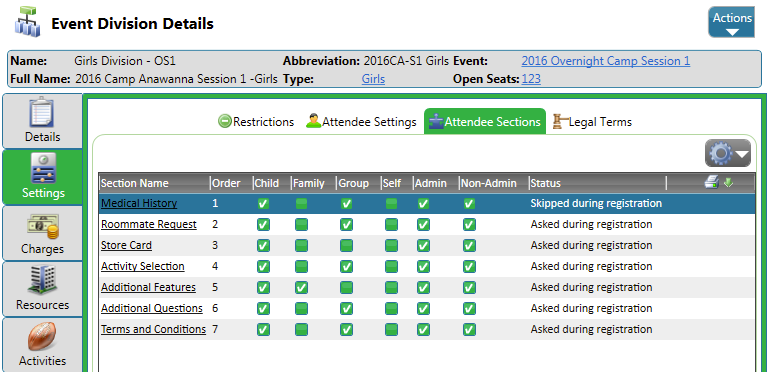
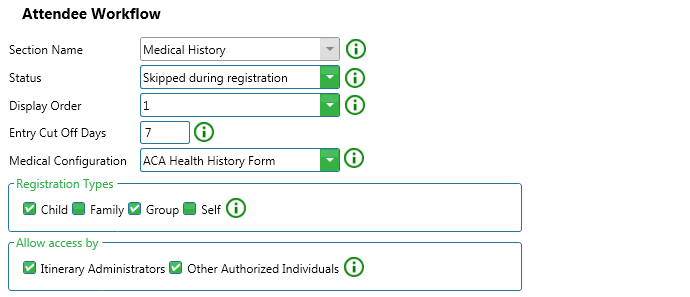
Each Attendee Section has the same format with a few specific fields. Let’s take a look at Medical History as an example.
Legal Terms
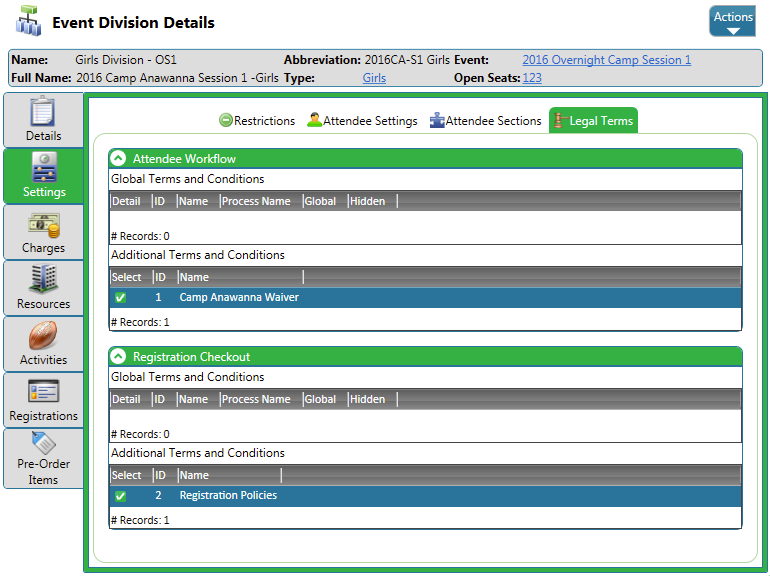
There are two types of Legal Terms that can be added to an Event Division.
- Attendee Workflow – Appear as a step during the registration process. Useful for terms that are specific to an Event Division, for example Summer Camp Hold Harmless. If you select a term and a Workflow Step hasn’t been added, you will be prompted to add one when you click Actions > Save.
- Registration Checkout – Show up during the checkout process after registration is complete. Useful for payment terms or terms that apply to anyone registering for an event. If there are terms that are set to Global, they will appear here.
Create new Legal Terms by right clicking in the list and selecting Add or by going to Configuration > Events > Legal Terms and Conditions.
After you have made all your changes, make sure to go to Actions > Save.
Try It Yourself
Using the example above or from your organization, create your own Event Division by completing the Details and Settings sections.
Once you are done, click next to learn how to add Charges.
Next – Event Division – Charges