The next step in creating an event is to determine which Resources you would like to allocate. Resources such as Lodging and Activities can be allocated at either the Event or Event Division level, depending on which works best. For example:
- If Activity Classes are available to the entire Event, allocate Activities under the Event.
- If specific cabins are designated by gender, allocated Lodging Resources under the Event Division.
If you have questions about which is the best way to set it up, talk with your Business Analyst.
The process for allocations to an Event and Event Division is the same, just where it takes place is different.
Resources
- Go to the Resources tab in either an Event or Event Division.
- Click on the
 icon and select Add.
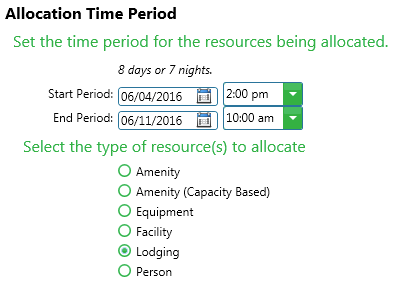
 - The Allocation Wizard box will appear. Set the Start and End Period [which will default to the Event Start and End] as well as select the type of Resource, then click Next.
- A list of available Resources for that category will appear. Click the checkbox next to Allocate. Once allocated, you can set the following:
- Allocated Capacity – Override the Default Capacity if needed.
- Use Event Cost Center – Uncheck the box to use the Resource’s Cost Center instead of the Event’s Cost Center.
- Hide from Web – Check box to not show the Resource on the guest’s itinerary online.
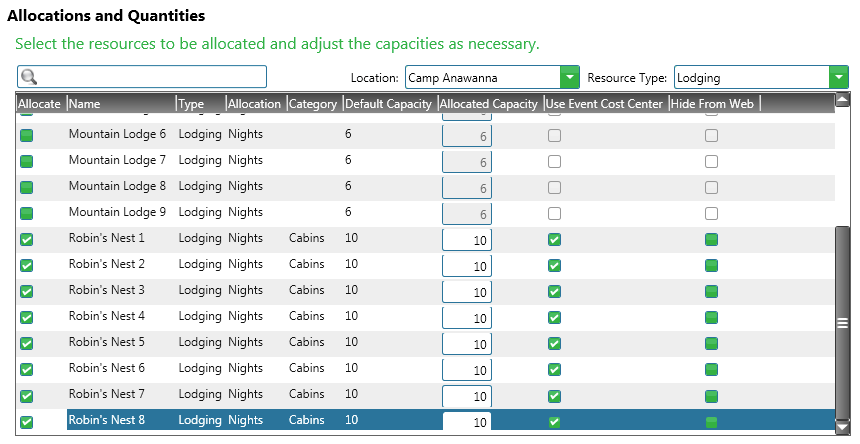
- Once you are done, click Finish.
Activities
- Go to Activities tab in either an Event or Event Division.
- Click on the icon and select Add Class.
- The Activity Wizard will appear and present you with two options, discuss with your Business Analyst which one is best for your scenario:
- No Scheduling – Allows attendee selection during registration, but class times are not managed in CircuiTree.
- With Scheduling – Attendee selection takes place after registration is complete, and the class times are managed in CircuiTree.
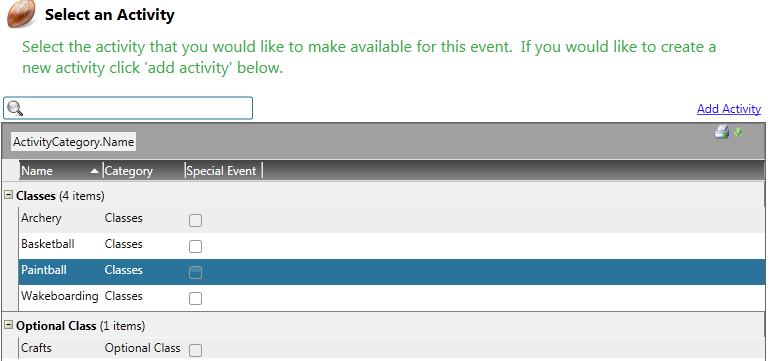
- After choosing either option, select an Activity you would like to make available and click Next.
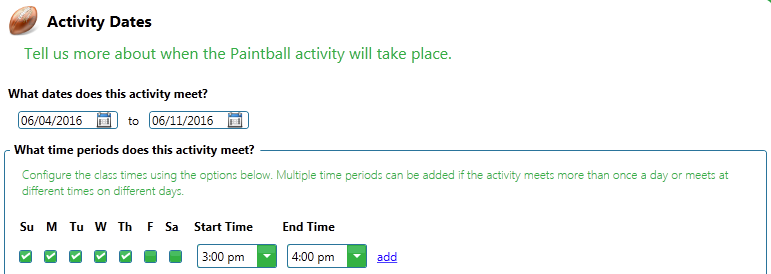
- For Scheduled Activities, select the date and times for the Activity. To add multiple times that the Activity will meet, click Add. Once complete, click Next.
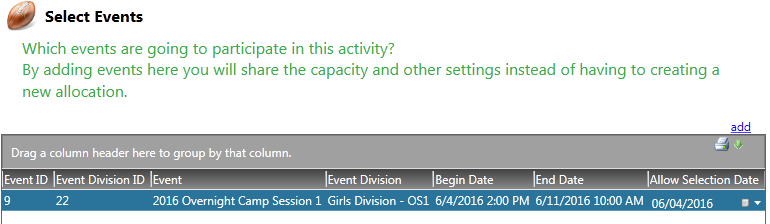
- Select which events are going to participate in the Activity. This is useful if you have events during the same time period using the same Activities. If needed, update the Allow Selection Date field and then click Next.
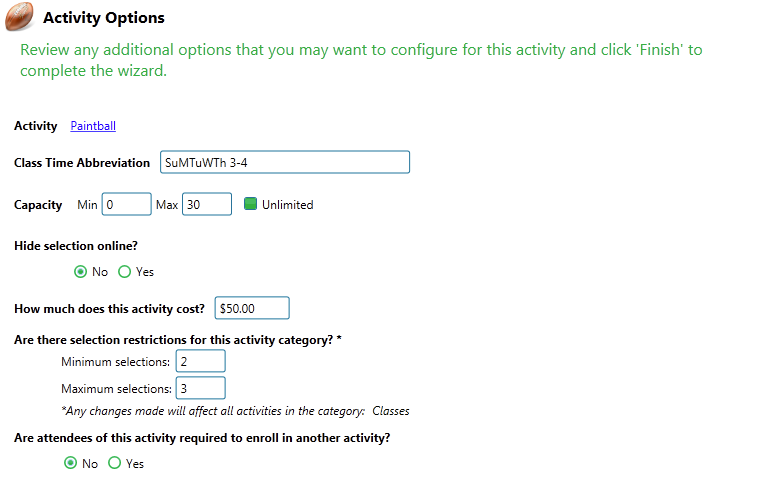
- Fill out the information in Activity Options and then click Finish.
- Repeat this process to add the rest of the Activities to the Event or Event Division.
Try It Yourself
Go through and allocate both a Resource and Activity for either your Event or Event Division.
Once you are done, click Next to learn how to add Optional Features.
Next – Optional Features