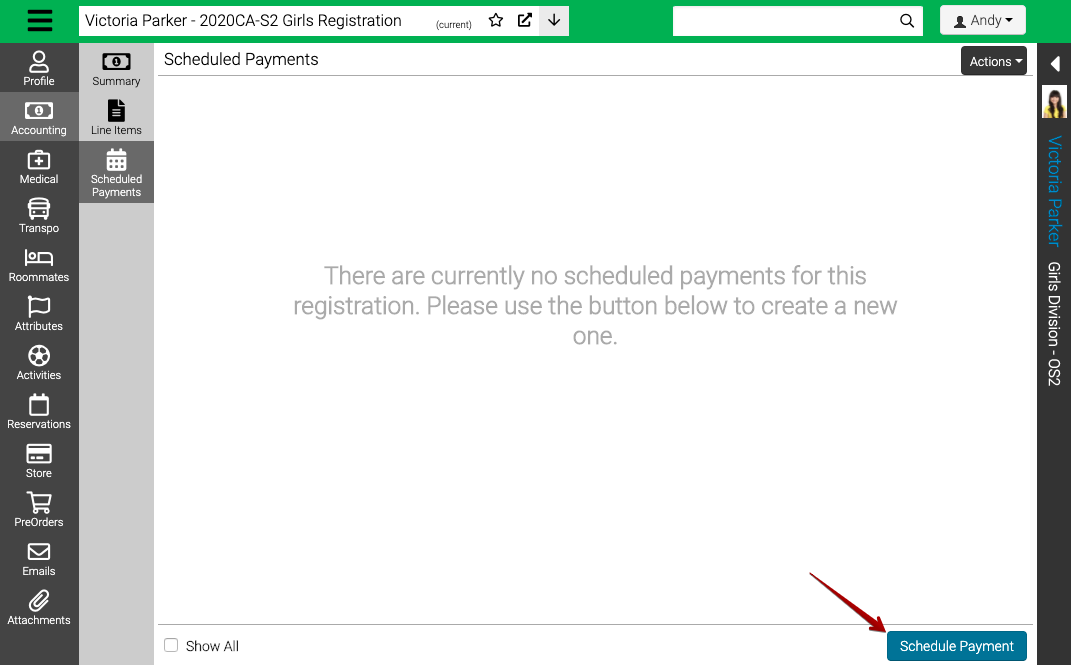
The following steps will allow you to add a Scheduled Payment/Payment Plan to a Registration.
- Look up a Registration and go to Accounting > Scheduled Payments and select Schedule Payment.
Calculated
Calculated Scheduled Payments takens the current balance due and divides by the number of months remaining before the Balance Due Date to determine the amount that is scheduled each month.
- Select Calculated and fill out the following fields.
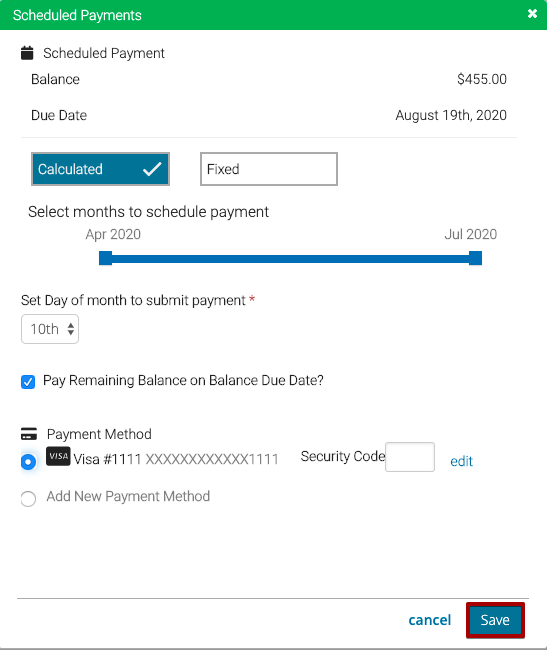
- Select Months – Move the slider to select the month that the Scheduled Payment starts and ends.
- Set Day of month – Select a day of the month for the Scheduled Payment to be withdrawn.
- Pay Remaining Balance on Balance Due Date? – Check to have the last payment occur on the Balance Due Date.
- Payment Method – Select an existing payment method or select Add New Payment Method.
- Select Save.
Fixed
A Fixed Scheduled Payment allows you to set an amount that will be withdrawn each month.
- Select Fixed and fill out the following fields.
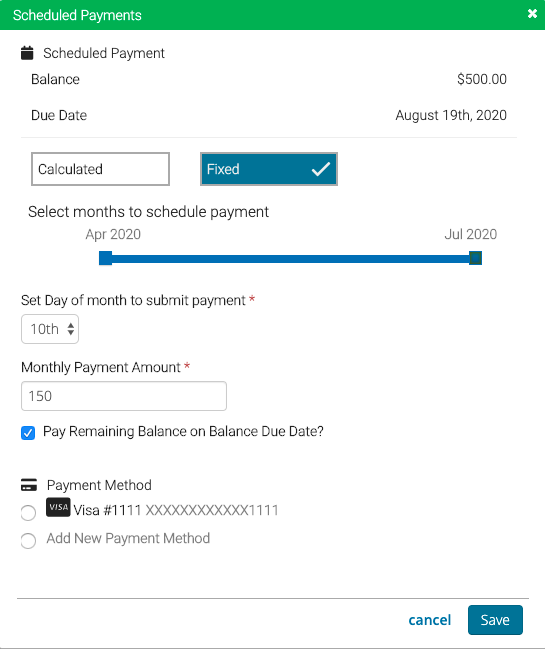
- Select Months – Move the slider to select the month that the Scheduled Payment starts and ends.
- Set Day of month – Select a day of the month for the Scheduled Payment to be withdrawn.
- Monthly Payment Amount – Set the amount to be withdrawn each month.
- Pay Remaining Balance on Balance Due Date? – Check to have the last payment occur on the Balance Due Date.
- Payment Method – Select an existing payment method or select Add New Payment Method.
2. Select Save.
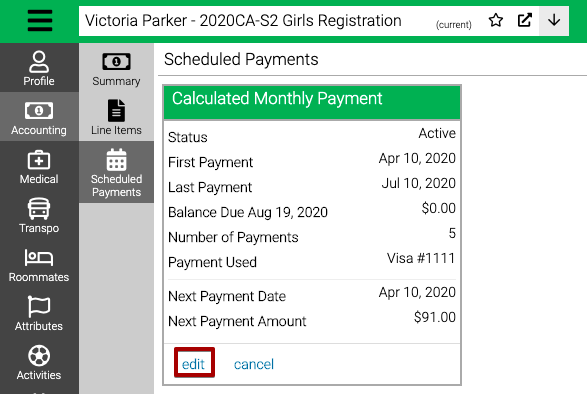
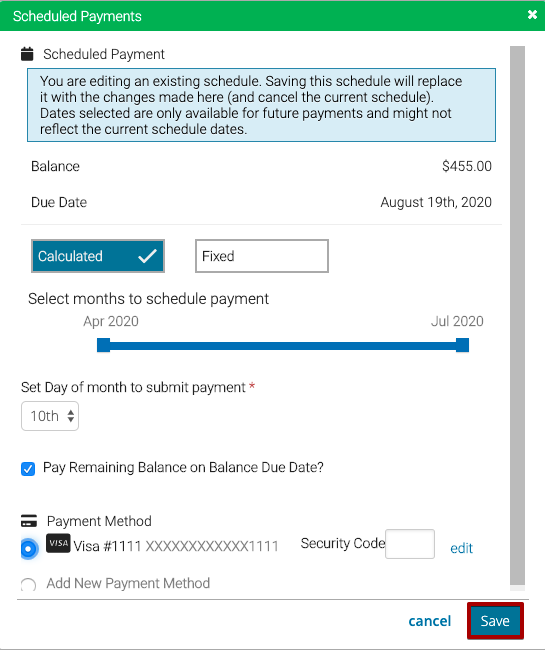
Edit
After a Scheduled Payment is created, you can edit if needed.
- Select Edit.
.
- Make any updates and select Save. Saving the scheduled will cancel the existing and create a new one.
Cancel
- Select Cancel.
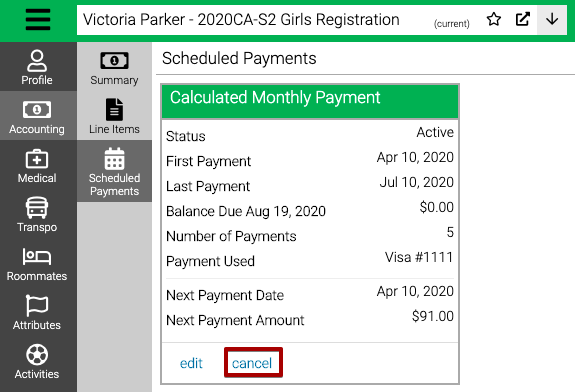
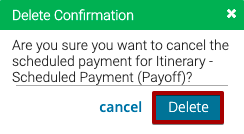
- Select Delete.
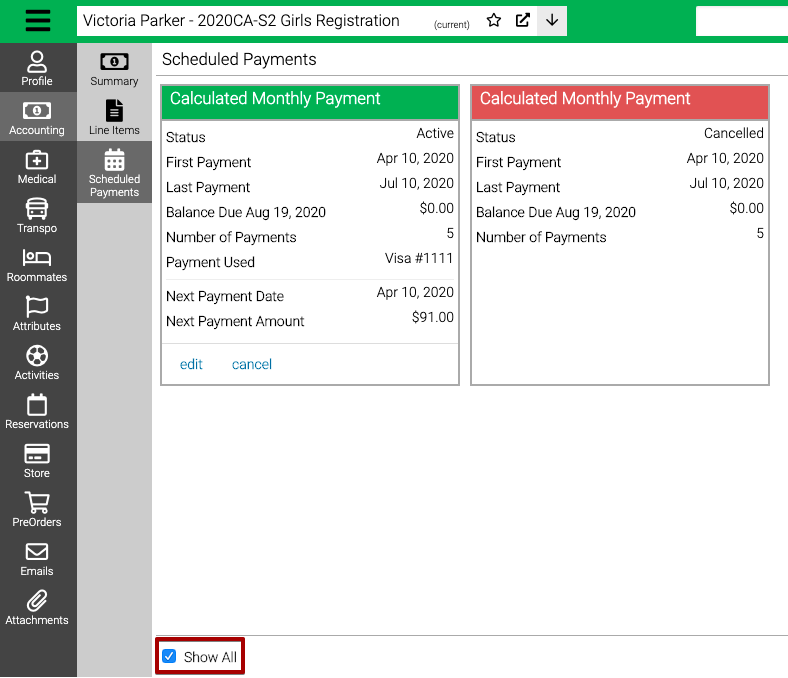
- To view cancelled Scheduled Payments, select Show All.
Notifications
The following Automated Emails are sent in relation to Scheduled Payments.
- AutoPay Payment Reminder
- Sent based on the number of days set in Application Settings > Payment > EmailNotifyDays. Default is 10 days.
- AutoPay No Payment Reminder
-
Sent to customers who have a scheduled auto payments, however no payment is due.
-
- AutoPay Payment Failed
- Only sent if the payment is failed. Add yourself as a BCC on email to receive notification.
- Run the Cancelled AutoPay Schedules query for details for failed Scheduled Payments over a time period.
Related Articles