After your family is created, the Family Details tab will appear. This is one of the standard tabs and contains the following items:
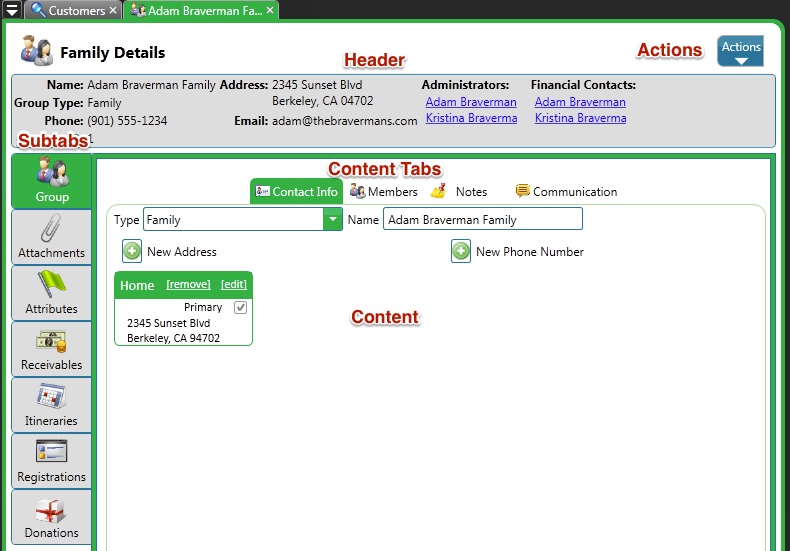
- Header – Displays important information about the family.
- Subtabs – Interact with different sections of the family’s account.
- Content – Displays information pertaining to Subtab.
- Content Tabs – Used to breakdown information from Subtab.
- Actions – Displays list of available actions for this tab.
Group Subtab
The Group Subtab contains four Content Tabs with information about the family.
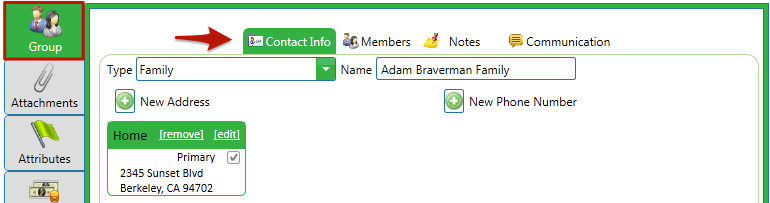
Contact Info
By default, a family inherits the phone number of the first Administrator. Lets add the home phone number for the Bravermans.
- Click on
 .
. - If this is the primary phone number for the family, check Is Primary. There can only be one primary entry per account.
- To remove the phone number from your marketing campaigns, check Do not Solicit.
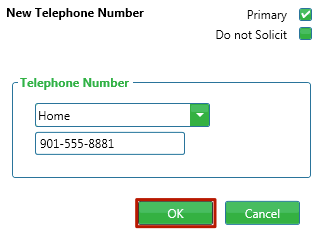
- Click OK.
Members
Looks like we forgot to add one of the children for this family, so we can add one here.
- To add another member to the family, click the gear button
 and select Add Member.
 - Enter their name and press enter to search for duplicates. If none are found, click Close.
- Enter the rest of the information and click Save.
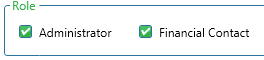
If you need to update the Administrator or Financial Contact for a family, right click on the member and select Modify. Check the boxes at the bottom of the screen to assign a role.
Notes
We need to remember that this family has a grandparent that sometimes helps pay for camp. Adding a note allows us to remember important facts about the family.
- Click

- Enter any details about the note.
- You can optionally set an expire date if the note is only valid until a certain time as well as mark it as critical.
- Click Save and Exit.
Communication
This parent called in with a question about dates on the website. We can record that conversation under Communication.
- Click the gear icon and select Add.
- Enter the Type, Subject and Content of the conversation. A time stamp will be automatically entered in the Date field.
- If this conversation had to do with a donation, mark which Campaign-Appeal it is associated with from the drop down menu.
Try It Yourself
Using your family as an example and the instructions above, accomplish the following:
- Add a Phone Number
- Create a New Member
- Create a Note
- Add Communication
Once you have completed those, click Next to go through an internal registration.
Next Up: Registration – Internal »