Contents
End of Event is a process that does several things to close an Event after it has happened, including the following:
- Clear out remaining Store Credit
- Process any donated Store Credit
- Set cancellation reason for any Pending or Waiting List registrations
- Transfer funds from deferred GL account to the final GL account
When should I run End of Event?
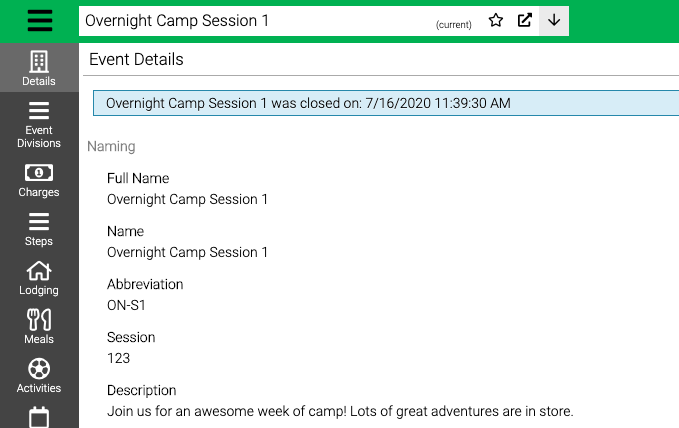
The End of Event process will become available for a specific Event on the day that Event ends. Typically this process should be run soon after the last day of the Event to be able to move funds from deferred to the final GL account. You will want to close store cards BEFORE running End of Event.
Two additional process that can be run after End of Event to wrap up the accounting for an Event include:
What happens after End of Event?
If you make payments to a registration after the End of Event process has run, payments will be batched to the final GL code instead of the deferred GL code. If you accidentally run End of Event too early, any payments made after will still be posted to final GL code, instead of deferred. Otherwise, running the process prematurely will cause no other impact/limitations to you or your customers.
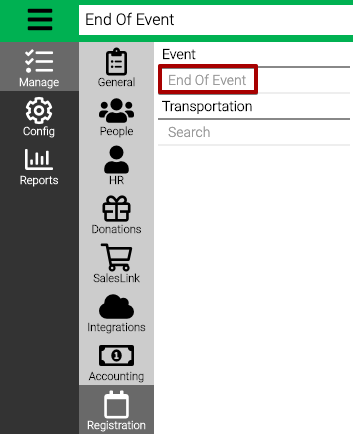
- Go to Manage > Registration > End of Event.
- Use the Criteria to filter the list of Events.
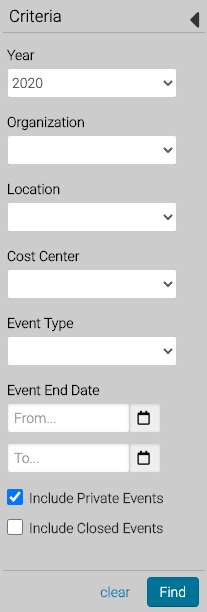
- Year – Select an Event Year.
- Organization – Select an Organization.
- Location – Select a Location.
- Cost Center – Select a Cost Center.
- Event Type – Select an Event Type.
- Event End Date – Enter a range of dates to find Events that end during that time.
- Include Private Events – Check box to include Events that are Private.
- Include Closed Events – Check box to include Events that have already been closed.
- Select Find.
Select Events
- From the list of Events, select the header (which is grouped by Location) to select all of the Events or select Event individually.
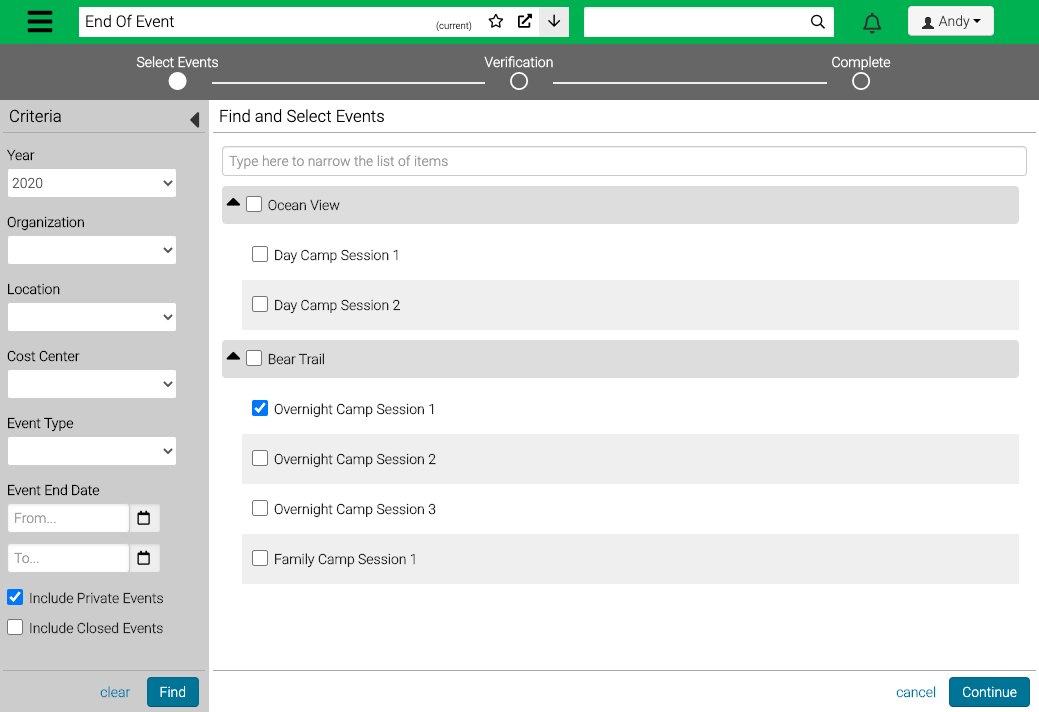
- Select Continue.
Verification
The next step will verify that everything is correct with the accounting settings with the Event and allow you to update a few settings.
- Verify the information and update as needed.
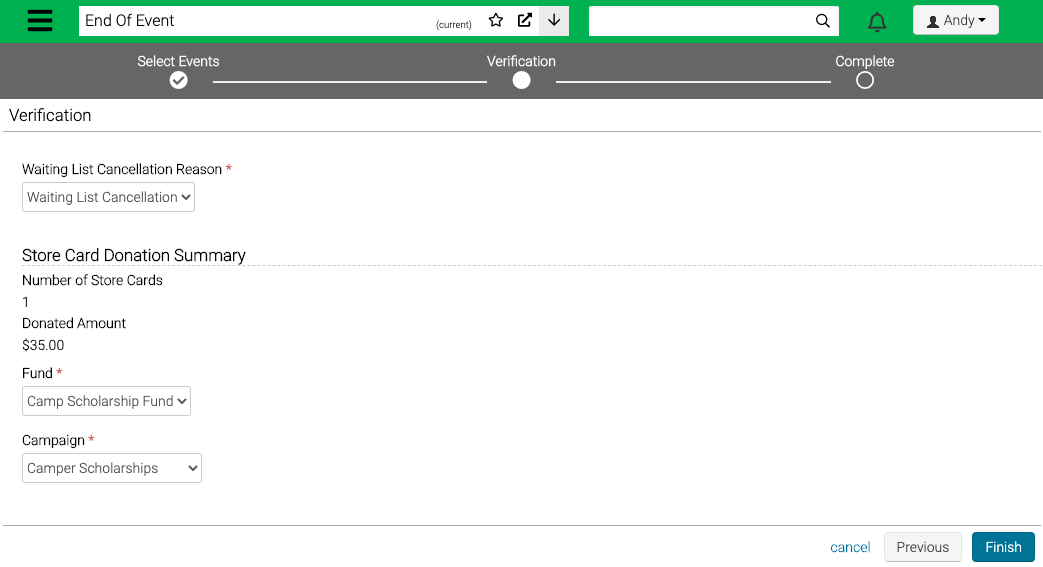
- Waiting List Cancellation Reason – Select a Cancellation Reason for Waiting List Registrations that will be cancelled during the process.
- Select Finish.
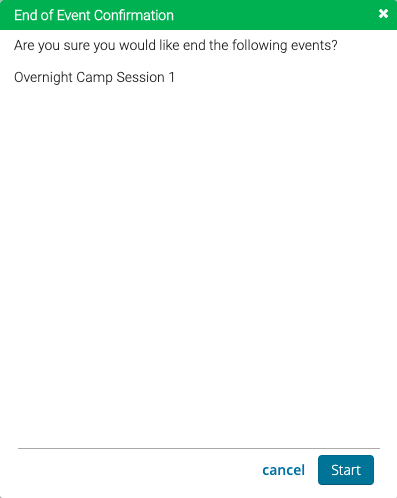
- On the confirmation screen, select Start.
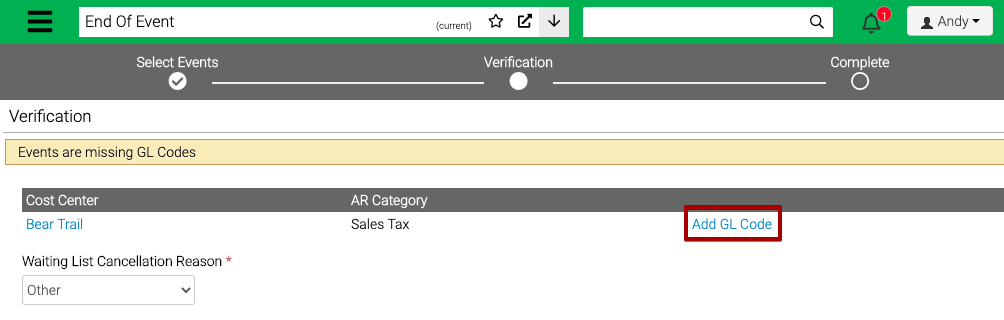
Add GL Code
If one of the AR Categories used for a charge on the Event does not have a GL Code associated with it, you will need to assign one.
- A list of AR Categories without GL Codes will display, select Add GL Code.
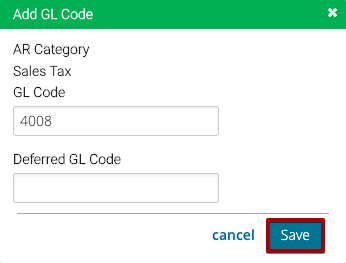
- Enter a GL Code and then select Save.
Complete
- Review the Events closed and then select Close.
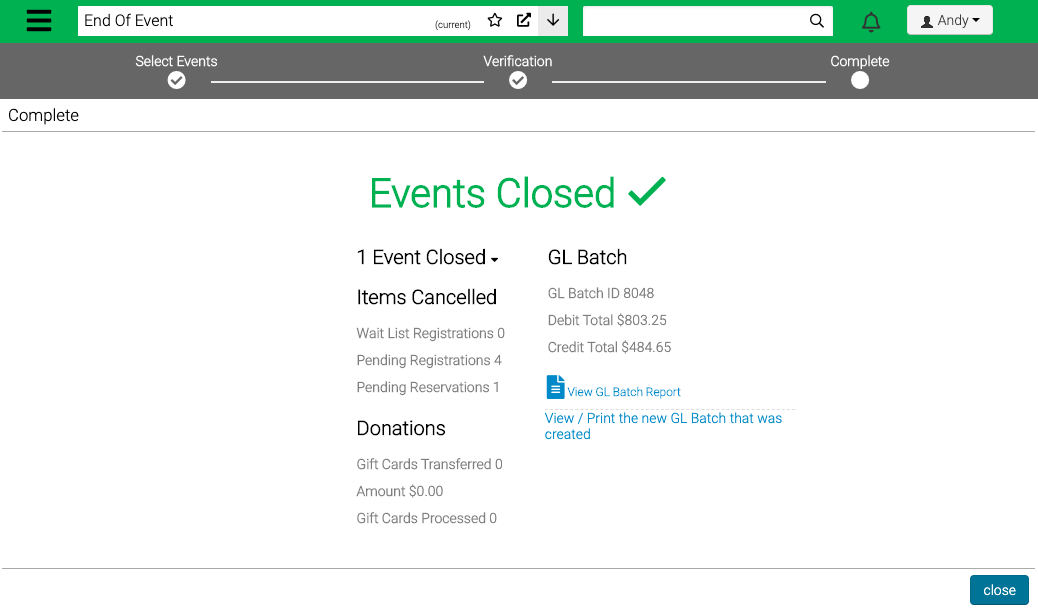
- View GL Batch Report – Select to see the GL Batch Report that was generated when the End of Event process was run.
Notifications
A notification will appear in the toolbar once the End of Event process is complete.
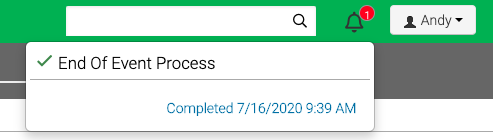
You will also see a notification when you open the Event.