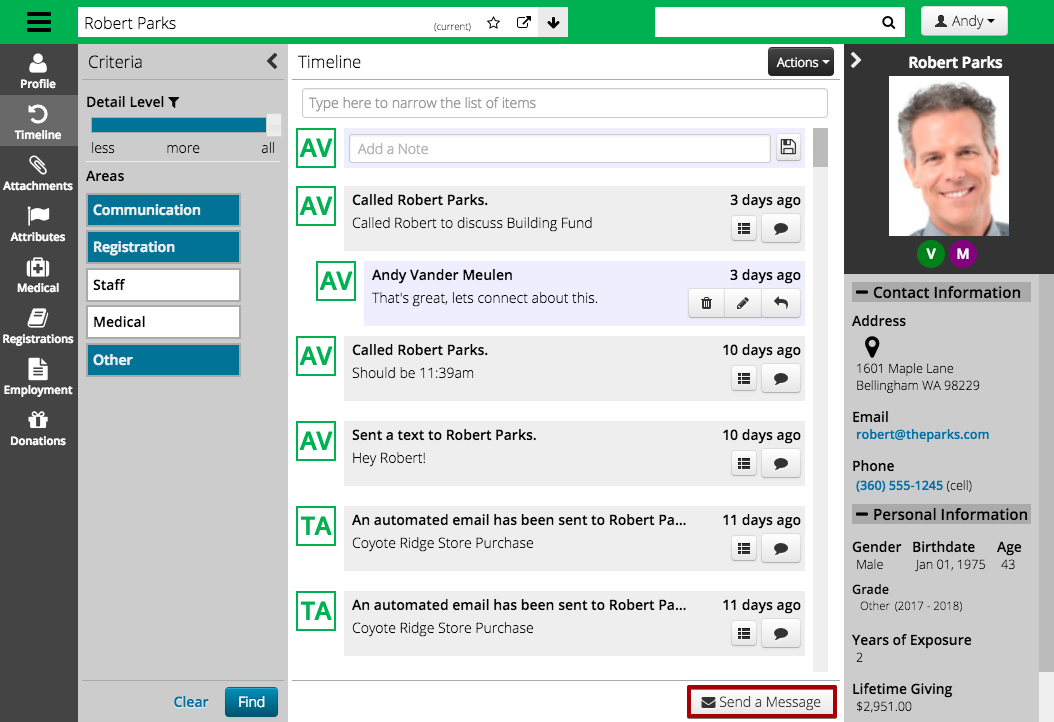
The Timeline is a powerful tool that can be used to review the history in a wide variety of contexts in CT6. Each entry on the Timeline represents a different activity such as when an Automated Email was sent, a payment entered, a discount applied or notes were added.
Navigation
To access the Timeline, select the  icon from one of the following:
- Individual
- Family
- Group
- Itineraries
- Medical Complaint
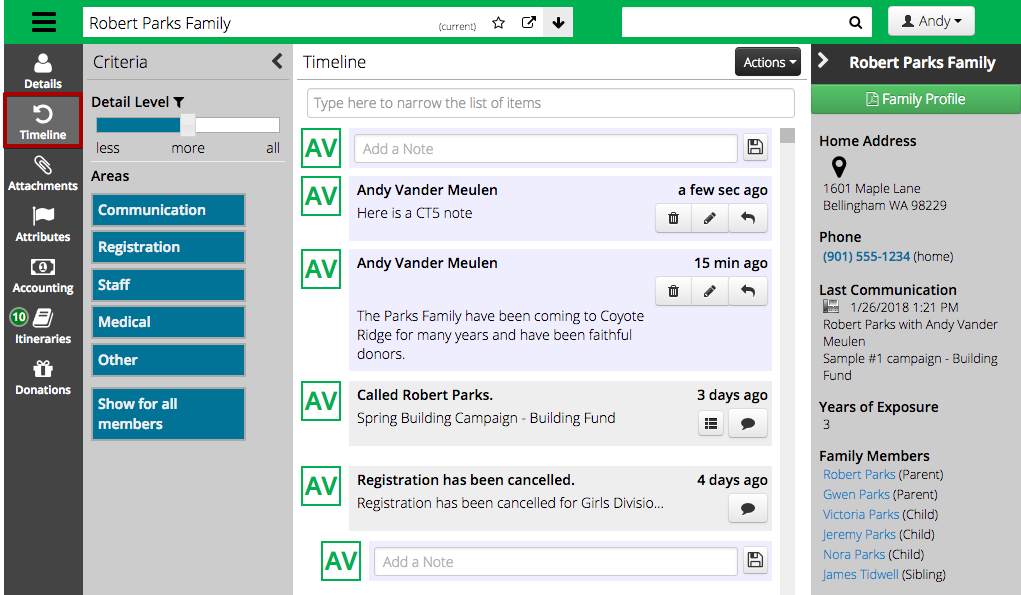
Criteria
The Criteria allows you to filter what entries that you can see on the Timeline.
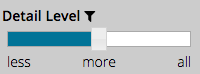
Detail Level
There are three levels of detail [less, more or all] that you can select by using the slider.
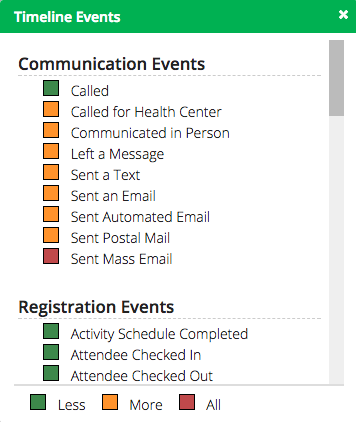
To see specific entries that are included in each Detail Level, select the ![]() icon.
icon.
Areas
To only see specific areas and filter out the rest, select from the list.
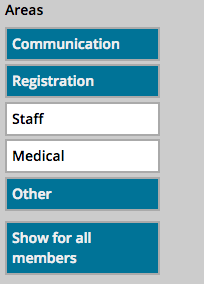
On Family accounts, there is an option to Show for all members, that allows you to see entries from individuals accounts on the Family level.
Timeline
There are various ways to interact with Timeline entries.
Filter
At the top of the Timeline, you can filter entries by typing in the box.
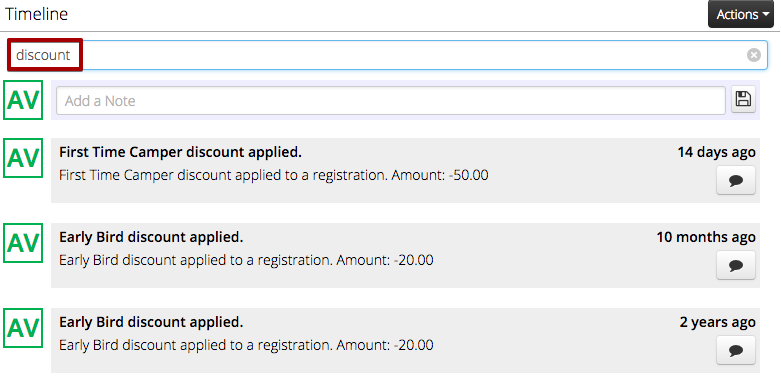
Entries
The initials on the left side indicate who made the entry on the Timeline. Select the initials to see the name of the user.

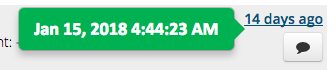
On the right hand side, you can see how long ago the entry was made. Select the time to see a specific time and date.
Notes
Below the filter is the option to add a note to the Timeline. Type the note and then either select enter on your keyboard to post or select the ![]() icon.
icon.
![]()
Once you have entered a note, you are able to delete, edit or reply. You can only delete or edit your own notes.

You can also add a note to a specific entry if needed. Select the ![]() icon to add a note.
icon to add a note.

Communication
On Individual accounts, you can add Communication entries to the Timeline. This is helpful when tracking phone call, emails or text messages with individuals who are associated with your organization.
Add Communication
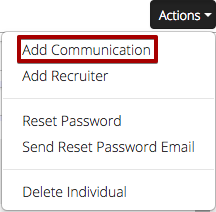
- To add a Communication entry to the Timeline, go to an Individual account and select Actions > Add Communication.
- Fill out the fields for the Communication entry and then select Save.
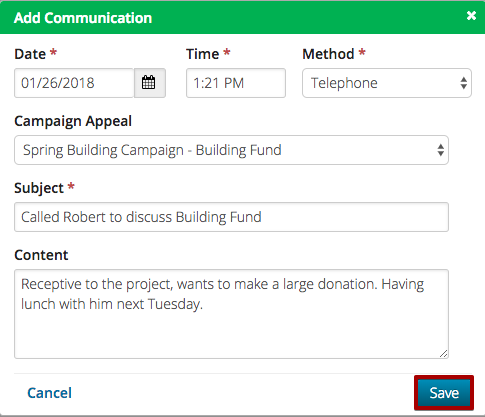
- Date / Time – Automatically set to current date and time. Update as needed.
- Method – Select from Telephone, Text, Mail, Email, In Person, Left Message.
- Campaign Appeal – Optional field to track Donation appeal.
- Subject – Add a subject line for the Communication.
- Content – Add content to track the conversation.
View Communication
- To view the details of the Communication entry at a later time, select the
 icon.
icon.

- For Communication entries like Automated, Scheduled or Mass emails, you can see the content of the email that was sent.
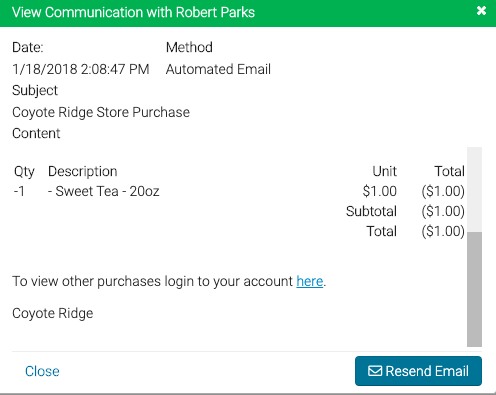
- Select Resend Email to send the email again.
Send a Message
Communication between you and your customers is important and being able to track those even more so. Being able to quickly send a message from the Timeline allows you to accomplish both of these goals at the same time.
- Select Send Message in the lower right hand corner.
- Fill out the fields for the message and then select Send.
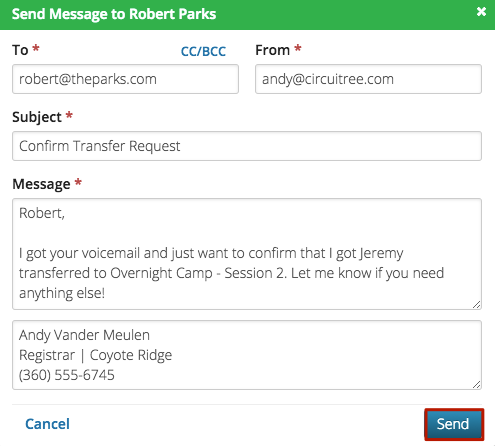
- To – Email Address of the Individual. Update if needed.
- From -Email Address of the CircuiTree user. Update if needed.
- CC/BCC – Click to add a CC or BCC for the message. Include multiple recipients by separating the emails with a comma.
- Subject – Enter a subject for the message.
- Message – Type the message to the Individual.
- Signature – Enter your signature once and it will be saved for successive messages.
- The message is added to the Timeline as an entry.

Security Privilege
The Allow User to Send Entity Messages Security Privileges is used to control who is able to send a message from the Timeline.