In order to processor payments in CircuiTree, you need to have a payment processor (cash, check, credit card or eCheck) configured. Each Payment Processor is assigned to an Organization and is available to process payments for registrations, reservations or store purchases where that Organization is assigned.
Here are some examples where different Payment Processors can be assigned to different Organizations.
- Registrations / Donations
- Summer Camp / Retreats
- Registrations / Store
- Multiple locations
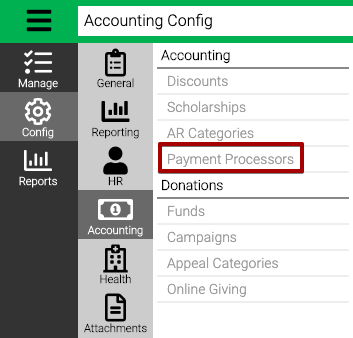
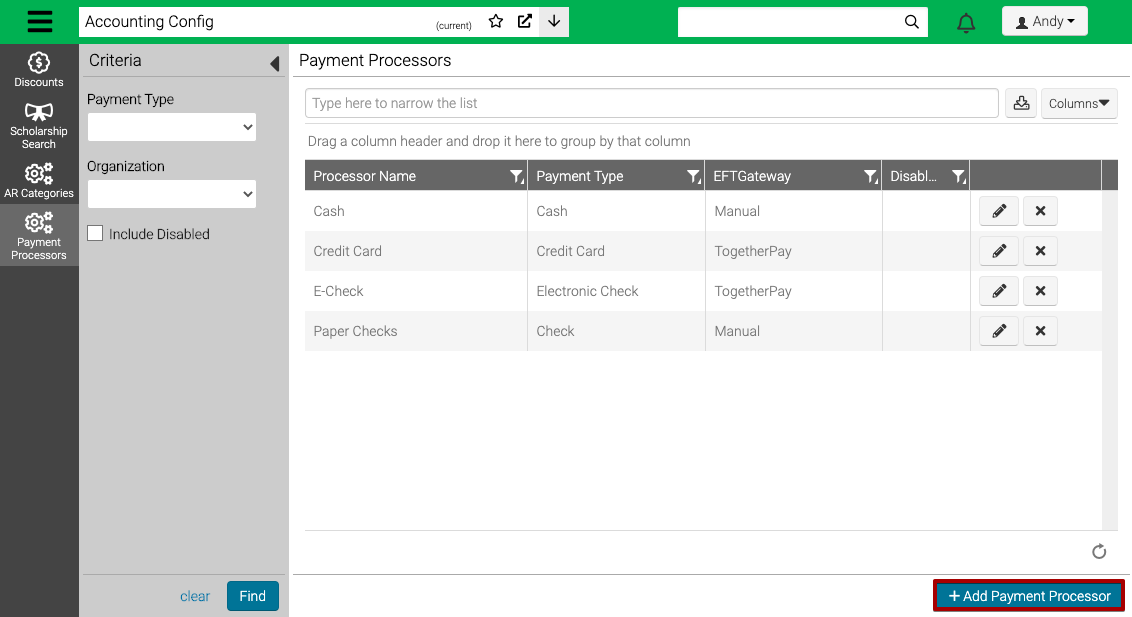
- Go to Config > Accounting > Payment Processors.
- Use the Criteria to filter the list of Payment Processors and then select Find.
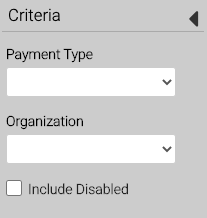
- Payment Type – Select one of the following:
- Check
- Electronic Check
- Credit Card
- Cash
- Organization – Select an Organization.
- Include Disabled – Select checkbox to include disabled Payment Processors in the results.
- Select
 to Edit or
  to remove.
Add Payment Processor
- In the lower right hand corner, select Add Payment Processor.
- Enter the information in the fields and then select Save.
Cash / Check
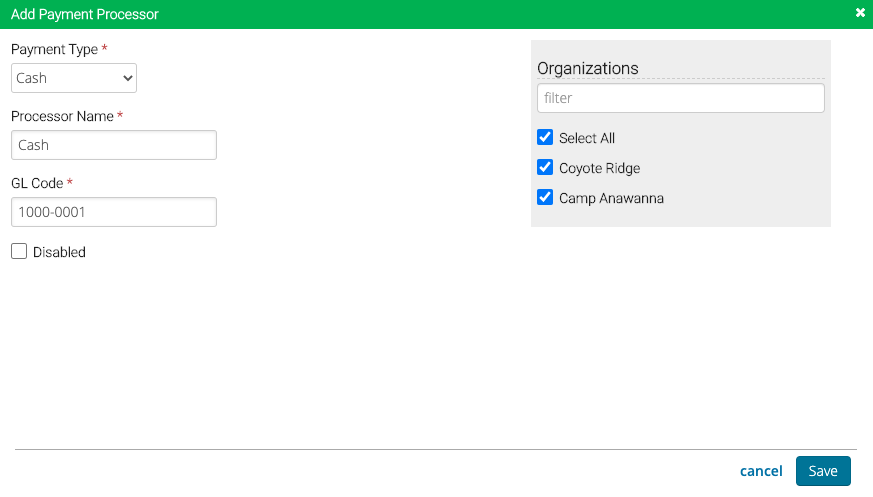
- Payment Type – Select Cash or Check.
- Processor Name – Enter a name for the processor to be used internally.
- GL Code – Enter a GL Code for where the funds will be deposited.
- Disabled – Select to disable processor. If any payments have been made on processor, you cannot delete it, but you can disable if needed.
- Organizations – Select the Organizations that can use this processor.
Credit Card / eCheck
Typically your Business Analyst will complete this configuration once you have submitted your TogetherPay application.
- Payment Type – Select Credit Card or Electronic Check.
- EFT Gateway – Select TogetherPay.
- Processor Name – Enter a name for the processor to be used internally.
- GL Code – Enter a GL Code for where the funds will be deposited.
- You will be prompted to enter your bank account details and EIN — have those on hand before completing this step.
- Saleslink Use Only – Select if only using processor with SalesLink.
- Disabled – Select to disable processor. If any payments have been made on processor, you cannot delete it, but you can disable if needed.
- Credit Cards – Select the credit card brands that you want to offer.
- Organizations – Select the Organizations that can use this processor.
CircuiTree support will never ask you to provide bank account details or your EIN over the phone or via email. If you receive an unsolicited request, do not comply — contact support directly.