Invoices are used to post Inventory to your Store Location. Whenever you receive Inventory from a Vendor, create an Invoice and post it for the Inventory to show up in your Store.
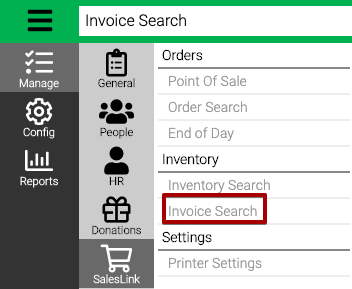
- Go to Manage > SalesLink > Invoice Search.
- Use the Criteria to filter the list and then select Find.
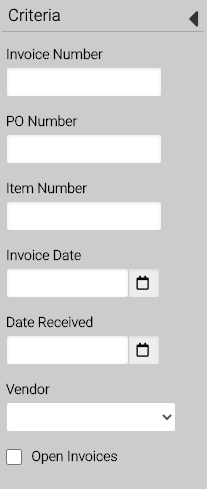
- Invoice Number – Enter an Invoice Number.
- PO Number – Enter a PO Number.
- Item Number – Enter a specific Item Number to return Invoices that contain the item.
- Invoice Date – Enter an Invoice Date.
- Date Received – Enter the date the Invoice was received.
- Vendor – Select from a list of vendors.
- Open Invoices – Check box to include Invoices that have not been posted.
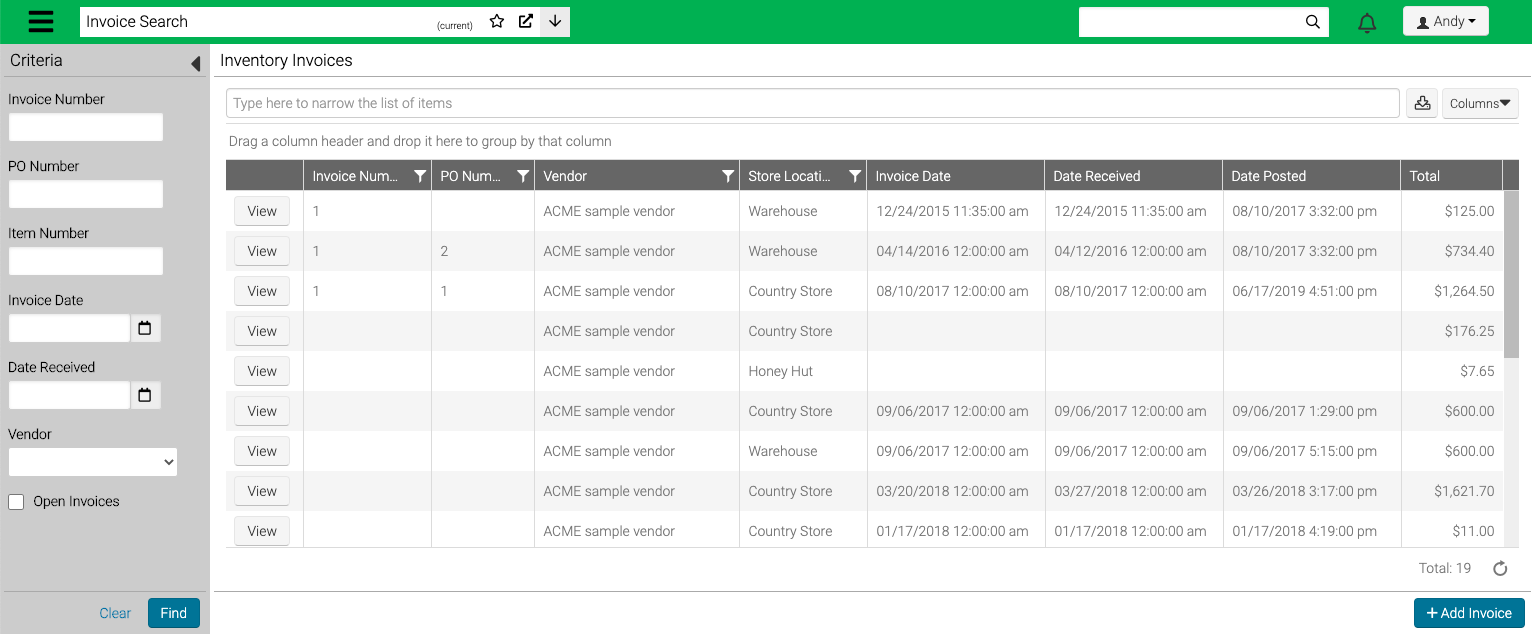
- Select View to open an Invoice.
Add Invoice
- In the lower right hand corner, select Add Invoice.
- Enter the information in the fields.
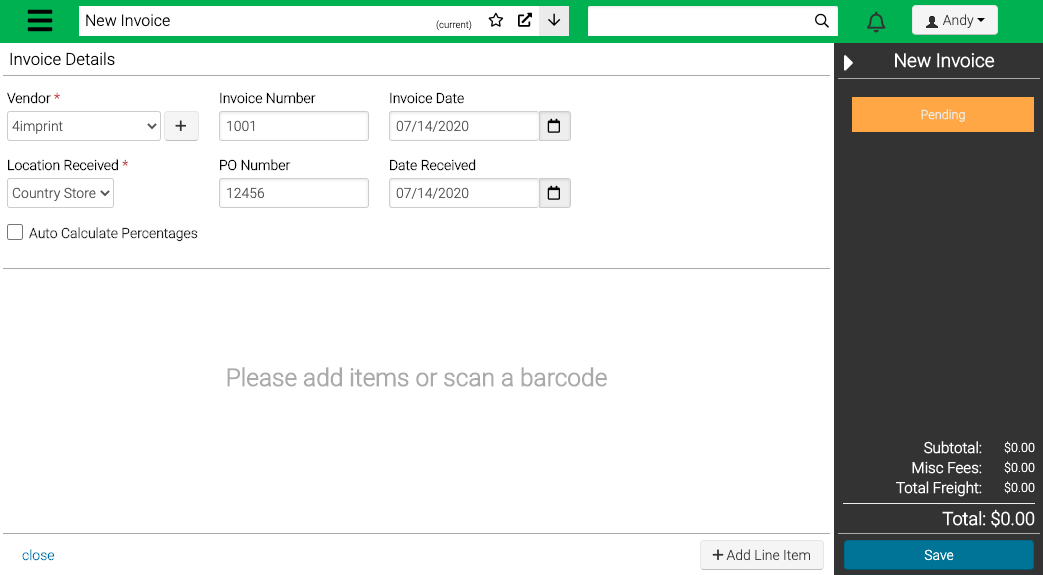
- Vendor – Select a Vendor from the list or add a Vendor.
- Location Received – Enter the Store Location where the inventory will be received.
- Invoice Number – Enter the Invoice Number from the Vendor.
- PO Number – Enter your PO Number assigned to the Invoice.
- Invoice Date – Enter a date for the Invoice.
- Date Received – Enter a date that the inventory was received.
- Auto Calculate Percentages – Check box to distribute costs of Total Freight and Misc Fees based on the quantity of items.
Add Vendor
- Select
 to add a new Vendor.
 - Fill out the information in the fields.
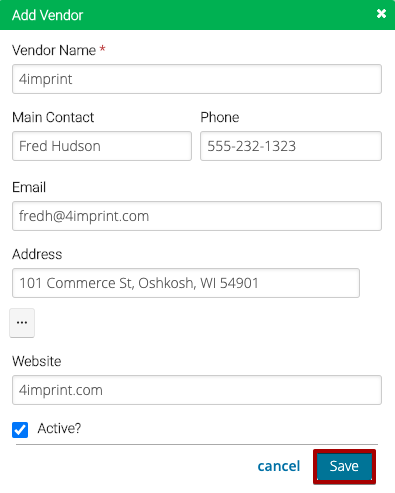
- Vendor Name – Enter a name for the Vendor.
- Main Contact – Enter a name for the main contact with the Vendor.
- Phone – Enter the main contact’s phone number.
- Email – Enter the main contact’s email address.
- Address – Enter an address.
- Website – Enter a website.
- Active – Select if the Vendor is Active.
- Select Save.
Add Line Item
After you have added the Invoice Details, the next step is to add the items that make up the Invoice.
- In the right hand corner, select Add Line Item.
- Use the filters to find the list and then select Find.
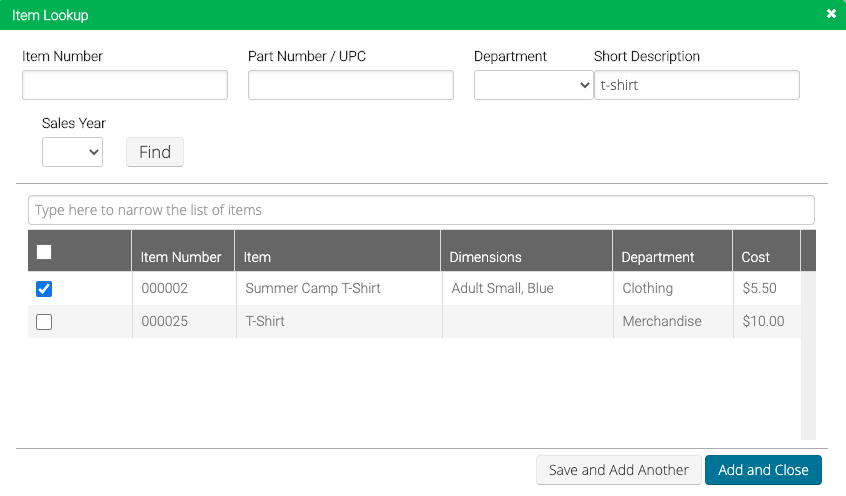
- Check the boxes next to the Inventory Items to include them on the Invoice.
- Once you are finished with your select, choose on of the following:
- Save and Add Another – Adds the items selected and remains on the same screen.
- Add and Close – Adds the items selected and closes the screen.
- Update the fields as needed.
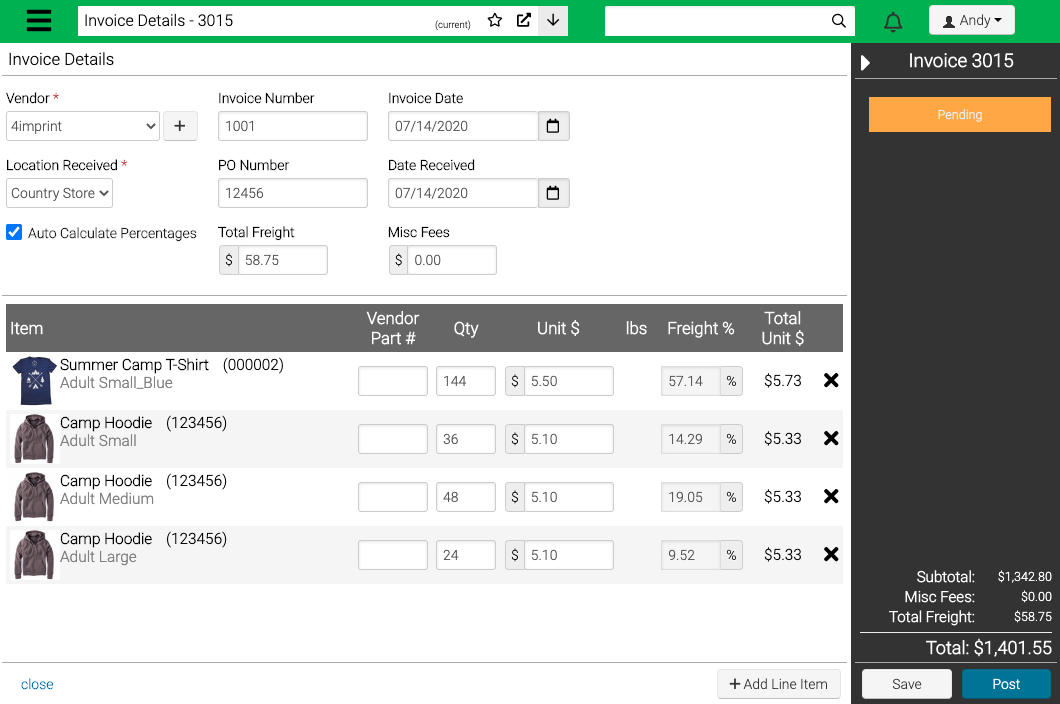
- Auto Calculate Percentages – Check box to distribute costs of Total Freight and Misc Fees based on the quantity of items.
- Total Freight – Enter the amount for freight of the Invoice.
- Misc Fees – Enter any miscellaneous fees on the Invoice.
- Vendor Part # – Enter the vendor part number.
- Qty – Defaults to 1 and then update to the actual number of items on Invoice.
- Unit $ – Pulled from the Cost field on the Inventory Item. Override as needed. Inventory is sold FIFO (first in, first out).
- Lbs – Pulled from the weight field on the Inventory Item.
- Freight % – Manually enter the percentage of the Total Freight and Misc Fees to apply to each Inventory Item.
- Total Unit $ – Sums the Unit Cost and Freight and Misc Costs.
- X – Select to remove a Line Item
Post Invoice
When an Inventory is started, it is in a Pending status. You can either Save the Invoice if you need to add more later or select Post to finalize the Invoice and post the Inventory.
- Select Post.
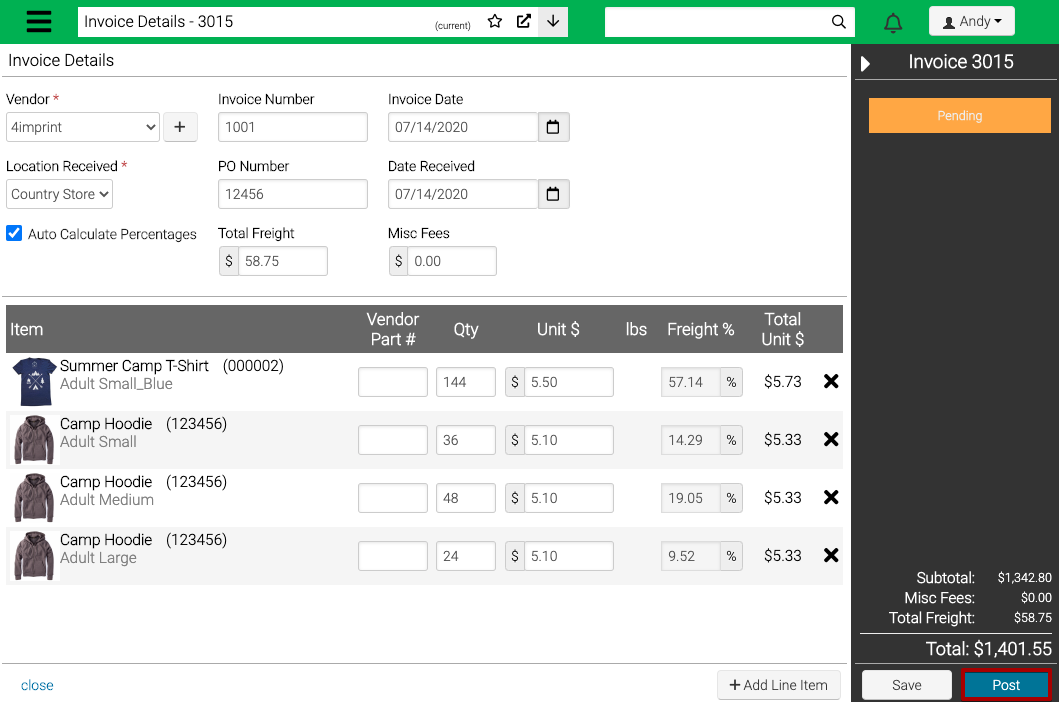
- Once you have posted an invoice, the status will change to Posted.
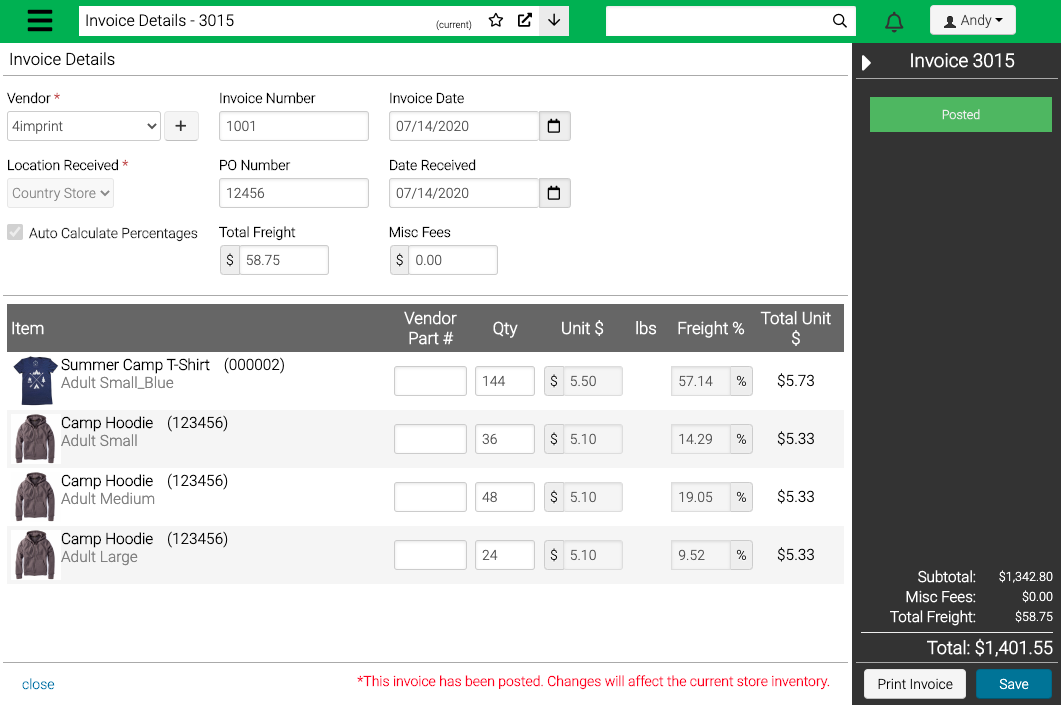
Quick Tip – Once an Invoice is Posted, any changes will affect the current store inventory.
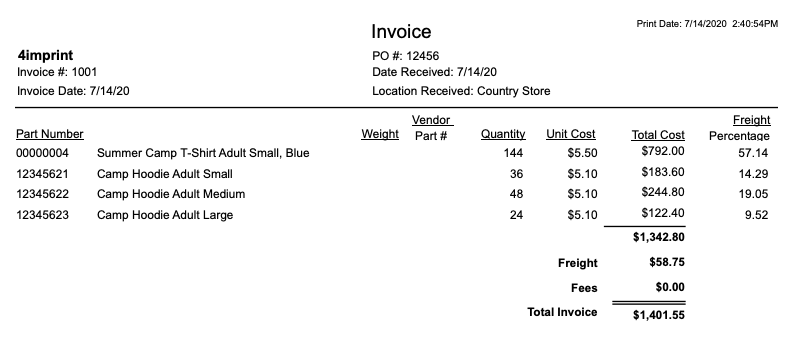
- To print an Invoice, select Print Invoice. This will print the Inventory Vendor Invoice report.
Reports
Here are a few reports that are helpful to audit your current inventory.
- Inventory Quantities by Location
- Inventory Quantities for Date
- Inventory Vendor Invoice