Models Supported
SalesLink currently supports the following models of receipt printers for use with Point of Sale in CT6.
Important Notes
- Ethernet based receipt printers need to be connected to the network via ethernet cables [not USB] and set to Static IP Addresses to successfully function with SalesLink.
- Prior to setting up any printers, the network should be properly configured and set up. The printers will need to be connected to the same router providing the network for any devices that are using the printer.
- If you are configuring a cash drawer, make sure to add the printer to a private secure network. This is helpful with keeping PCI compliance.
- Popup blocker should be disabled for the browser.
- Devices should not share IP addresses.
- When using Chrome or Edge browser, you must disable the “Block insecure private network requests.” in the browser settings in order to communicate with the printer
- edge://flags/#block-insecure-private-network-requests
- chrome://flags/#block-insecure-private-network-requests
Set Static IP Address
- Load paper into the printer.
- Plug the ethernet cable into the back of the printer. Ensure the other end of the Ethernet cable is connected to the router or a switch leading to the router.
- Turn the printer on. A green light should be visible on the front of the printer.
- Turn the printer off.
- Press and hold the paper feed button while turning the printer back on.
- SP700 – A beep will be heard shortly after turning the printer back on then the printer-head will adjust and a second beep will be heard. Once the second beep has been heard, release the paper feed button.
- TSP650 – After turning the printer back on, a report will print out. Release the paper feed button as soon as this report begins to print.
Quick Tip – With both printers, two reports will print out, the second report will have a header along the lines of “Network Card…” and at the bottom of the paper there will be an IP Address, Subnet Mask, and Default Gateway. The first report can be discarded.
- Open a web browser on a computer connected to the same network as the printer.
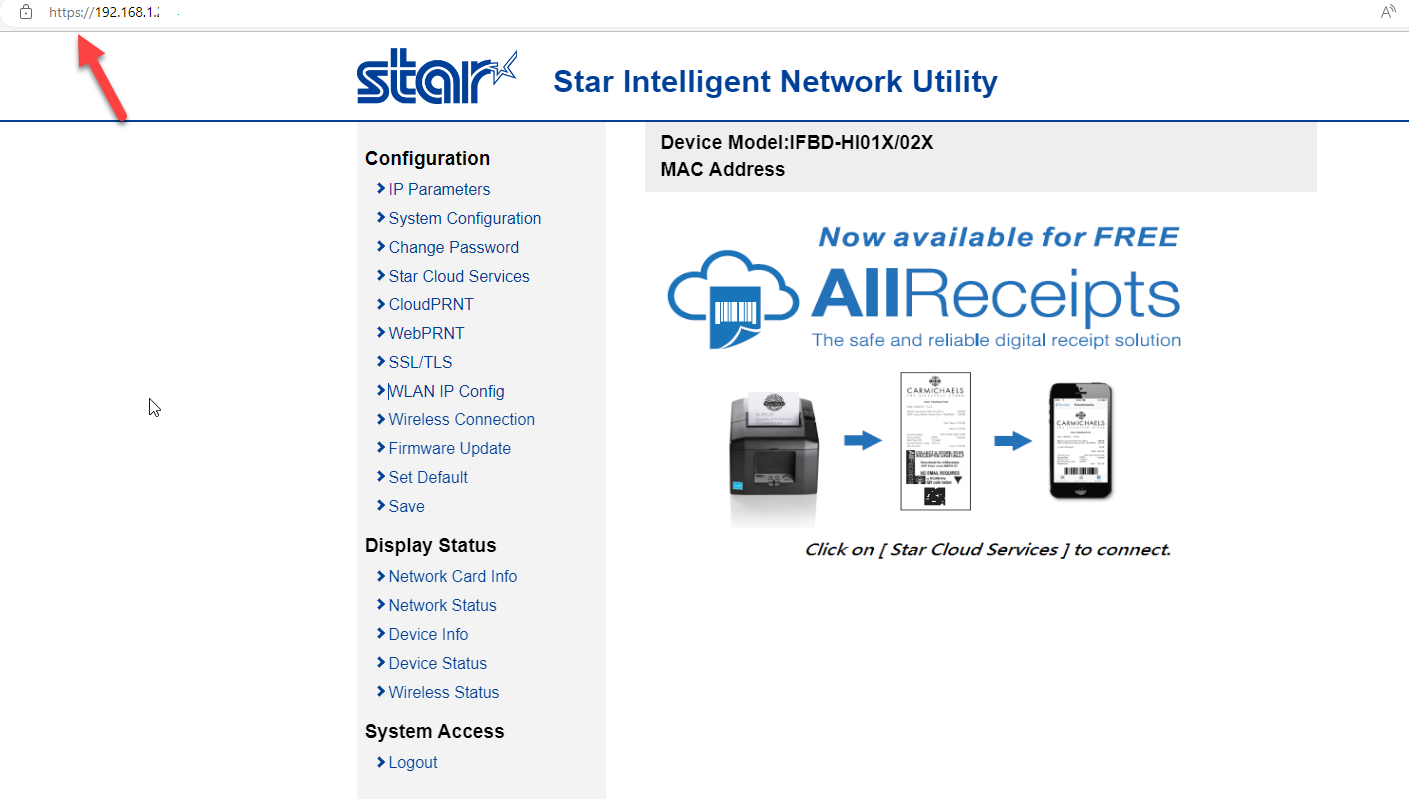
- Type the IP Address from the second report from the printer into the address bar and press Enter. The Star Micronics Network Utility will load.
Note – Not all IP Address schemes are the same; enter the IP Address found at the bottom of the Network Card report from the Star printer.
- Under System Access, click Login
- Enter the default Username and Password.
- Username – root
- Password – public
- Once logged in, go to Network Configuration > IP Parameters
- Select Static //following addresses are fixed.
- Type in a static IP Address that is outside of the DHCP range of the router.
- Type in the Subnet Mask (typically 255.255.255.0, but also located on the report from the printer).
- Type in the Default Gateway (the IP Address of the router).
- Click Submit.
Create Self-Signed Certificate
- Create and download a self-signed certificate for the printer’s IP Address.
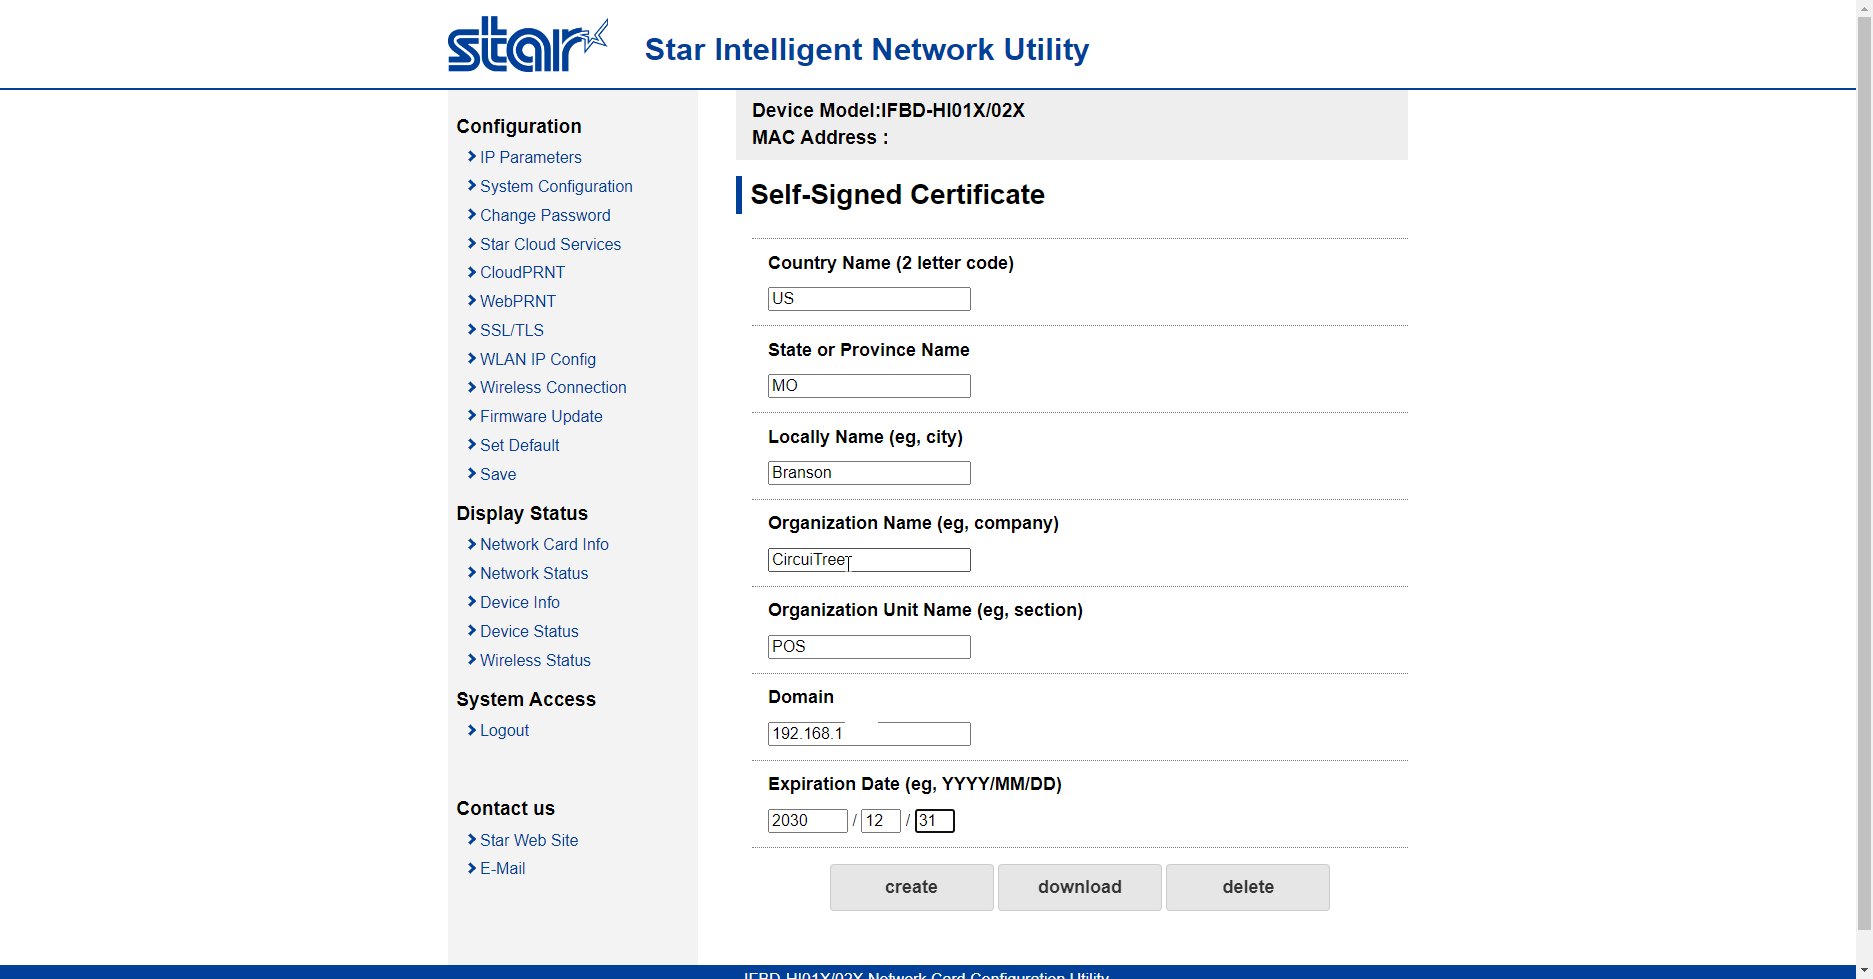
- Select Download to download the certificate.
-
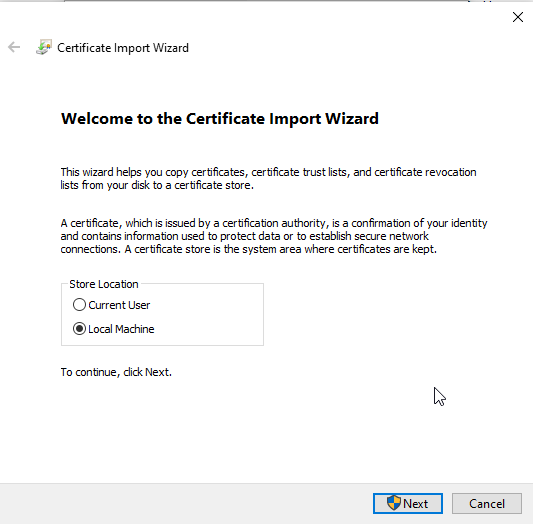
Install the self-signed certificate on all computers that need to communicate with CircuiTree POS
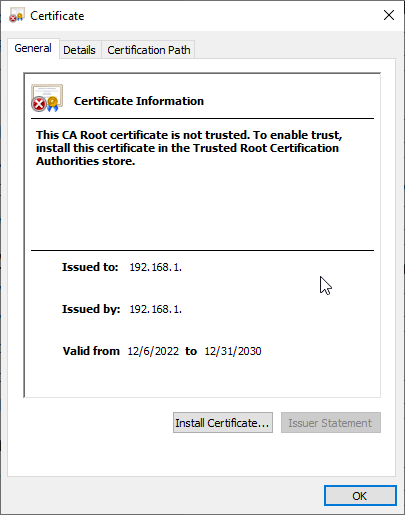
- Ideally this is done for the computer, but can be limited to the current user if needed.
- Certificate should be placed in the
Trusted Root Certification Authoritiesfolder.
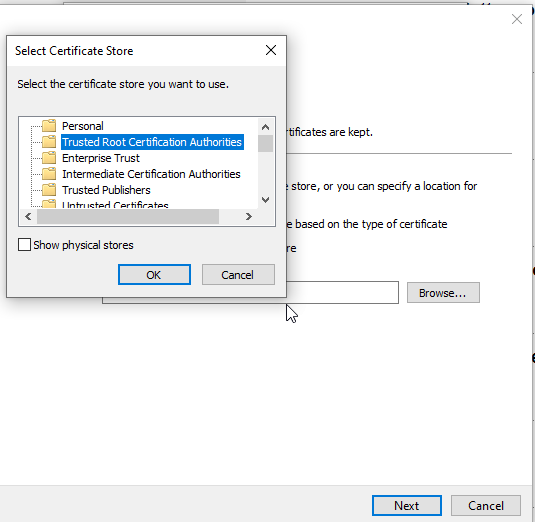
- After installed, the computer should be able to access the printer’s IP address via HTTPS.
Other Configuration
- Click System Configuration.
- Enter 30 into the text field for Web Refresh Interval Time (Sec.).
- Ensure #9100 Multi Session is Enabled.
- Set #9100 Data Timeout (Sec.) to 30.
- Click Submit.
Restart Printer
- Click Save (found in the control pane along the left side of the page).
- Click Execute on the page that loads (do not change anything).
- Your printer will restart and print out a new Network Card report. The static IP Address will appear at the bottom of the report.
Printer Settings
Once you have set a static IP for the printer, follow these steps to configure Point of Sale in CT6.
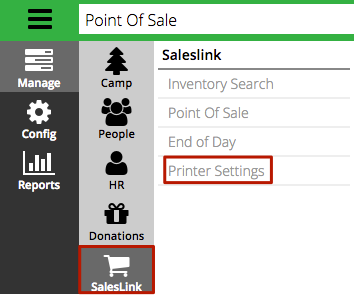
- In CT6, go to Manage > SalesLink > Printer Settings.
- Enter the IP address of the printer.
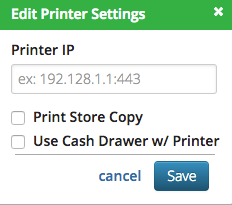
- Print Store Copy – Select to print two copies of the receipt.
- Use Cash Drawer w/ Printer – Select to open the cash drawer when receipt is printed.
- Click Save.
Bump Printer
To configure a Bump Printer, follow the instructions in the article below: