Once you have created all of your Event Divisions, you can move on to adding Charges.
- Select the Charges tab and select Edit to update.
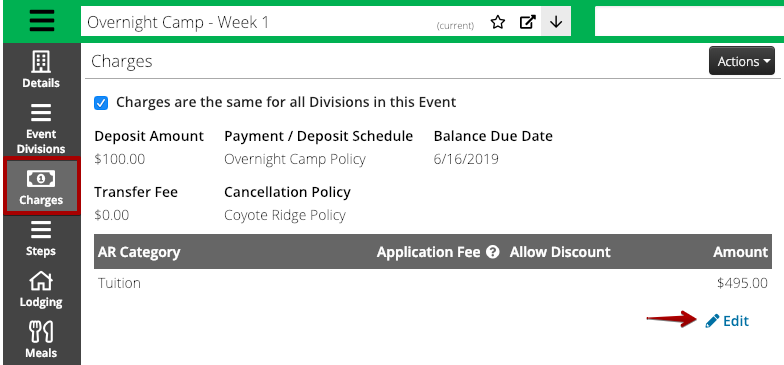
- Fill out the following fields:
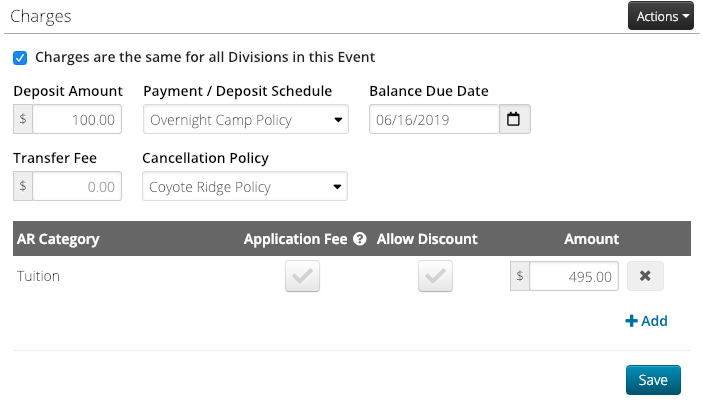
- Charges are the same – If all of the Charges on the Event Divisions are going to be the same for the Event, check the box. If they are different, uncheck the box to set up different charges per Event Division.
Quick Tip – Unchecked the box but didn’t mean to? Refresh the screen, and if nothing has changed, the system will group them again.
- Deposit Amount – Enter the amount required to Activate the Registration.
- Transfer Fee – Set the amount to charge when a transfer occurs.
- Payment / Deposit Schedule – See How do I create an Event?
- Cancellation Policy – See How do I create a Cancellation Policy?
- Balance Due Date – Set the date when the balance is due.
- AR Category – Select an AR Category, choose to Allow Discounts or not and set an Amount. Select
 for multiple charges from different AR Categories.
 - Application Fee – Select to add an Application Fee. The fee will be applied once per Attendee per Itinerary regardless of how many Registrations there are. How do I add an Application Fee?
- Allow Discount – Select to allow a Discount to be applied to the AR Category.
- Once complete, select Save.