If you offer meals as part of your conference or camp, you can use a special resource type called Meals to set those up in CircuiTree. This will allow you to set meal times, quantities available, and charges.
Step 1: Configure Meal Categories
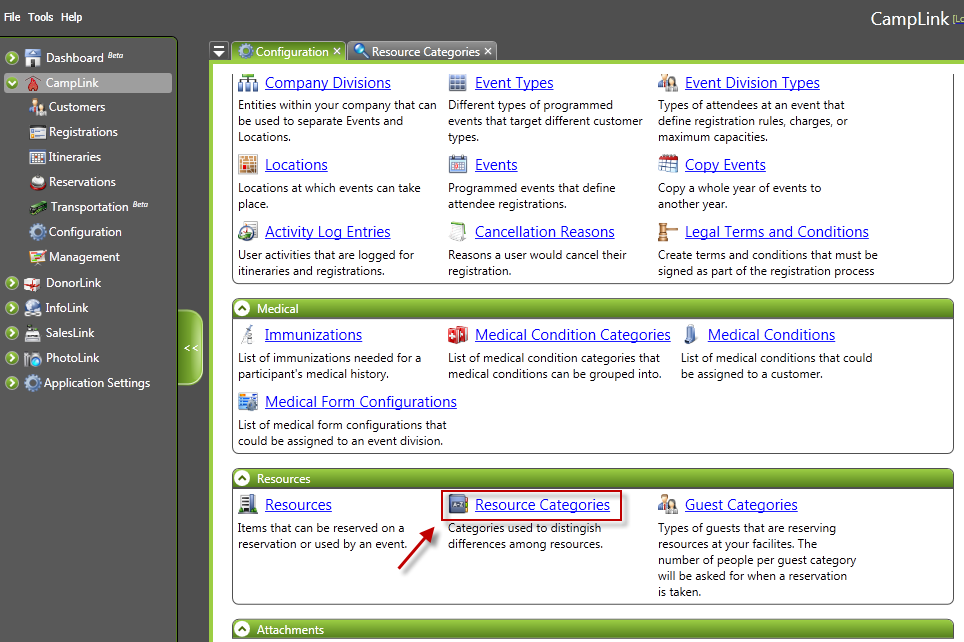
Begin by opening Resource Categories from the Configuration menu.
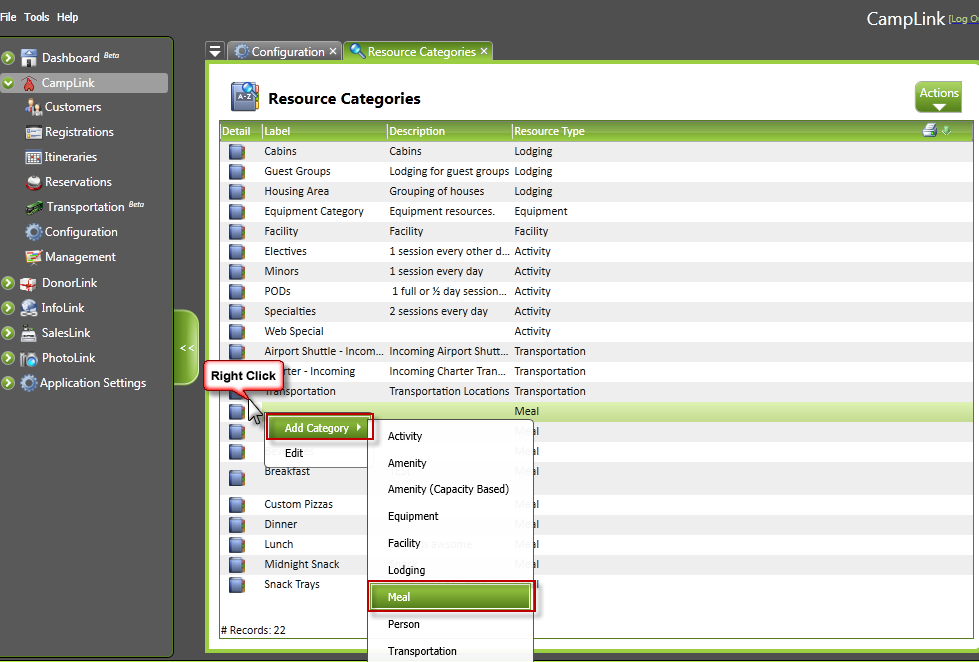
Navigation: Camplink > Configuration > Resources > Resource CategoriesRight-click on the grid or select the Actions Menu > Add > Meal to add a new Resource Category. Some examples might include: Breakfast, Lunch, and Dinner. This is also where you add À la carte categories (which is explained below) such as Snack Trays or Midnight Snacks.
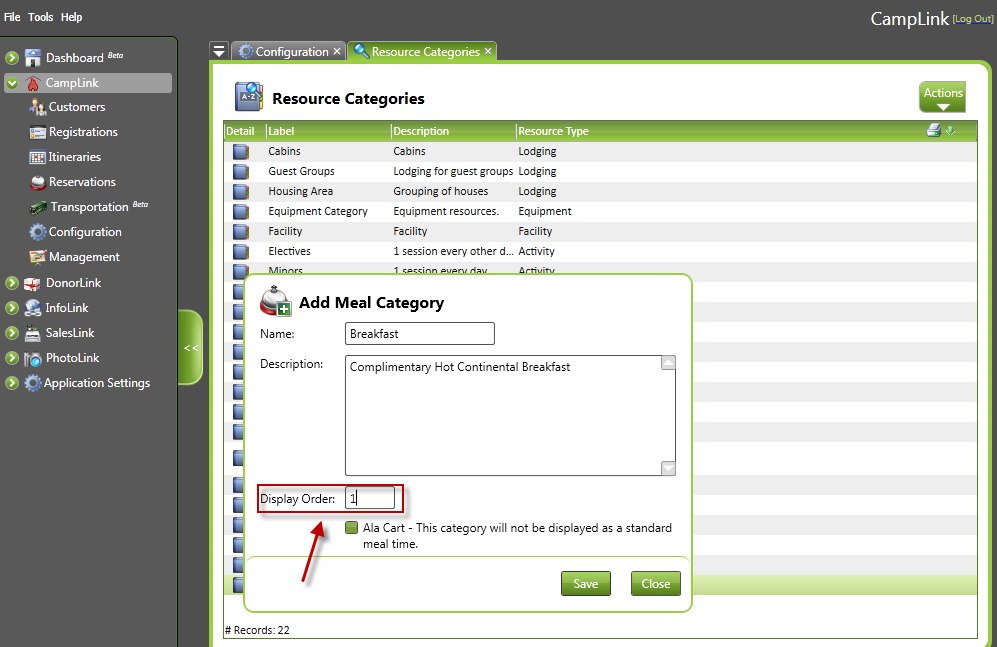
Fill in the appropriate information. The display order determines what order the categories will be displayed. For example Breakfast would be first, Lunch would be second, and Dinner would be third. Check the Ala Cart box if the meal option will not be offered at a standard meal time but rather on an as-desired basis.
CampLink –> Configuration –> Resource Category –> Add Meal Category
Step 2: Configure Meals
Navigation: Camplink > Configuration > Resources
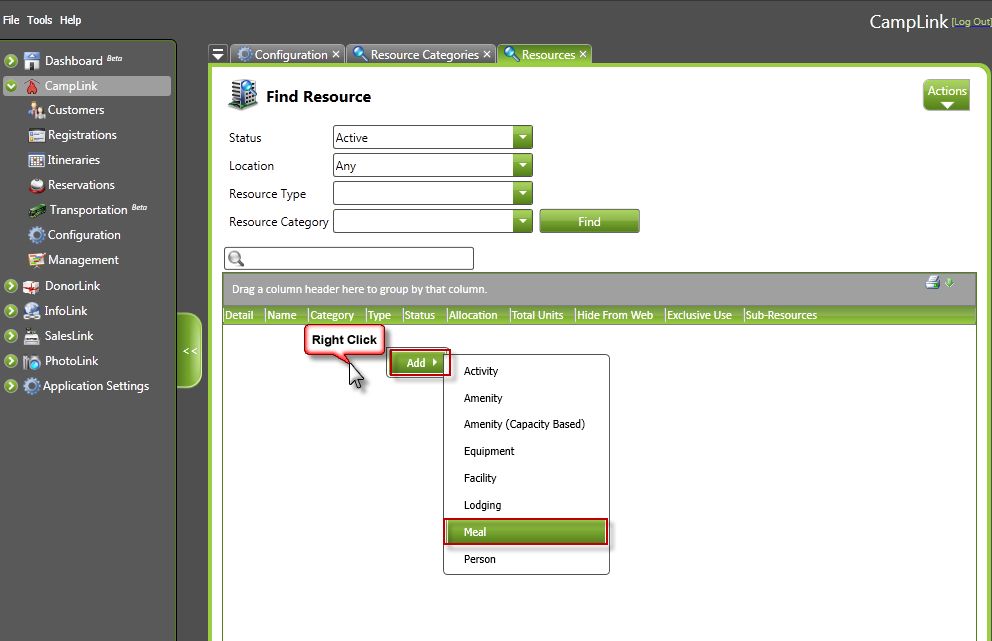
After setting up the appropriate resource categories, next is to set up the meals themselves. To add a meal, select the Resources link on the configuration screen.
On the Resources Menu, Right click and select Add > Meal.
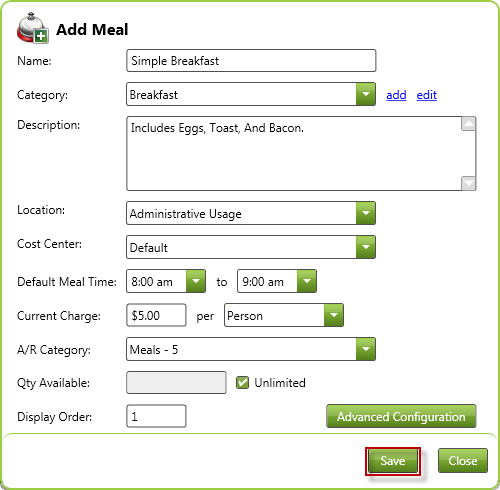
This will allow you to add basic information about a meal:
CampLink –> Configuration –> Resource –> Add Meal
- Name. Text that will display when you’re choosing this meal from a list.
- Category. The appropriate resource category that you set up in the prior step.
- Description. Basic description of what the meal includes, including any special notes.
- Location. The location of the meal. Typically will be Administrative Usage, although you can switch that if appropriate for your reporting needs.
- Cost Center. The cost center associated with these meal purchases.
- Default Meal Time. The normal time this meal is offered. Time is divided in 15-minute increments, although you can type directly into the fields for a specific time like 9:55 am.
- Currrent Charge. The amount charged, expressed as an amount per person/unit/serving. This will depend on how your meal fees are structured. (Unit, for instance, might work for a la carte offerings, Serving for fancier dinner settings, Person for normal usage, etc.)
- AR Category. The accounts receivable category that will collect this information.
- Qty Available. Use this to limit quantities, if appropriate. You can also specify “Unlimited” if there is no real restriction on what’s available for a particular meal.
- Display Order. Determines where this meal will show up in a list of options.
- Advanced Configuration. Clicking this button will open up the resource in the standard Resources tab with full information (settings, sub-resources, charges, etc.)
Show Me How
0:00 – 1:20: Create the resource category for your meals
1:20 – 3:50: Create a particular meal from the resource screen
3:50 – 4:41: Review the created resource

