This article will walk through how to reserve a meal using the Resource Calendar. Please note that you need to have set up your meals before you can complete this step.
Step 1: Open Calendar
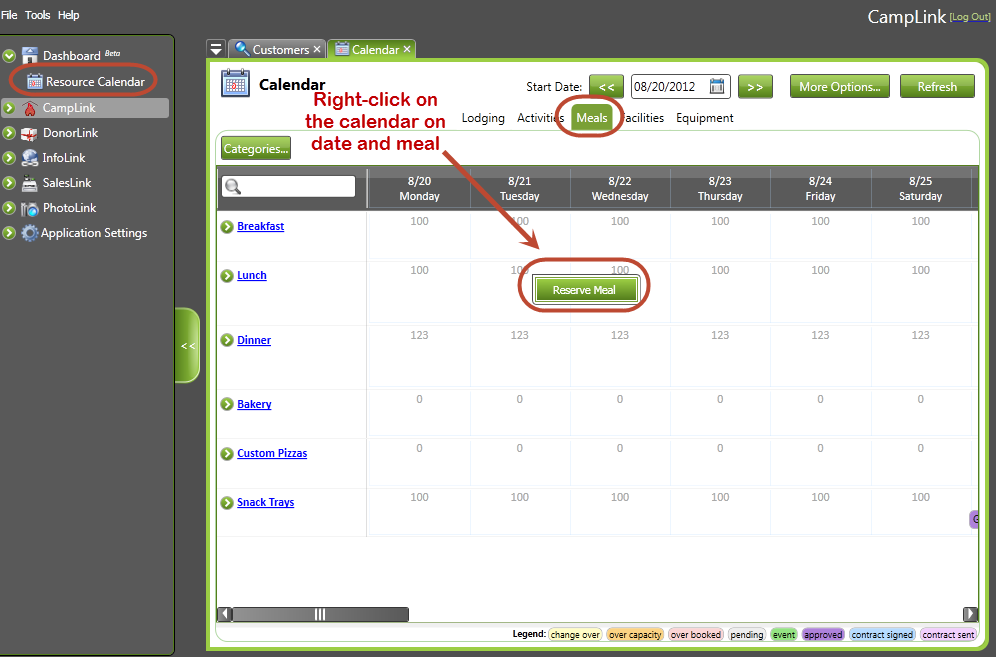
Navigation: Dashboard > CalendarTo reserve a meal, choose the Dashboard and select Resource Calendar. Select the Meals tab to view upcoming meals.
Right-click on the calendar (in the approximate time and date you’d like to work with) and select Reserve Meal.
Step 2: Select Meals Using Reservation Wizard
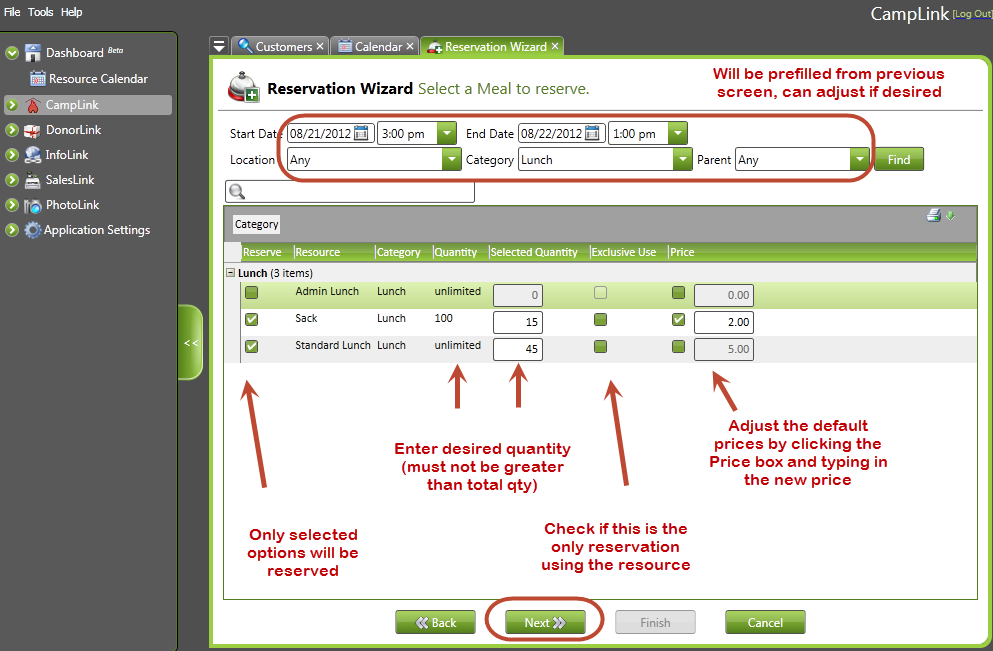
Navigation: Dashboard > Calendar > Reservation Wizard > Select MealThe Reservation Wizard will open with the general parameters you selected in the top. For instance, if you were hovering over Lunch on the previous screen, it will pre-fill Lunch in the Category box and restrict your options to only the meals listed in the Lunch category. You can adjust dates, times, locations, categories, and parents to change the options available to you in the center of the screen.
Click the box at the left to select an option (whether one or many.) Enter the quantity you want in the Selected Quantity box, noting that it should not be greater than the available quantity. You can also choose to reserve this meal entirely in this reservation so that no one else can use it by checking the Exclusive Use box. Finally, while each option will have a default price listed, you can check the Price box and enter a new price for this particular reservation if appropriate. Click Next once you have selected your main meal options.
 Dashboard –> Calendar –> Reservation Wizard –> Select Meal
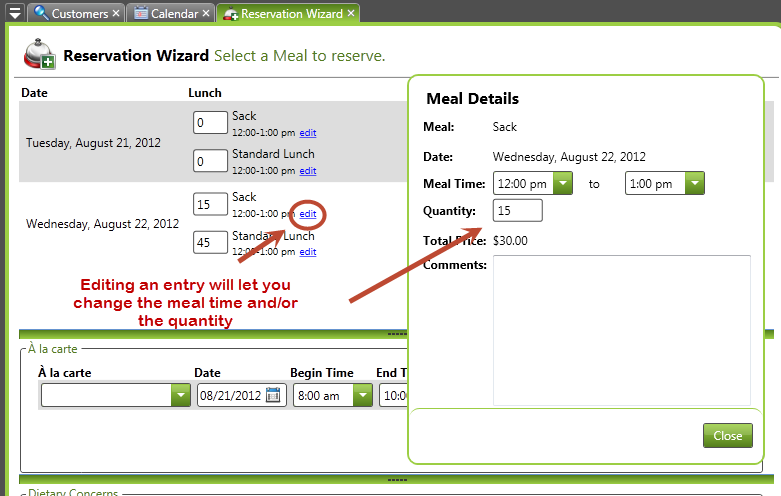
On this step, the quantities and information can be changed about any one meal by clicking edit link beside the meal. Please note that at this step, you can only edit meal times and quantity (plus add any notes/comments); you cannot edit prices or set exclusive use.
Dashboard –> Calendar –> Reservation Wizard –> Select Meal Step –> Edit Meal
Step 3: Add À la Carte Options
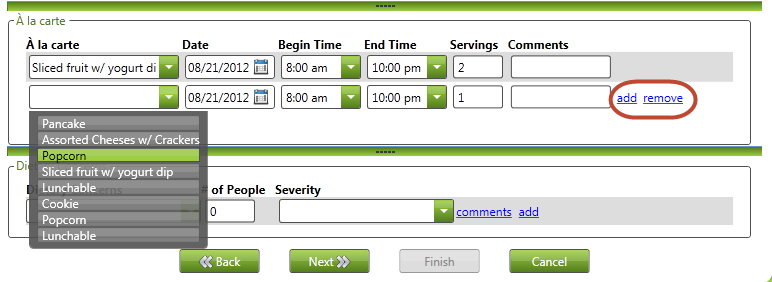
À la carte items can be selected and added per each day of the reservation. These items are typically available during a specified time frame and are not associated with a set meal time. You can also specify the number of servings and include comments if you wish. More À la carte items can be added by clicking the Add button at the end of the row.
Navigation: Dashboard > Calendar > Reservation Wizard > Select Meal Dashboard –> Calendar –> Reservation Wizard –> Select MealStep 4: Add Dietary Concerns
Dietary concerns can be added for this itinerary along with any additional comments that are needed. You can also set the severity and number of people affected by the issue. More concerns can be added by clicking the Add button at the end of the row. After you have added a Dietary Concern, it will be added to the dropdown list to allow you to select in the future.
Navigation: Dashboard > Calendar > Reservation Wizard > Select MealDashboard –> Calendar –> Reservation Wizard –> Select Meal
Step 5: Select A Customer
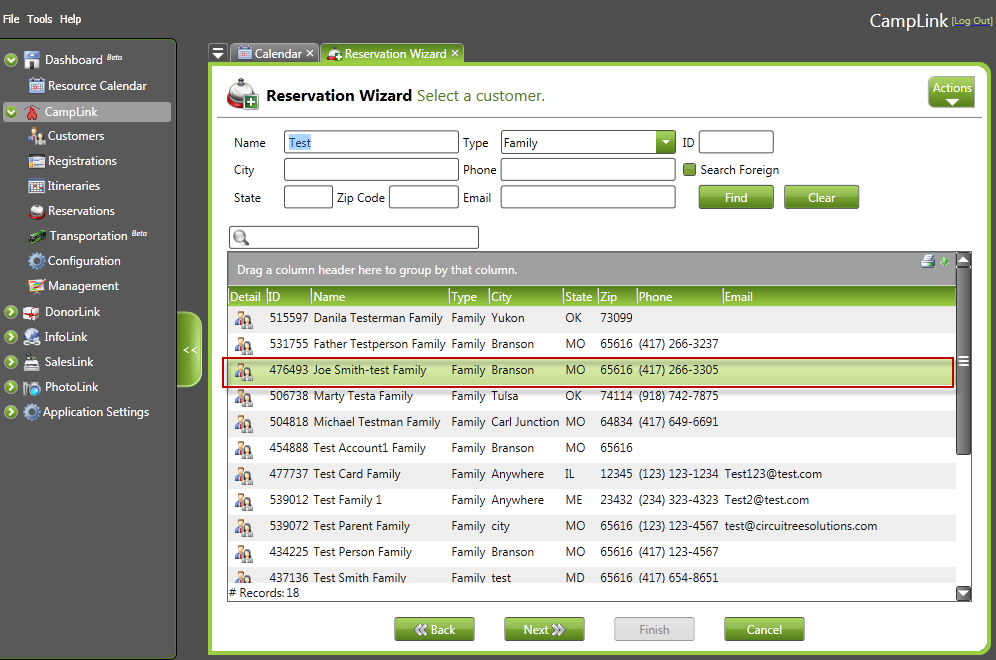
Navigation: Dashboard > Calendar > Reservation Wizard > Select CustomerOnce the main meal selections have been chosen and/or edited, the a la carte options chosen, and any dietary concerns addressed, click Next to proceed to the customer selection step. This step allows you to search for and select a customer as the paying entity of the itinerary. That will identify whom to associate with this meal reservation. Once you have made your selection, click Next to proceed to the review step.
Dashboard –> Calendar –> Select CustomerStep 6: Review and Activate Reservations
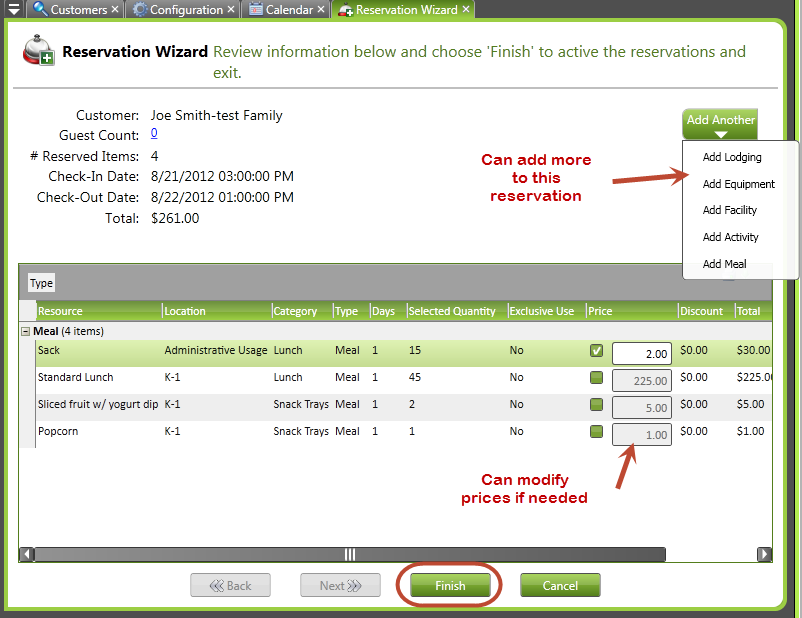
Navigation: Dashboard > Calendar > Reservation Wizard > Review InformationThe previous step added all reservation items into the system as pending. This final step allows you to confirm your choices, giving you one last chance to override any prices. You can also choose to add another item to this reservation with the Add Another button. Click Finish to confirm your reservation and complete the wizard.
Dashboard –> Calendar –> Reservation Wizard –> Review InformationShow Me How
Released in version 5.19

