The following instructions show you how to create a payment schedule for a registration.
Step 1: Open the Receivables tab of the registration
Navigation: CampLink > Registrations> [Specific Registration> Receivables tab > Payments/Charges subtab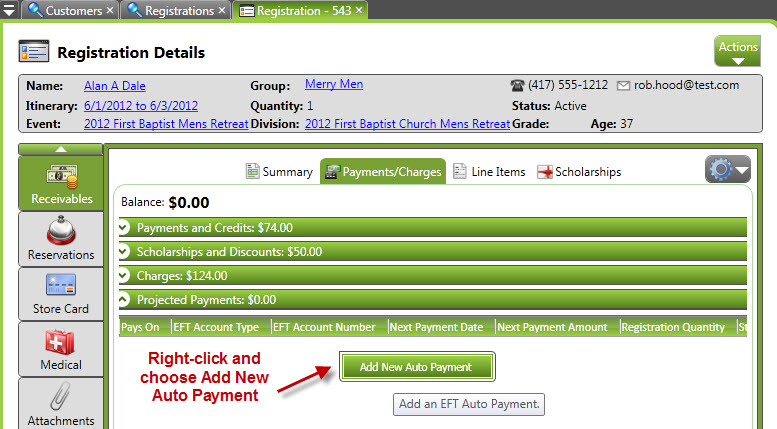
Step 2: Right-click, choose Add New Auto Payment, and choose Payment Method
Choose the Payments/Charges subtab of the Receivables screen. From there, open the Projected Payments tab and right-click in that area. From the menu, choose Add New Auto Payment. In the next screen, choose a payment method to proceed.
Navigation: [Specific Registration] > Auto Payment setup wizard step 1
Step 3: Set your Auto-Payment Options
The payment amount can be calculated or fixed. If it’s calculated, you specify the date range, and the system will calculate the amount of each monthly payment. If fixed, then you set the amount per payment. You can then specify the day of the month the payment will be made as well as the beginning and ending months. (Please note that you cannot make payments past the balance due date.) If you wish to make a final payment for the remainder on the balance due date, check the box at the bottom.
Navigation: [Specific Registration] > Auto Payment setup wizard step 2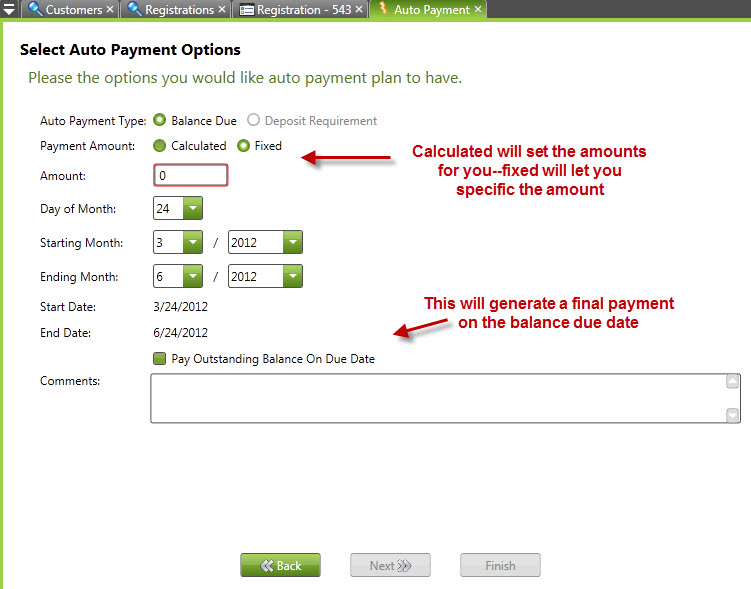
Review and Confirm the auto payment when done.