Medical Incident Details
Medical incidents are a way to keep track of medical incidents that occur for an individual, especially useful for incidents that trigger some kind of insurance claim.
To create an incident for an individual, navigate to:
CampLink > Customers > [Specific Individual] > Medical tab > Incident sub tab > Add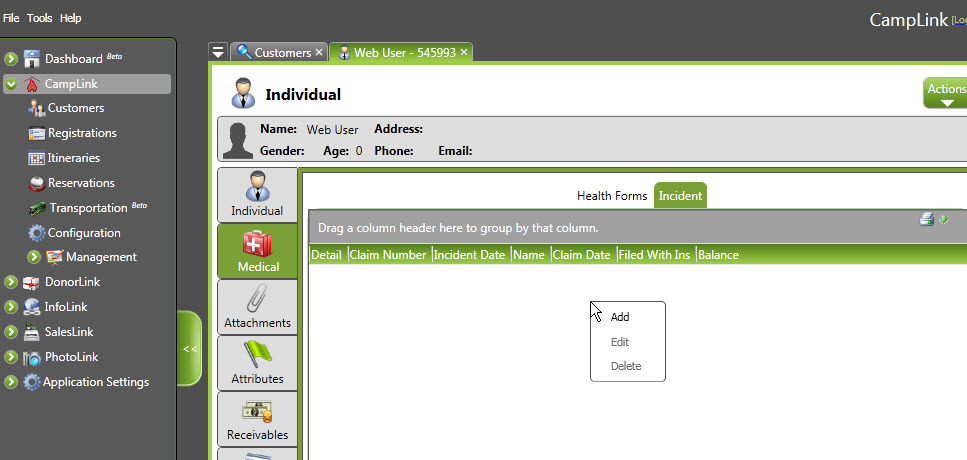
Step 1: Create Incident
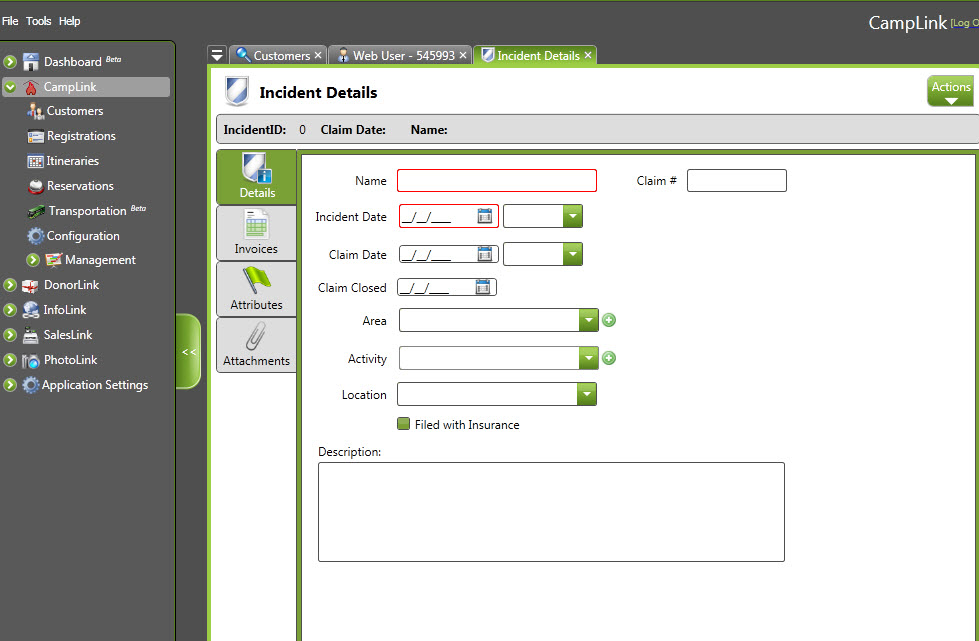
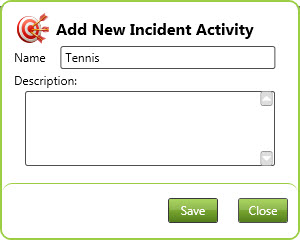
- Name: a brief name or description for the incident (like “Broken Arm”, “Twisted Ankle”, “Fall/Slip”, etc.)
-
Incident Date: The date the incident occurred.
-
Claim Number: This is number that is returned from the insurance company after the claim has been made.
-
Claim Date: The date filed with the insurance company.
-
Claim Closed: The date the insurance company closed the claim.
-
Area: This is the physical area that was injured (like “leg”, “calf”, “patella”, etc.)
-
Activity: What the individual was doing at the time of the incident (like “football”, “diving”, “water-ski”, etc.)
-
Location: the physical property on which the incident occurred
-
Description: a full description of the circumstances of the incident
Step 1a: Add/Edit Areas
If you don’t already have an area of the body listed that matches the current incident, you can add to the list by clicking the green arrow next to the Area dropdown box. (You can also access your list through the main Configuration screens. Both options are shown below.) Since you will be creating these names, you can be as general, specific, or technical as you like.
Camplink > Configuration > Incidents > Incident Areas

Camplink > Configuration > Incidents > Incident Areas > Add Area
or
[Specific Incident] > Details tab > Add button next to Area dropdown
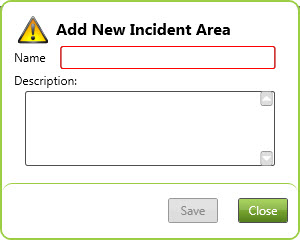
Fields:
- Name: The name of the area (i.e. Leg).
- Description: The description of the area.
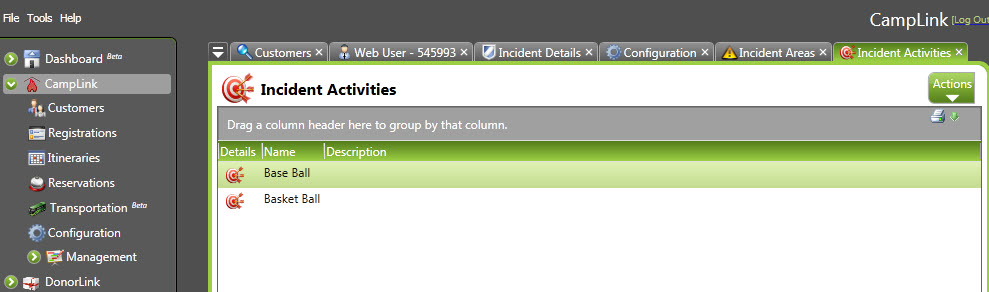
Step 1b: Add/Edit Activities
Likewise, you can add or edit activities in which the attendee was engaging either through the configuration or on a case-by-case basis using the medical incident screen. Both approaches are shown below. As with the area entries, you can be as general or specific as you like. Our recommendation is that you come up with a consistent scheme for these activities so that you can usefully group them to pinpoint possible intervention areas.
Camplink > Configuration > Incidents > Incident Activities
Camplink > Configuration > Incidents > Incident Activities > Add Activity
or
[Specific Incident] > Details tab > Add button next to Activity dropdown
Fields:
- Name: The name of the activity. (i.e. Basketball)
- Description: The description of the activity.
Step 2: Add Invoices
For incidents that require some sort of medical intervention that creates costs, you can create invoices showing the amounts and costs associated with the incident. Again, this is useful in dealing with insurance questions and documenting just what was done in response to an incident. It also helps you direct any payments that will be received in the future to recover these costs.
[Specific Incident] > Invoices tab > Add Invoice
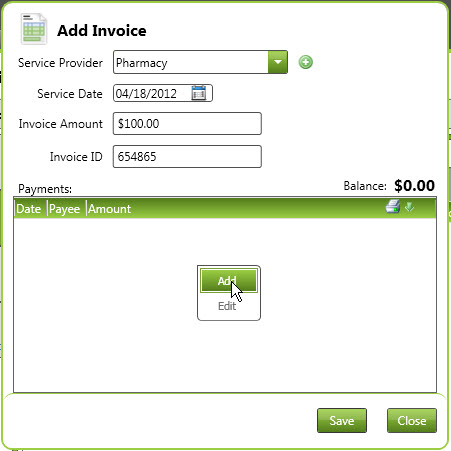
Fields:
- Service Provider: The name of a service provider for an incident.
- Service Date: The date the service was took place.
- Invoice Amount: The cost of the service.
- Invoice ID: The id on the invoice from the service provider.
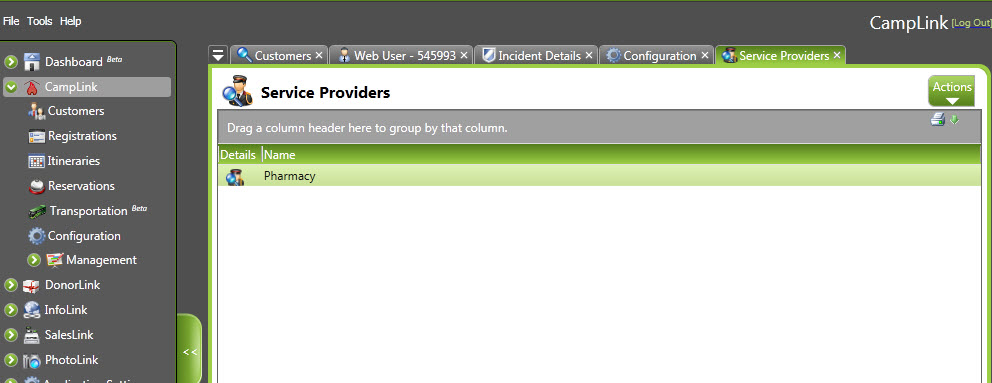
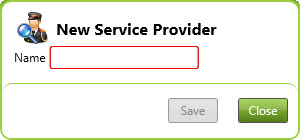
Step 2a: Add Service Providers
If you do not have any service providers listed (a pharmacy, for instance, or a hospital or urgent care center), you can either add them directly from the screen or from the main Configuration menus. Both options are shown below.
Camplink > Configuration > Incidents > Service Providers
Camplink > Configuration > Incidents > Incident Activity> Add Activity
or
[Specific Incident] > Details tab > Add button next to Activity drop down
Fields:
- Name: The name of the service provider (e.g., Pharmacy)
Step 3: Add Payments
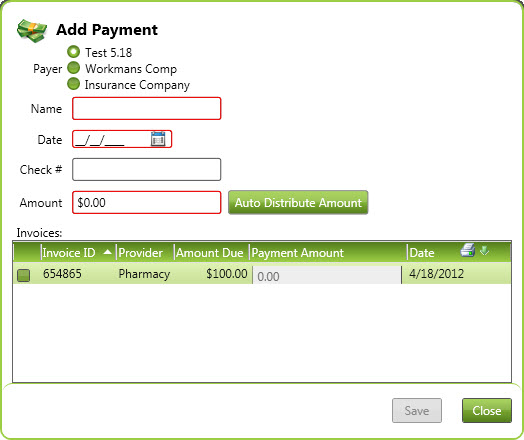
Fields:
- Invoice Payment: This is a payment an invoice whether payed by your organization, workmans’ compensation, or the insurance company.
- Amount: The total amount of the check.
- Auto Distribute Amount: This will distribute the total amount to the selected invoices in the grid. It will begin with the first selected invoice setting the payment amount up to the amount due and if the amount due is less then the total amount then it will move on to the next selected invoice.
- Invoices: These are the invoices that can be paid with this check. Entering a payment through the Invoice dialog will only allow you to enter a payment for the specific invoice. (See Adding a Payment for Multiple Invoices just below.)
1.) Select the invoices that are included on the check.
2.) Enter the Payment Amount that has been paid for each invoice.
Adding a Payment for Multiple Invoices.
[Specific Incident] > Invoice tab > Make Payment
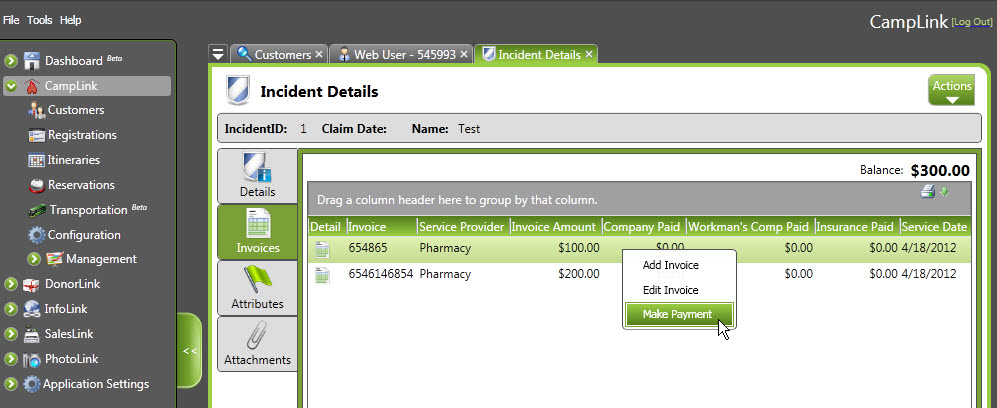
If a payment was made for multiple invoices for the same incident this will allow you to select those invoices by checking the appropriate boxes and allow you to distribute the payment.

Released in version 5.18