Single Sign-on (SSO), or OAuth, allows your customers to login using their Google or Facebook account instead of an email and password. The benefit to them is that instead of trying to remember another password, they can sign on with an account they already have.
There are two type of domains that can be used with CT6 Registration Site.
- CircuiTree Domain – events.circuitree.com/yourcompany
- SSO with Google and Facebook available by default.
- Configuration available to disable options.
- Custom Domain – register.yourcompany.com
- Configuration needed in order to use SSO.
Example
See how your customers can sign on to CT6 Registration Site using Google or Facebook.
CircuiTree Domain
When hosted using a CircuiTree domain, SSO is enabled by default for both Google and Facebook.
To configure these options, follow these steps:
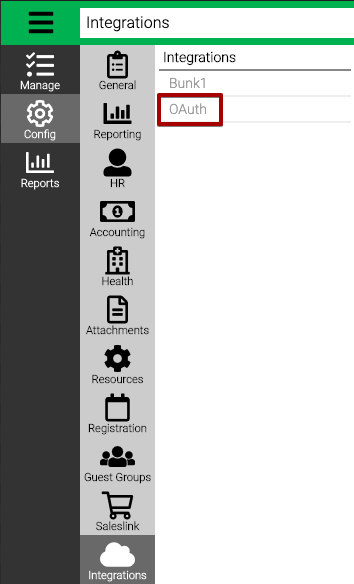
- In CT6, go to Configure > Integrations > OAuth.
- To disable, uncheck the box next to Enable Google OAuth or Enable Facebook OAuth.
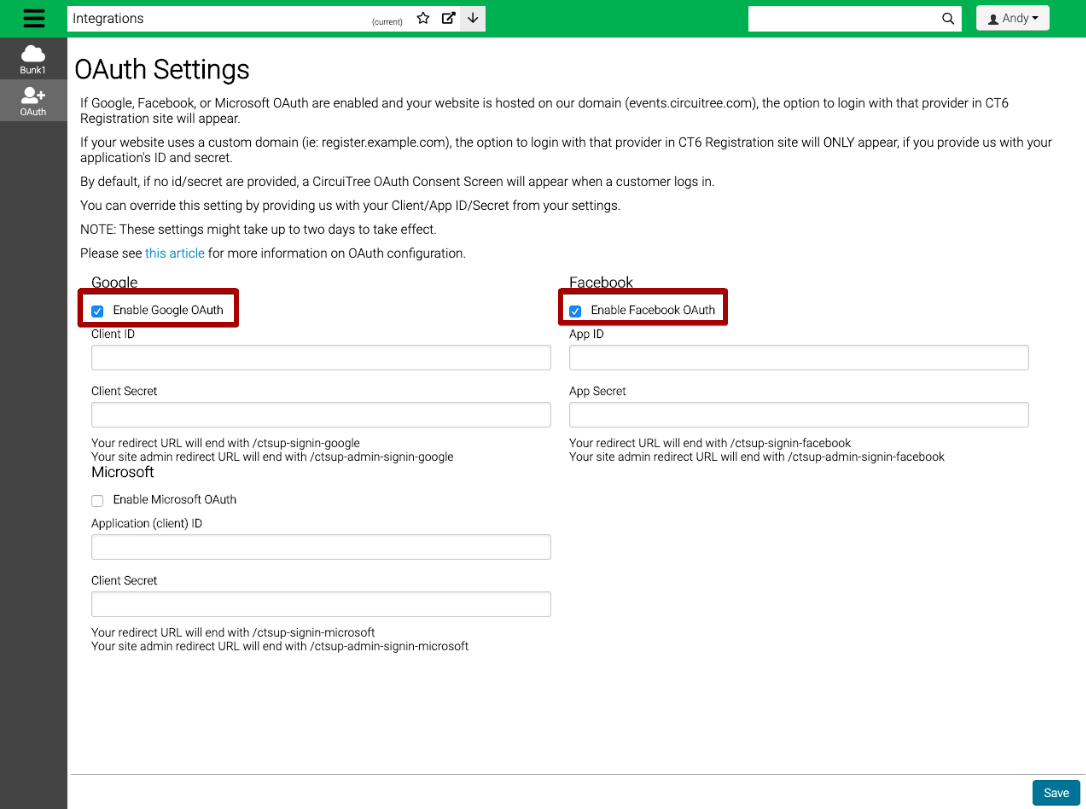
- Select Save and the option will be removed CT6 Registration Site.
Custom Domain
When hosted using a custom domain (register.yourcamp.com or register.example.com) due to domain ownership restrictions we cannot provide SSO automatically. You must create an OAuth application for Google/Facebook in order to enable this functionality. The “Enable Google OAuth” settings still hide and show the options you have configured, but they will not show an option automatically.
Create a Facebook Application
- Go to https://developers.facebook.com/apps/ and login
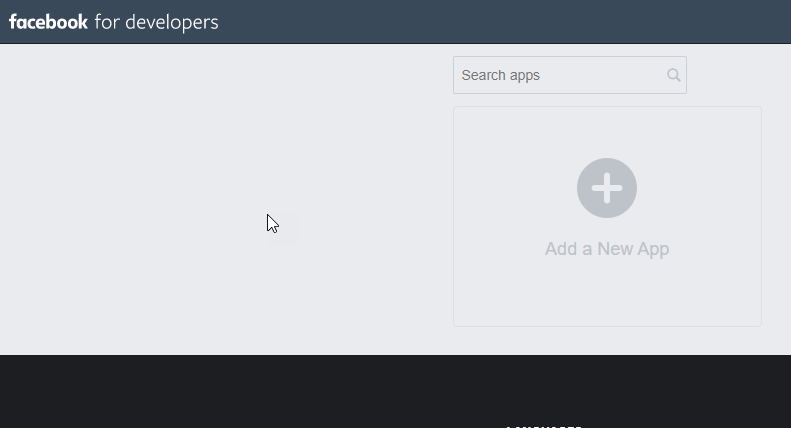
- Find a button to “Create App” or “Add a New App”
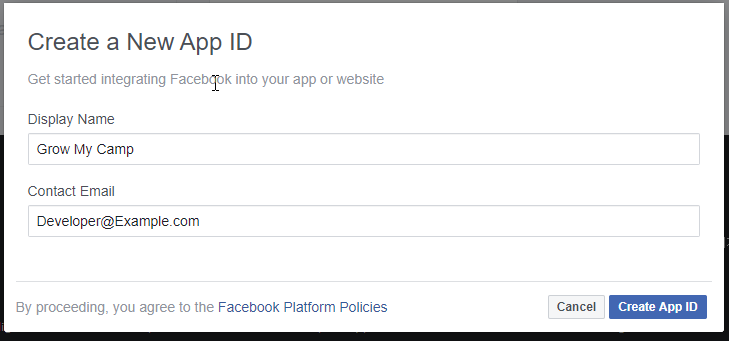
- Enter your App Name (shown to users during consent) and an email to contact you
- Find the option to setup a “Facebook Login”

- Select WWW (Web) Platform

- Enter your domain Name
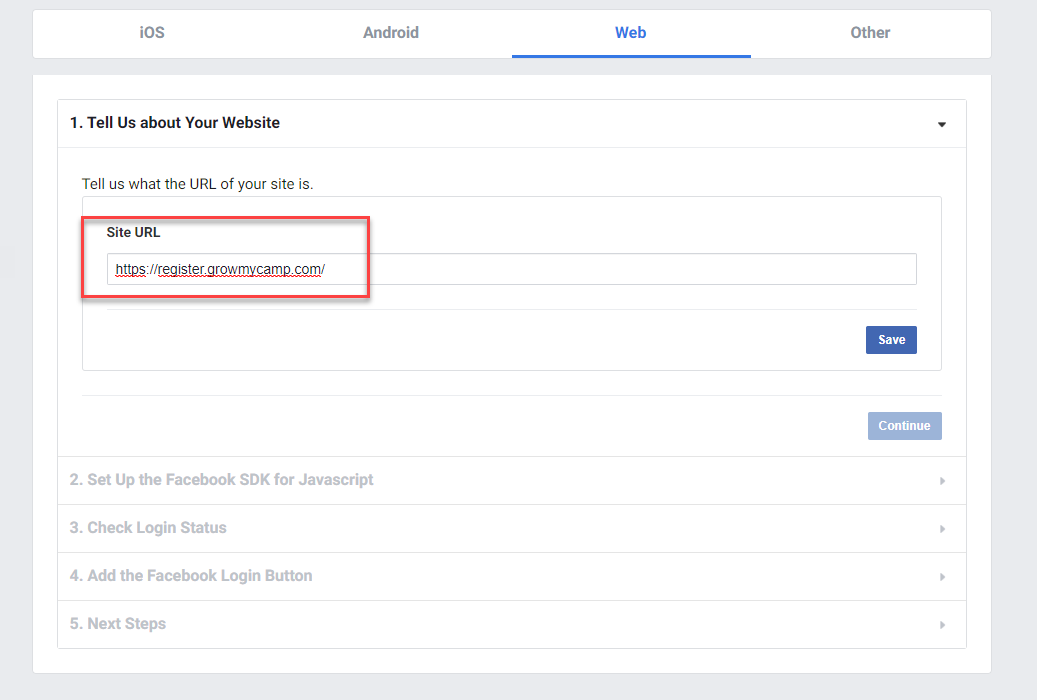
- Click next on steps 2 thru 5, they are not needed for the CircuiTree SSO implementation
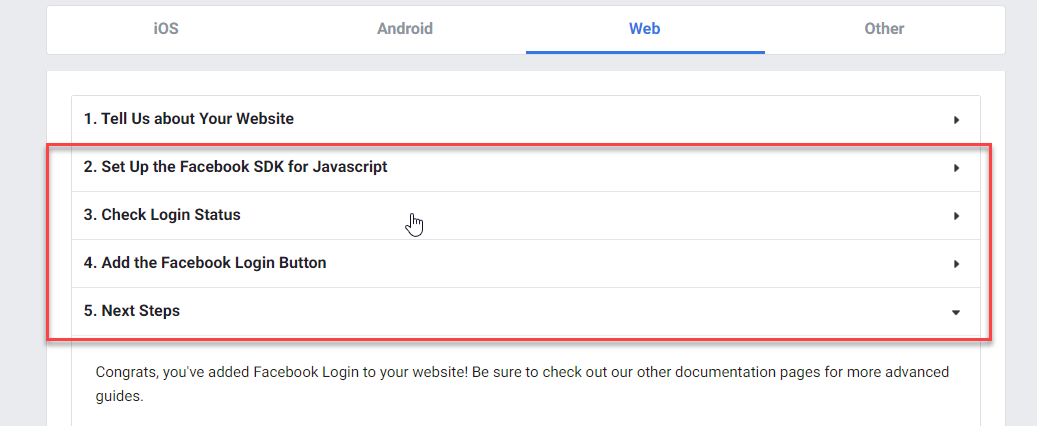
- Click the “Settings” under the “Facebook Login” then enter a valid OAuth Redirect URL for your domain
We entered: https://register.growmycamp.com/grow-signin-facebook
You will enter something like: https://register.example.com/grow-signin-facebook
Note: the /grow-signin-facebook at the end of your domain
If you use this for your test website too, you will need to enter those domains here too, such as: https://staging.growmycamp.com/grow-signin-facebook
If you wish to allow site admin login to also use SSO then you will need to repeat the steps above with the admin callback url: /grow-admin-signin-facebook
For CircuiTree Domains that wish to manage their own provider applications, There are 2 callback urls for each domain and 3 domains (6 urls total)Quick Tip – The entire callback url is lowercase. /GROW-signin-facebook will not work, whereas /grow-signin-facebook will work.
Domains:
events.circuitree.com
sb-events.circuitree.com
int-events.circuitree.comAnd two urls
/grow-signin-facebook
/grow-admin-signin-facebookComplete List:
https://events.circuitree.com/grow-signin-facebook
https://events.circuitree.com/grow-admin-signin-facebook
https://int-events.circuitree.com/grow-signin-facebook
https://int-events.circuitree.com/grow-admin-signin-facebook
https://sb-events.circuitree.com/grow-signin-facebook
https://sb-events.circuitree.com/grow-admin-signin-facebookThen Click Save
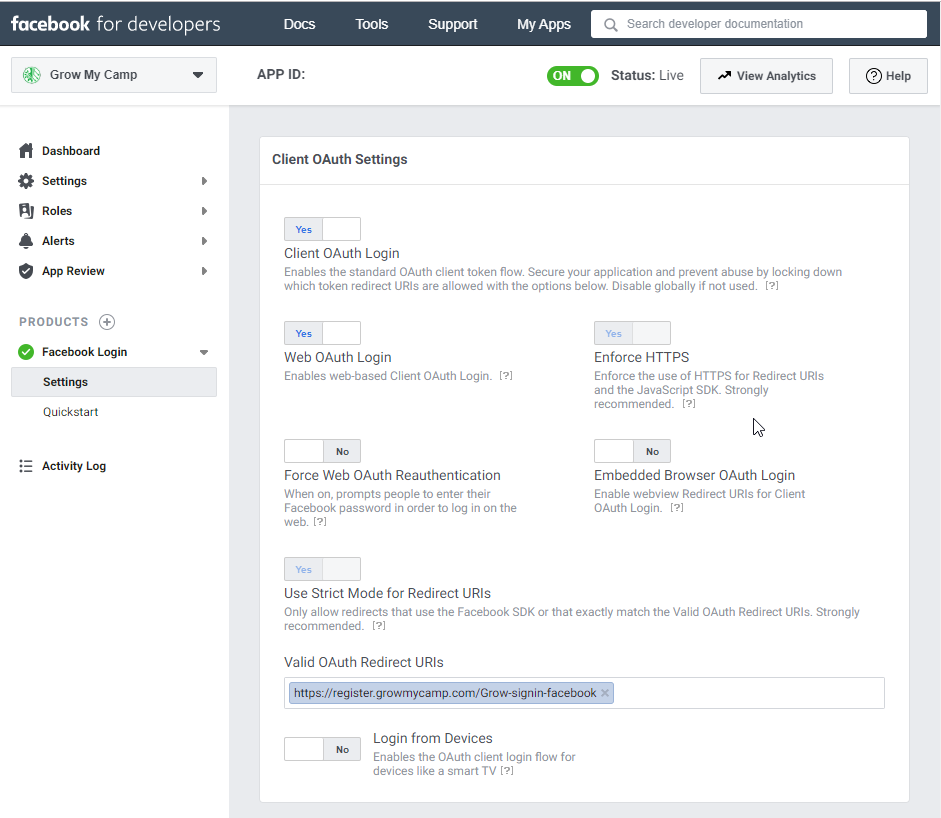
- Click the “Basic” under the “Settings” section to edit the information shown to the user during the consent process:
Privacy Policy is required before you are allowed to make the application “Live”
After finished editing information click “Save”
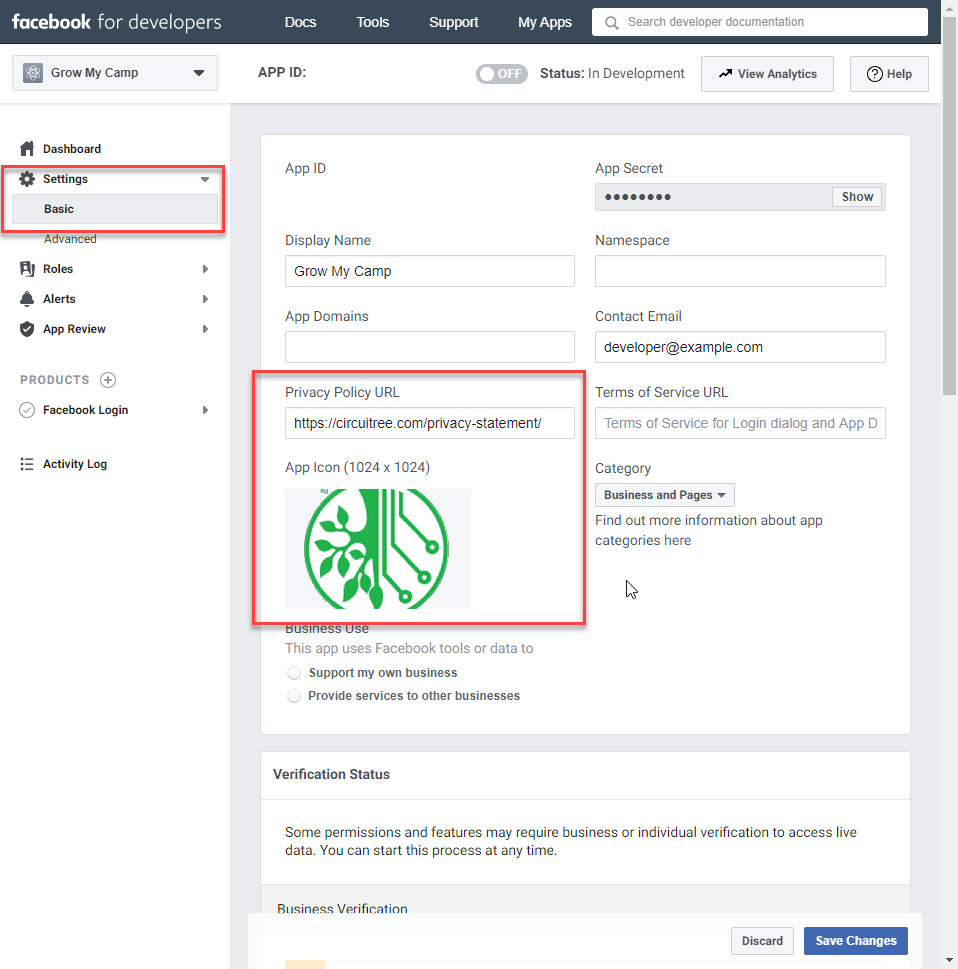
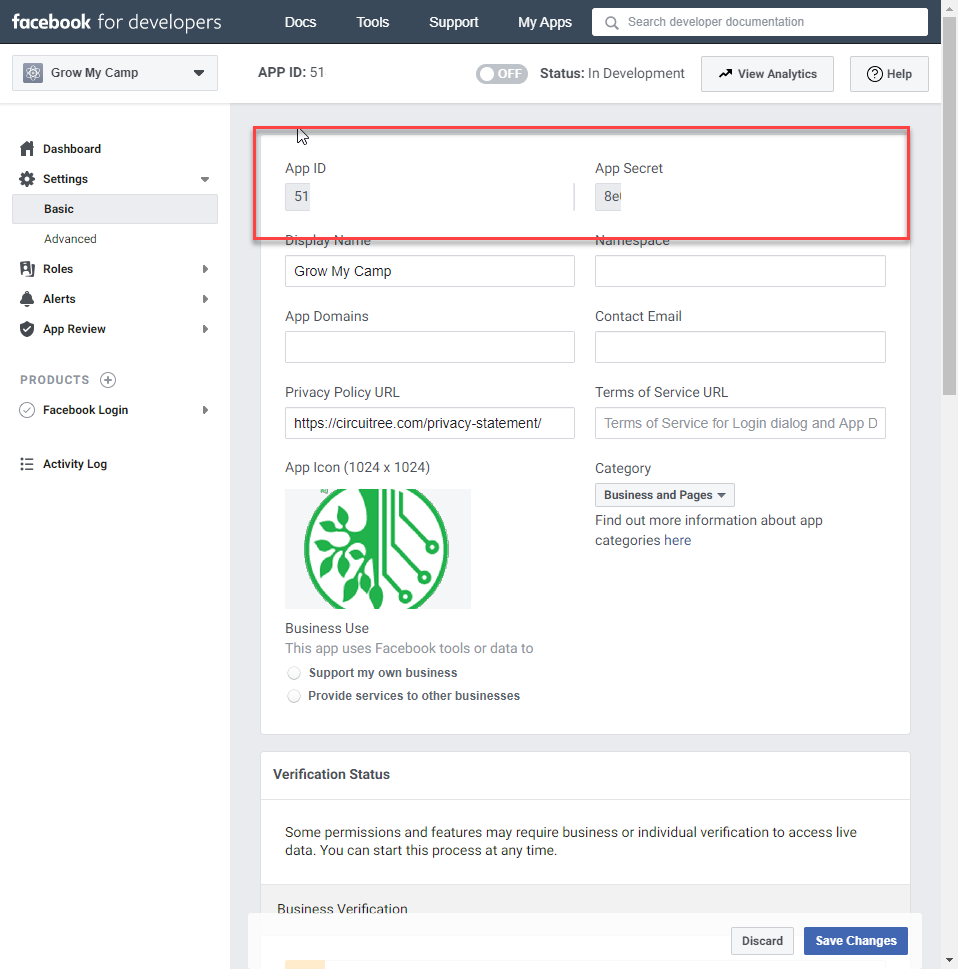
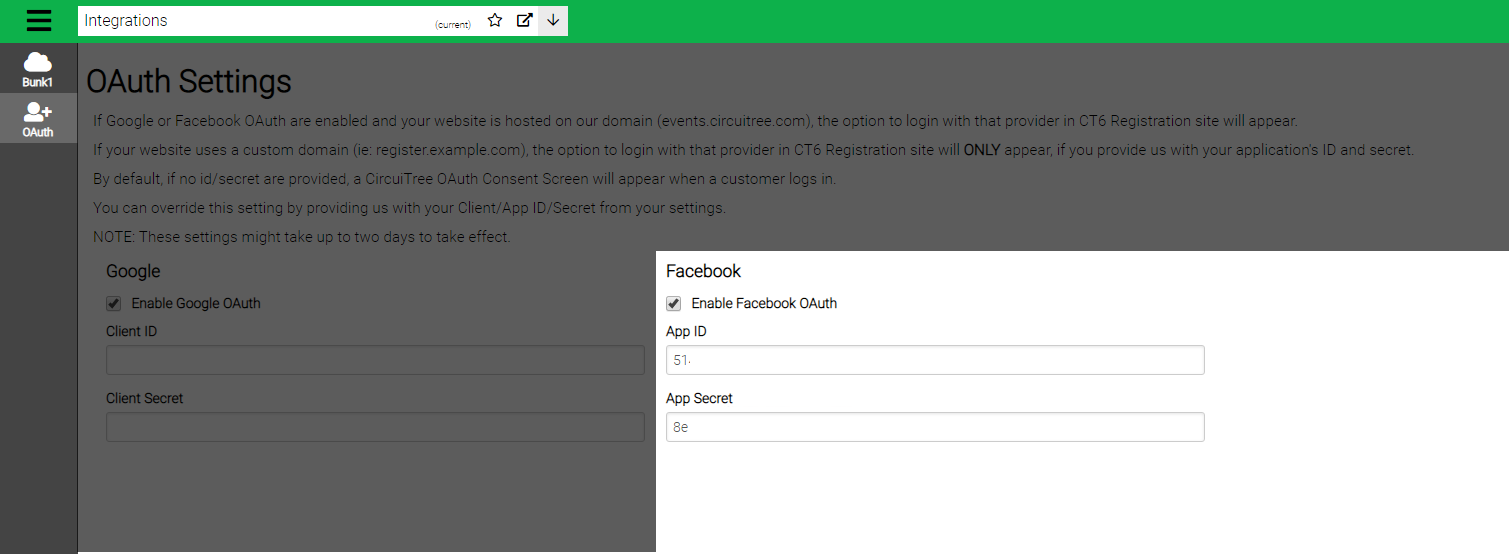
- Next Copy the AppID and AppSecret from Facebook and paste it into the CT6 App and click save:
- Testing
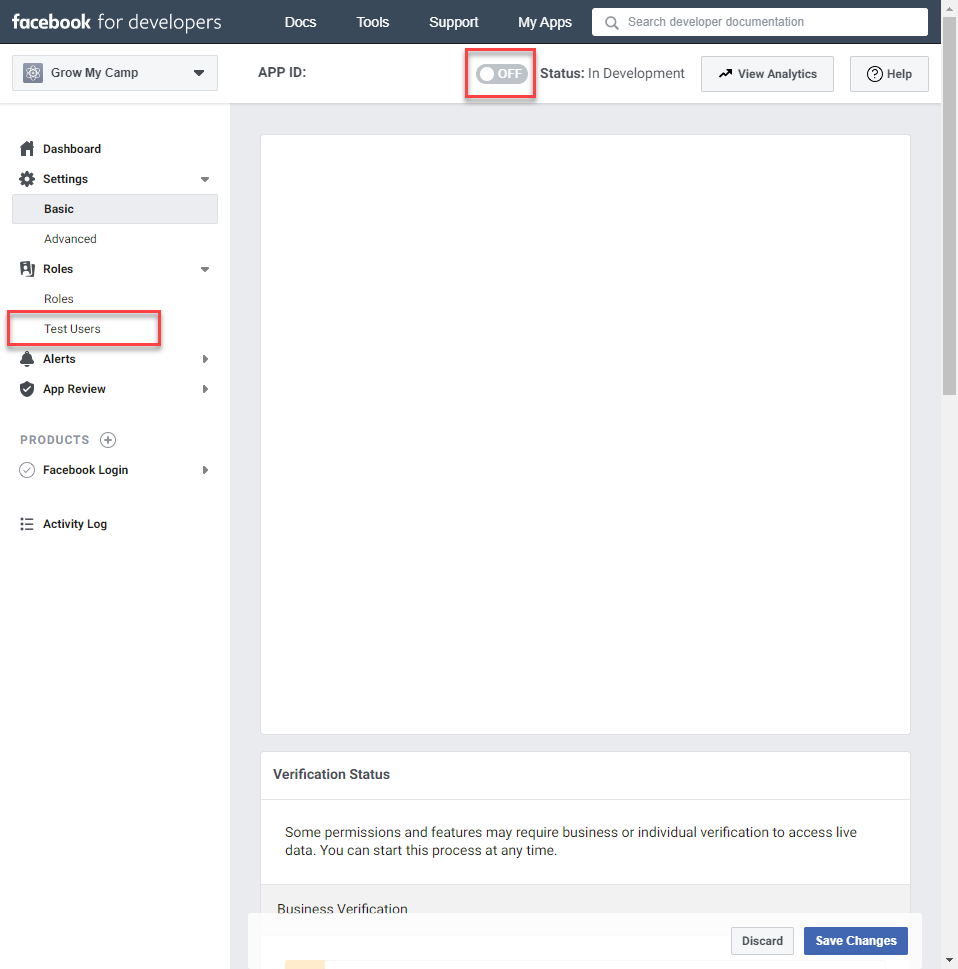
In order to test, you must either make the application “live” or use a test user.
In order for your customers to login via Facebook, the application must be live.
- Consent Screen
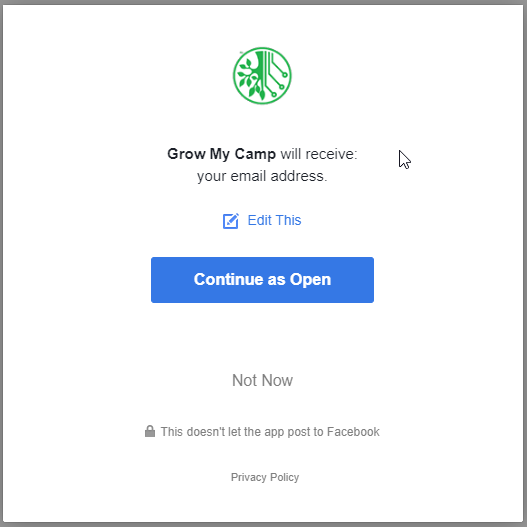
Note the name and upside down CircuiTree logo that was uploaded during the application configuration.
Create a Google Application
- Go to https://console.cloud.google.com/ and login
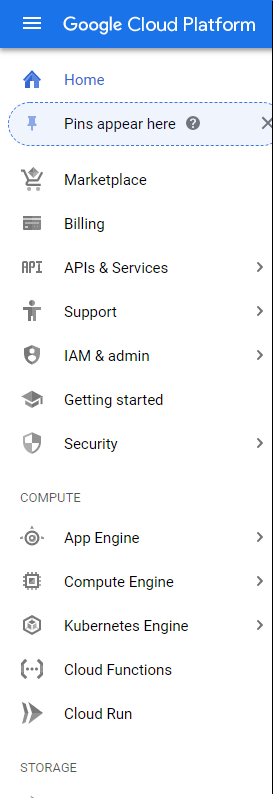
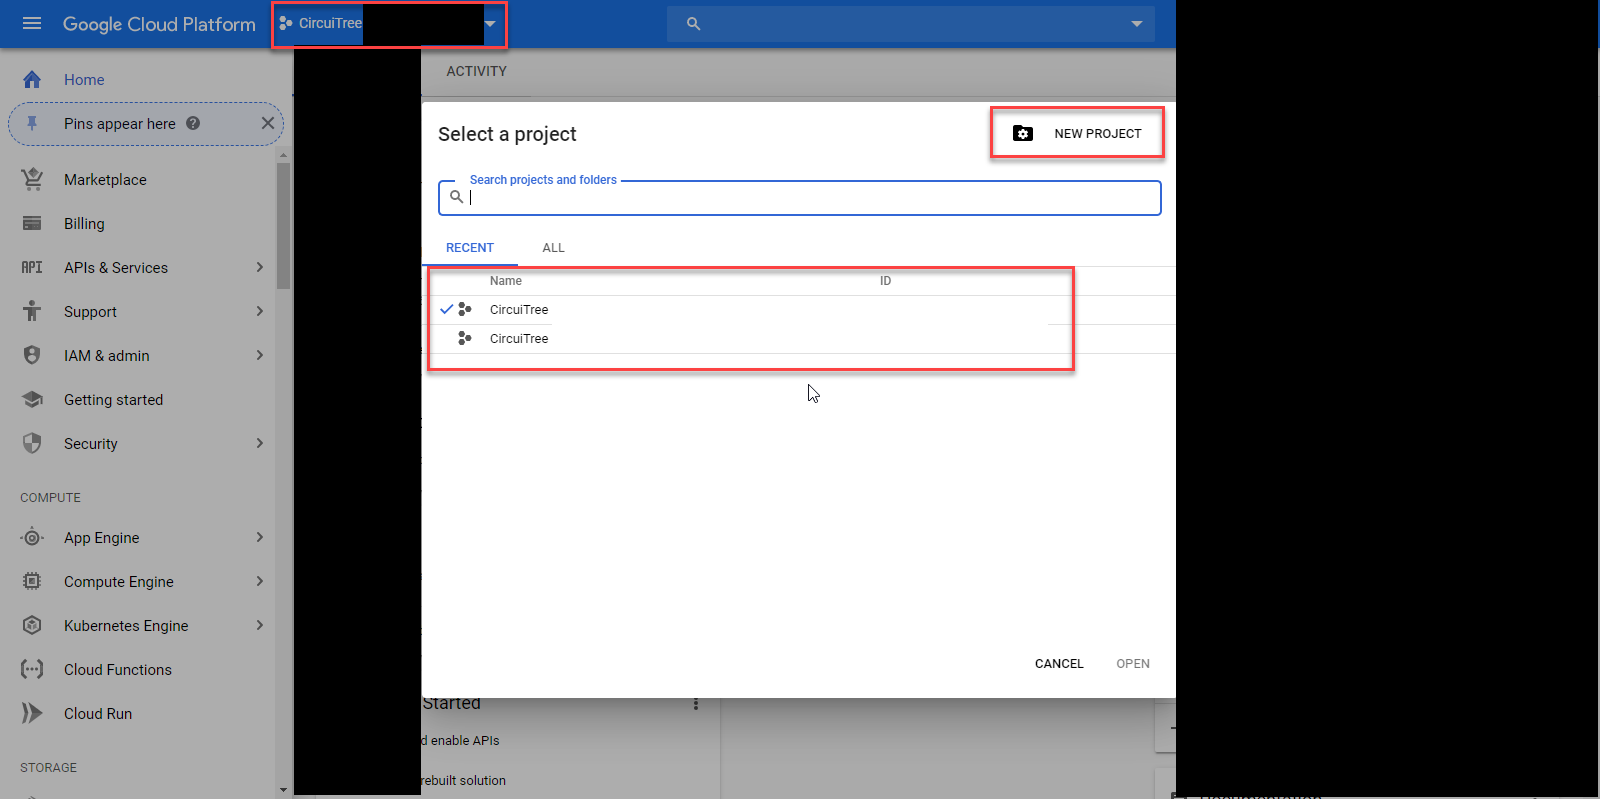
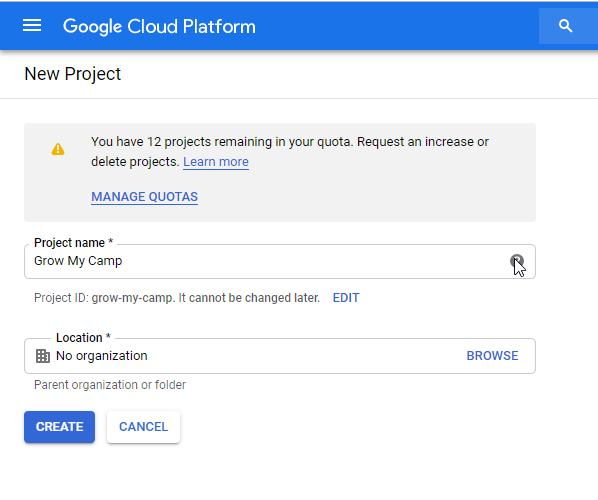
- Create or select a project:
- Use the Hamburger menu in the upper left hand corner to view the Menu and we will need to visit the OAuth and Credentials Sections
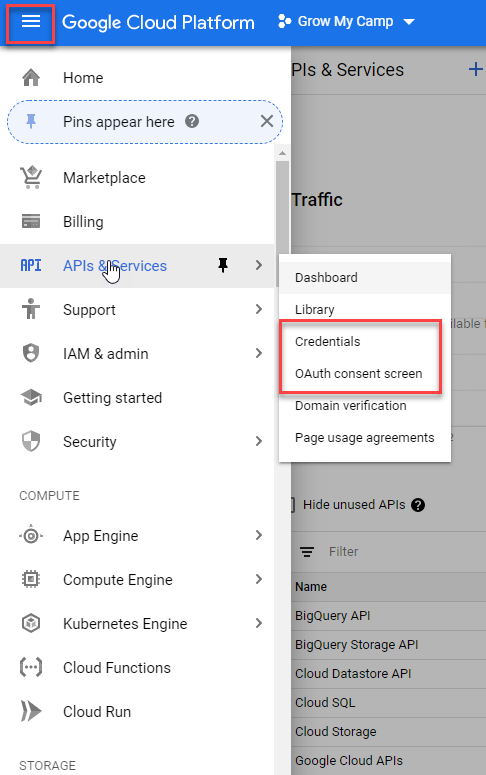
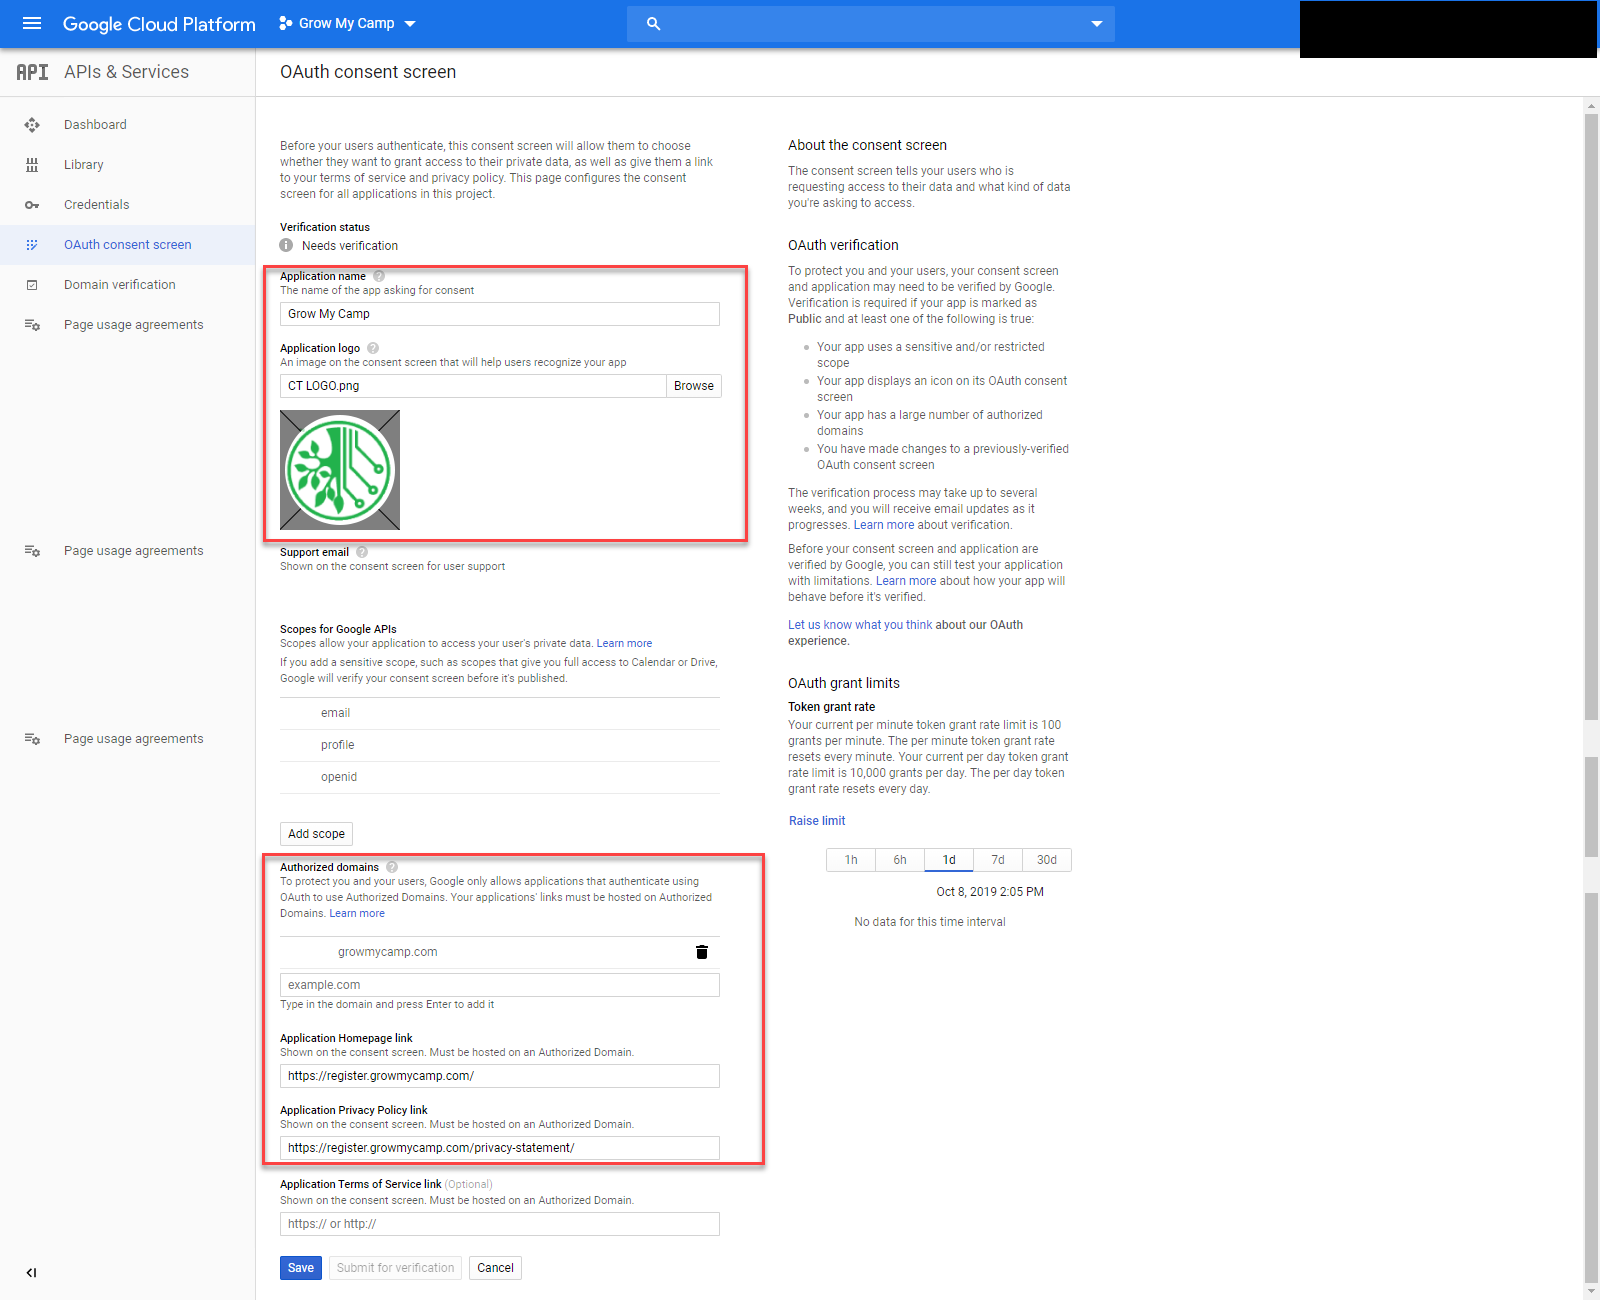
- Fill out the OAuth Section First:
- Name: You will set this to your camp name
- Logo: Your logo goes here
- Authorized Domain: You will need to put in the parent domain that CT6 Registration is hosted
- Our url is https://register.growmycamp.com so you we will put growmycamp.com
- Homepage: Valid Authorized Domain to your homepage
- Privacy Policy: Privacy policy (on your authorized domain
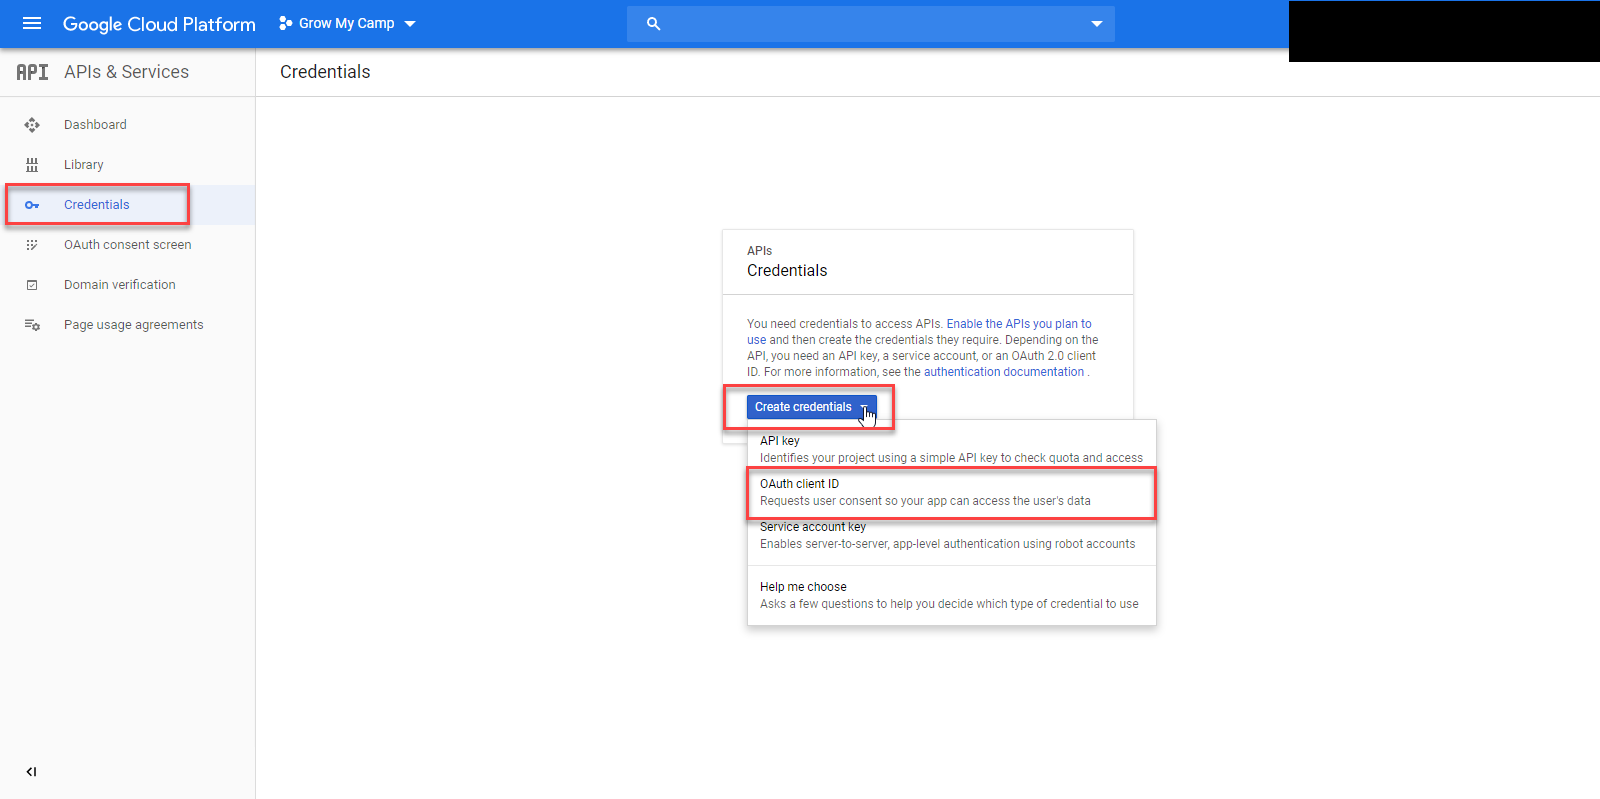
- Next, create credentials:
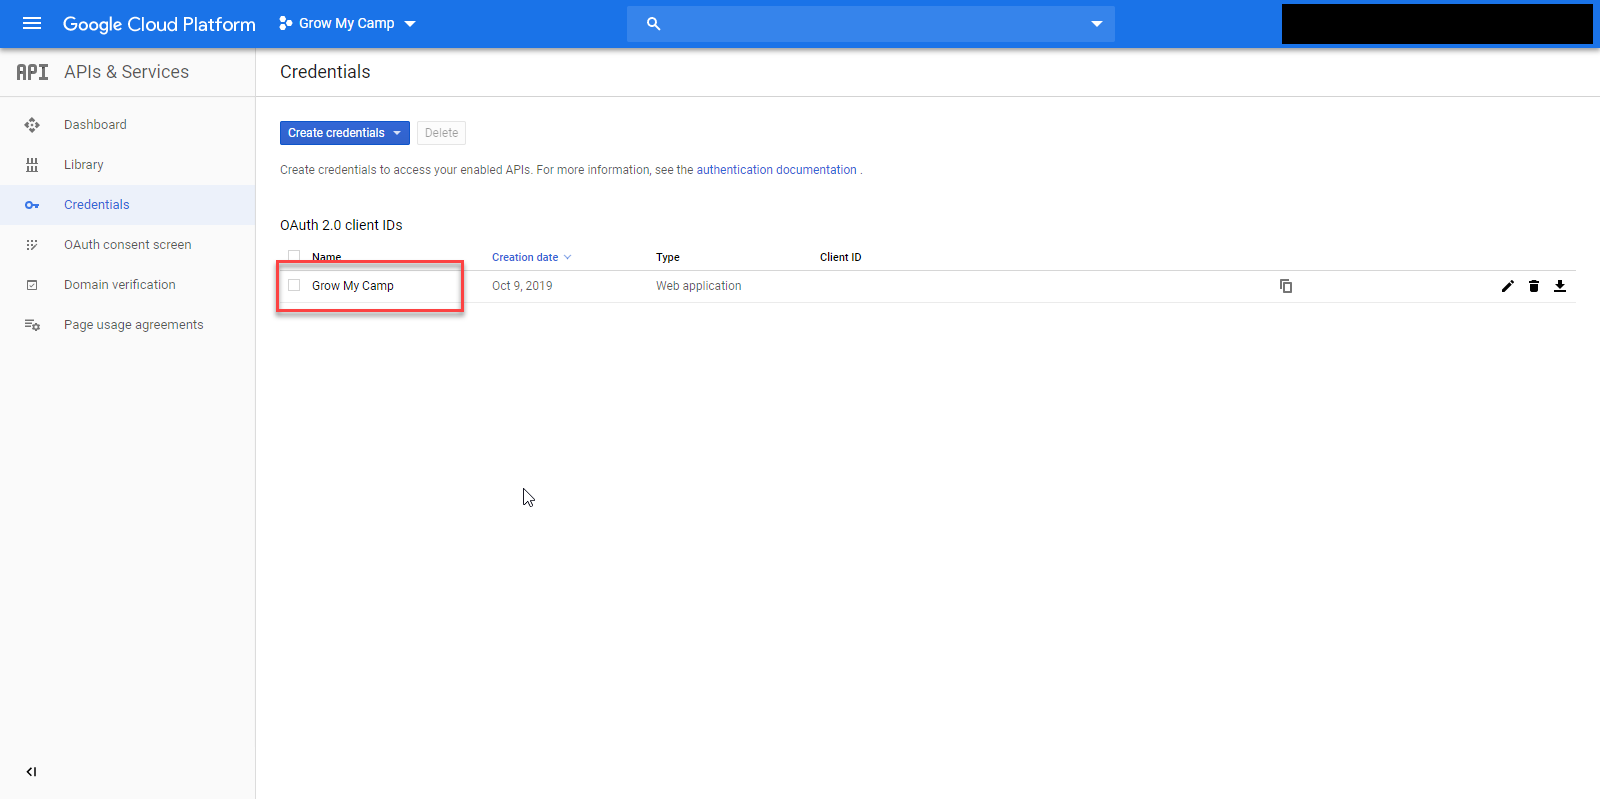
Click Credentials, then Create Credentials, then OAuth Client ID
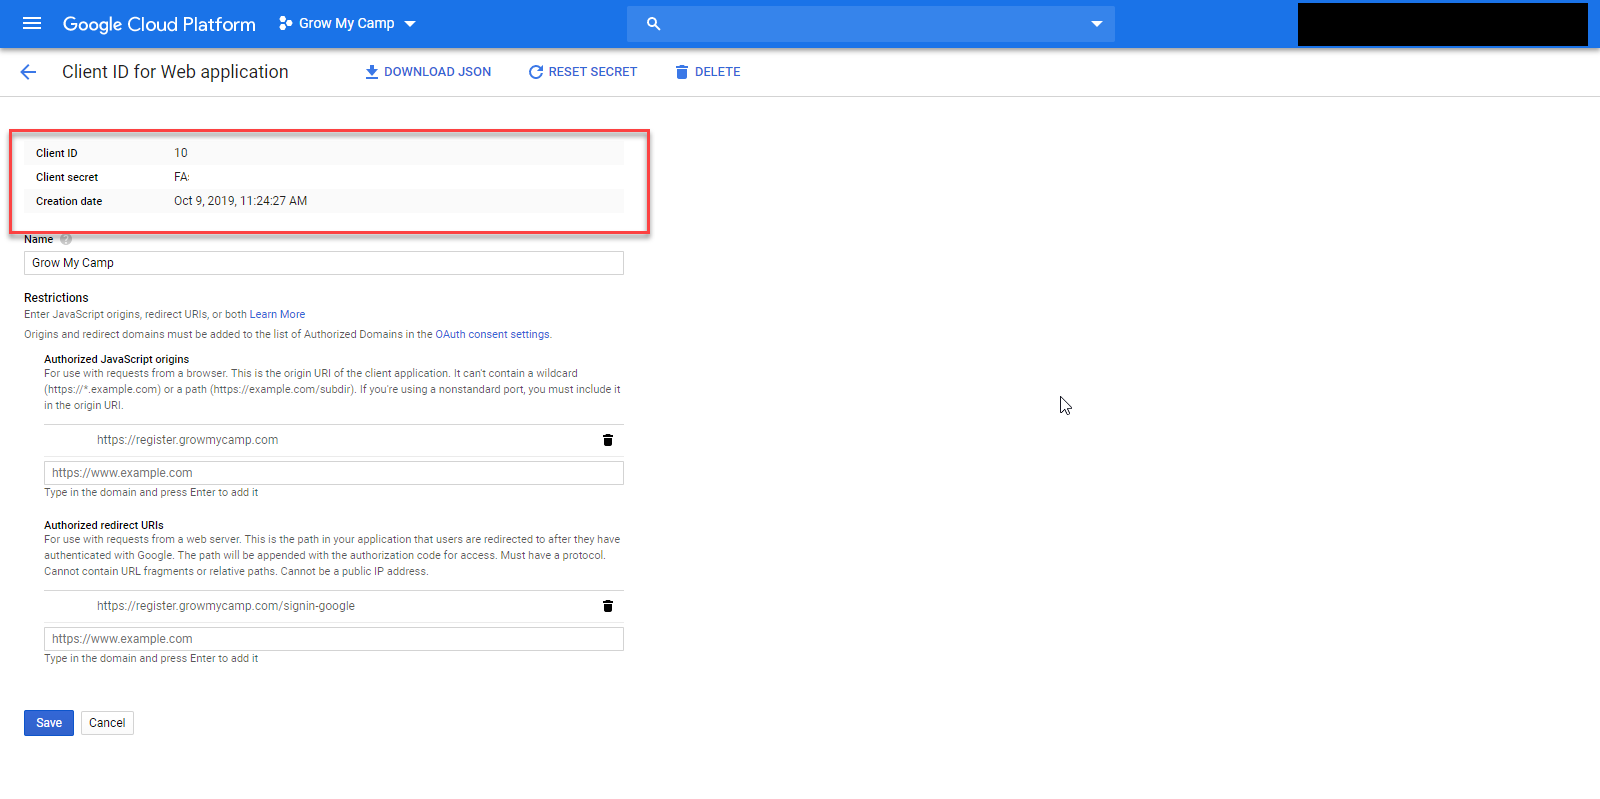
- Enter Credential Details:
Web Application
Enter a meaningful name
The Authorized Javascript Orgins must match the Authorized Domains on the last screen (we used https://register.growmycamp.com/)
For Authorized redirect URIs enter your domain with /grow-signin-google at the end (we used https://register.growmycamp.com/grow-signin-google)
If you have test/staging companies you will need to enter those urls in the Authorized Redirect URIs section here (for example: https://staging.growmycamp.com/grow-signin-google
If you wish to allow site admin login to also use SSO then you will need to repeat the steps above with the admin callback url: /grow-admin-signin-google
For CircuiTree Domains that wish to manage their own provider applications, There are 2 callback urls for each domain and 3 domains (6 urls total)Quick Tip – The entire callback url is lowercase. /GROW-signin-google will not work, whereas /grow-signin-google will work.
Domains:
events.circuitree.com
sb-events.circuitree.com
int-events.circuitree.comAnd two urls
/grow-signin-google
/grow-admin-signin-google
Complete List:
https://events.circuitree.com/grow-signin-google
https://events.circuitree.com/grow-admin-signin-google
https://int-events.circuitree.com/grow-signin-google
https://int-events.circuitree.com/grow-admin-signin-google
https://sb-events.circuitree.com/grow-signin-google
https://sb-events.circuitree.com/grow-admin-signin-google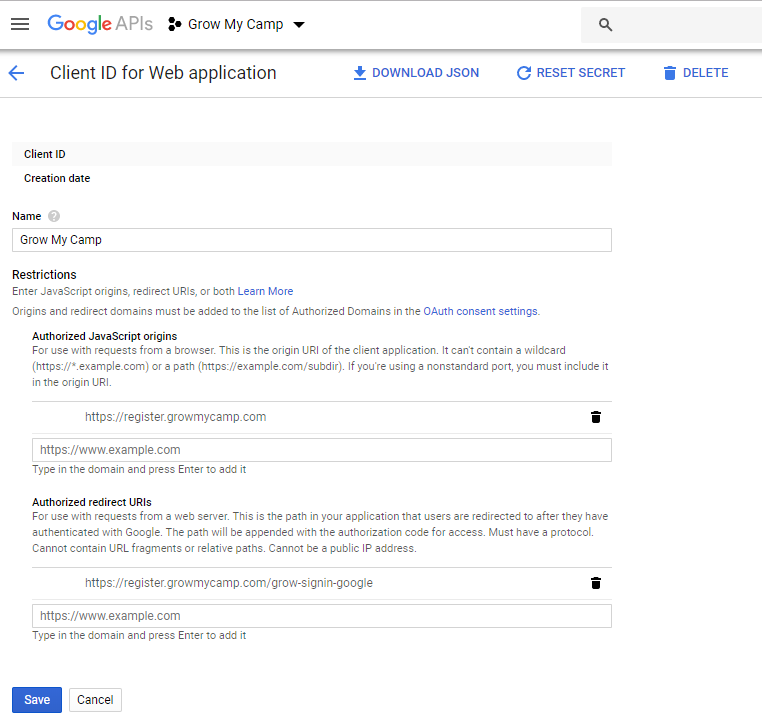
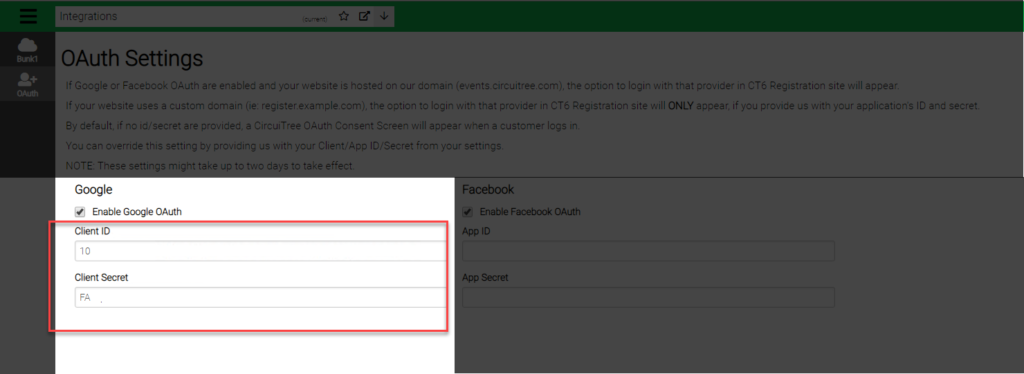
- You will take the Client ID and Secret and paste it into the CT6 App
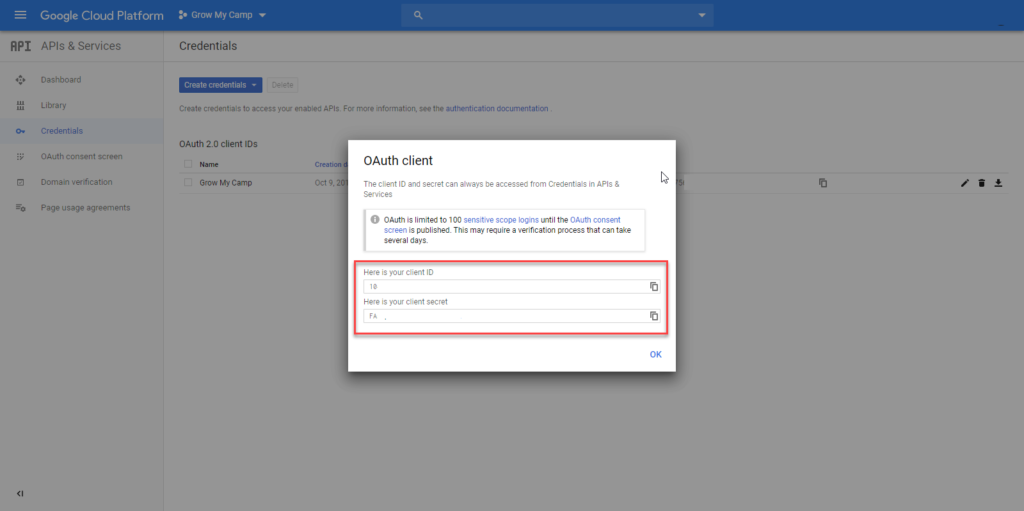
- You can also see these details from the Credential Detail Screen
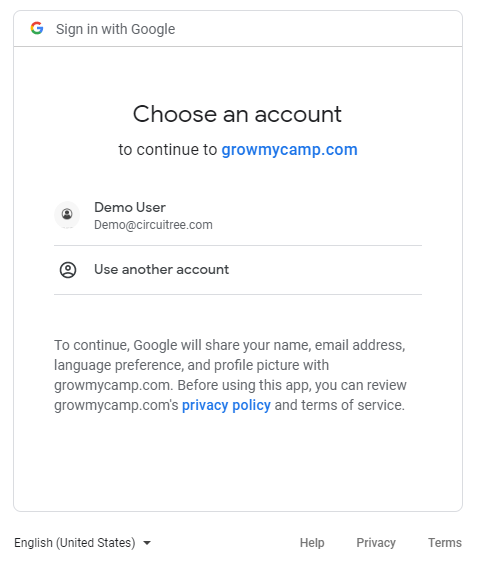
- Consent Screen:
Note the URL is your custom domain
Create a Microsoft Application
- Go to https://portal.azure.com/#home and login
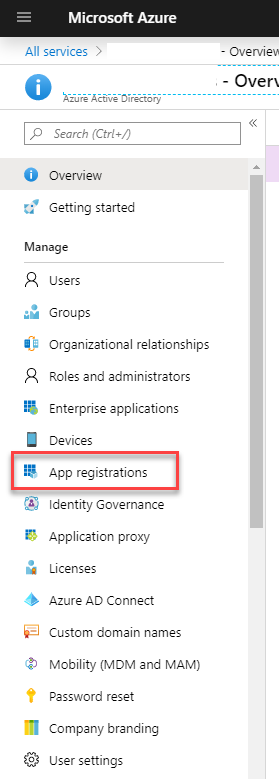
- Find the section for “Azure Active Directory”

- Then Navigate to “App Registrations”
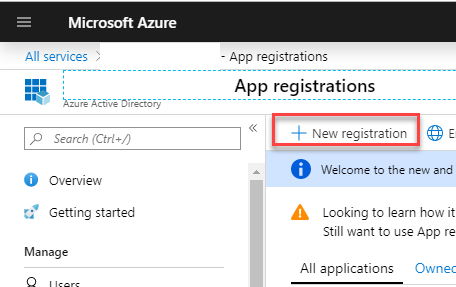
- Select New Registration
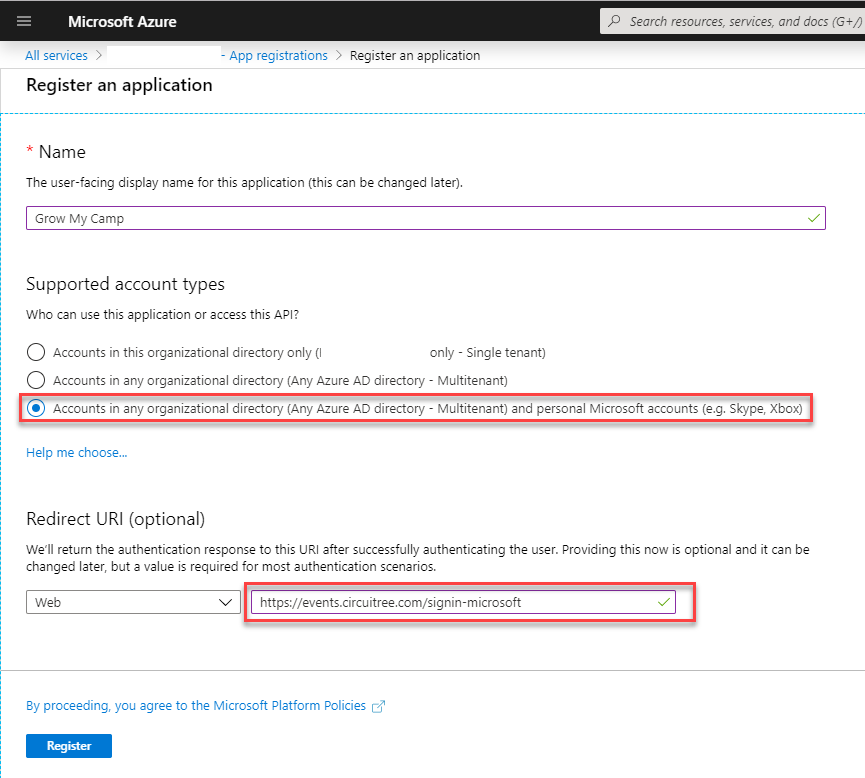
- Enter information about your App, We picked All accounts since this will serve customers.
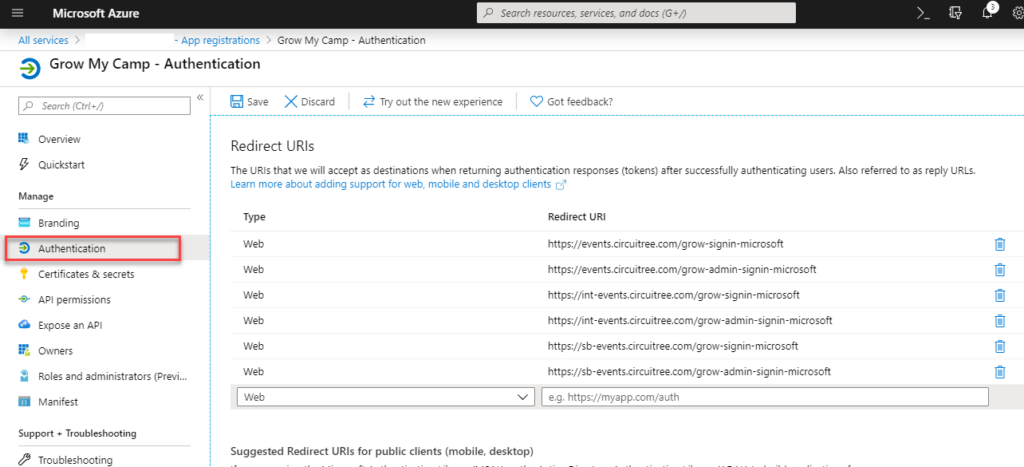
- Edit Authentication Redirect URLs:
Click on Authentication and enter your redirect URLs, see next
For Redirect URIs enter your domain with /grow-signin-microsoft at the end (we used https://register.growmycamp.com/grow-signin-microsoft)
If you have test/staging companies you will need to enter those urls in the Authorized Redirect URIs section here (for example: https://staging.growmycamp.com/grow-signin-microsoft
If you wish to allow site admin login to also use SSO then you will need to repeat the steps above with the admin callback url: /grow-admin-signin-microsoft
For CircuiTree Domains that wish to manage their own provider applications, There are 2 callback urls for each domain and 3 domains (6 urls total)Quick Tip – The entire callback url is lowercase. /GROW-signin-microsoft will not work, whereas /grow-signin-microsoft will work.
Domains:
events.circuitree.com
sb-events.circuitree.com
int-events.circuitree.comAnd two urls
/grow-signin-microsoft
/grow-admin-signin-microsoft
Complete List:
https://events.circuitree.com/grow-signin-microsoft
https://events.circuitree.com/grow-admin-signin-microsoft
https://int-events.circuitree.com/grow-signin-microsoft
https://int-events.circuitree.com/grow-admin-signin-microsoft
https://sb-events.circuitree.com/grow-signin-microsoft
https://sb-events.circuitree.com/grow-admin-signin-microsoft
- Create a Client Secret:
Quick Tip – Copy this secret and paste it into CircuiTree, but don’t save until you have the ID.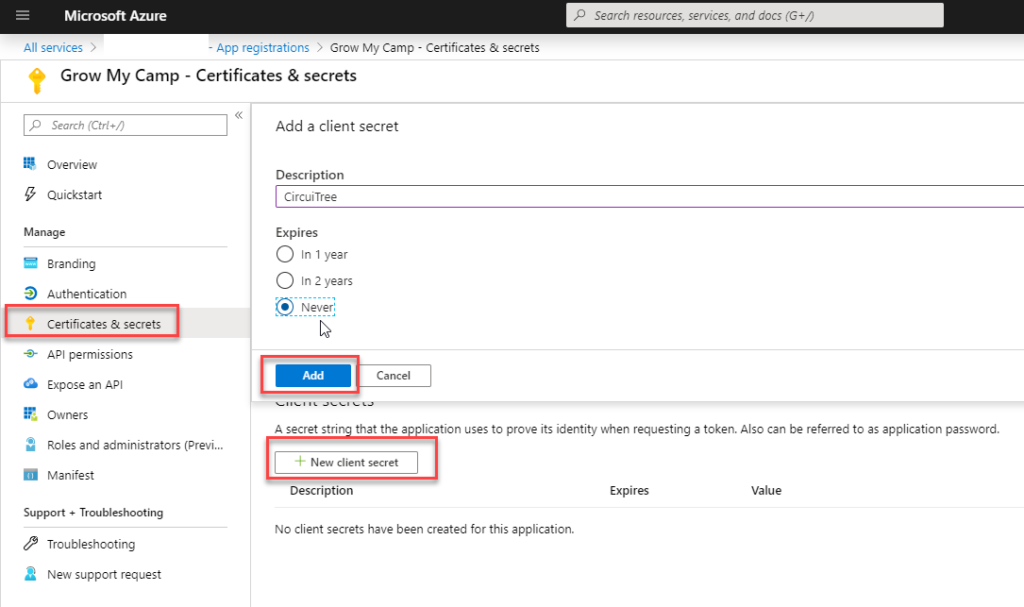
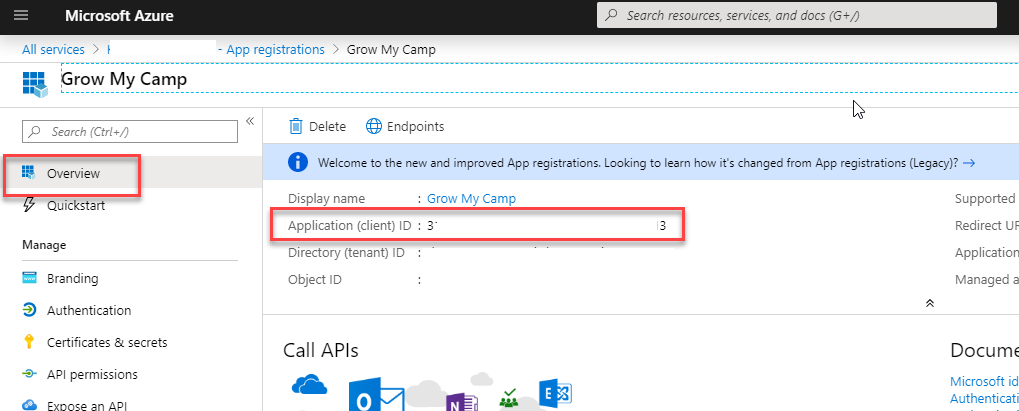
- Application (client) ID
Go to the “Overview” and copy the “Application (client) ID” out and paste it into the CircuiTree Configuration
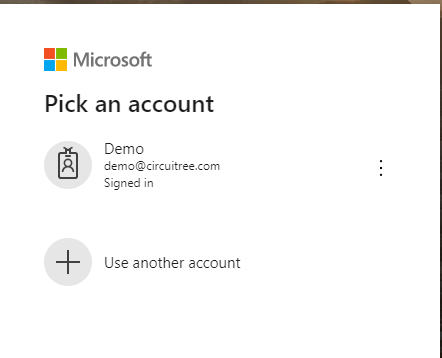
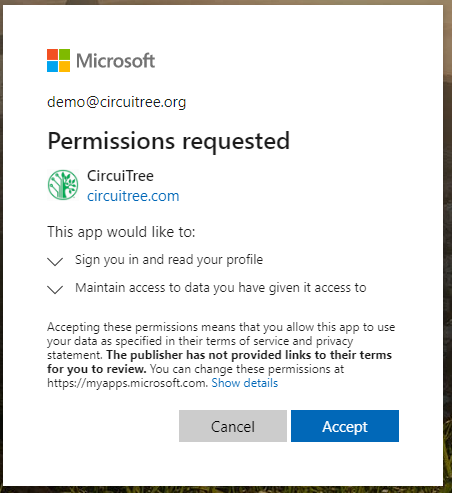
- Here is what the user will see:
IMPORTANT: Refresh Cache
After making changes to the Google ID/Secret, Facebook ID/Secret or the Microsoft ID/Secret, you must login to your CT6 Registration site as a site admin and refresh the cache.
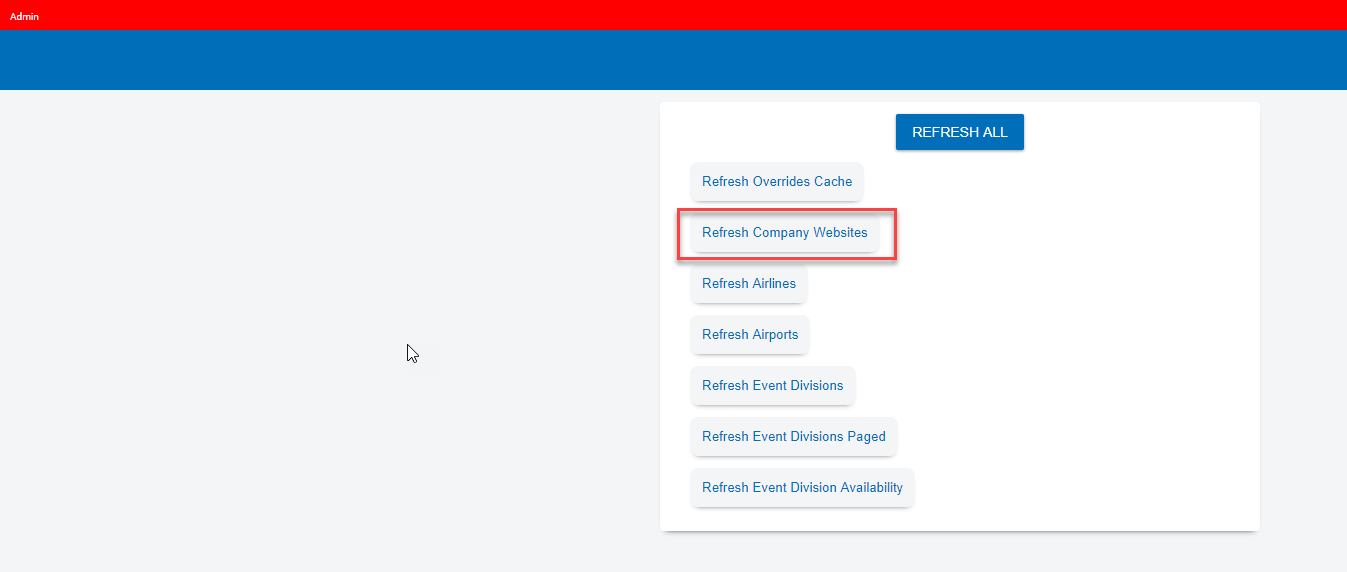
NOTE: Also, that in addition to refreshing the cache, the website caches these options when running and cannot be cleared until the site is restarted. The site will typically restart every two days. If the changes do not take effect in two days, please contact support to force a restart.
