Contents
Attachments allow you to add external files and associate them with people, groups, registrations or even Health Center Complaints. You can upload Attachments internally or even give your Users the option to upload Attachments from the Registration or HR Site.
Attachments are great for information that doesn’t have another spot to be collected in CircuITree. Some examples include:
- CPR Certification
- Third Party Hold Harmless Forms
- Signed Guest Group Contract
- Guest Group Schedule
- Insurance Card
- Discharge Instructions from Hospital
In order to upload Attachments, there are two required steps and one optional step to configure. This example shows how you could allow Applicants to upload a copy of their CPR Certification during the Application process.
- Attachment Category – Staff
- Attachment Type – Staff Application
- Attachment Forms (optional) – Resume
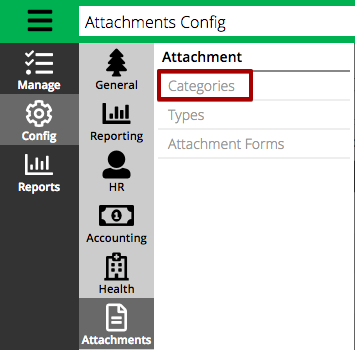
Attachment Categories
Attachment Categories are the highest level of grouping for Attachments. You are able to prevent access by Users to an Attachment category via Security Privilege if needed. One example would be to only give access to health related Attachments to Health Center staff.
- In CT6, go to Config > Attachments > Categories.
- In the lower right hand corner, select Add Attachment Category.
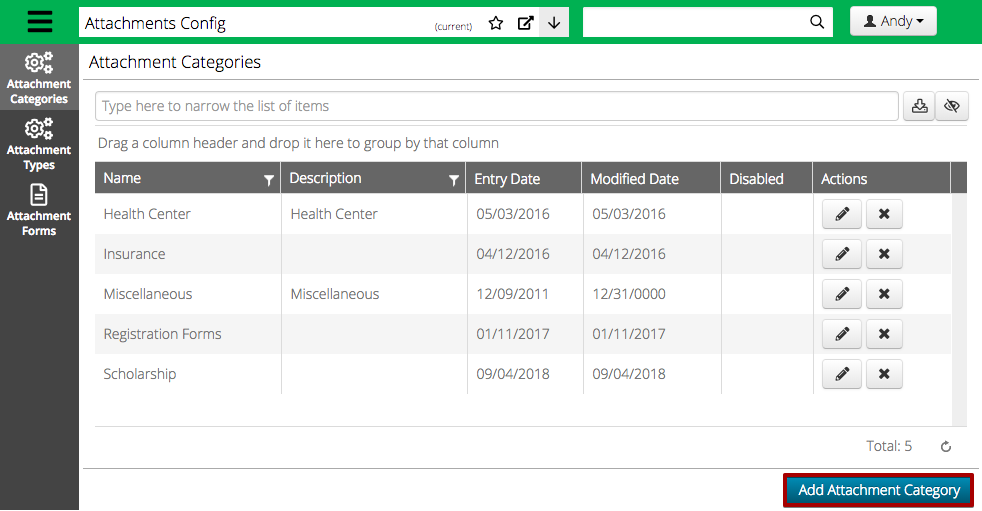
- Enter a Name and Description and then select Save.
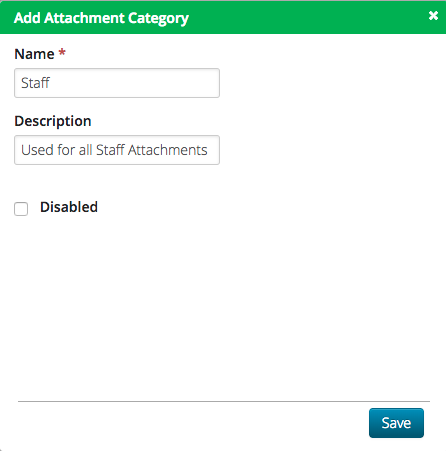
- Name – Enter the name of the Attachment Category.
- Description – Enter a description for reference in the list of Attachment Categories.
- Disabled – Select to disable category from showing up when adding Attachment.
Security Privileges
After you create an Attachment Category, by default, no Users will have access to use that Attachment Category. To give Users access via Security Privilege, follow these steps:
Assign Group
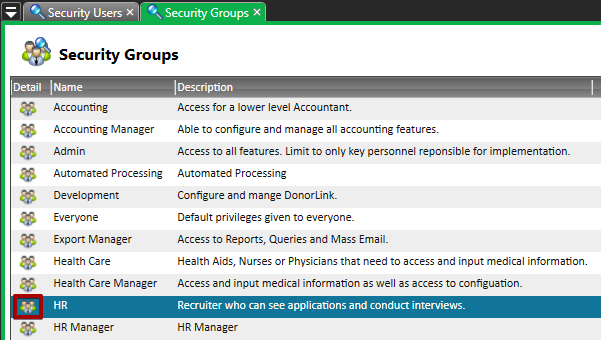
- In CT5, go to Application Settings > Security > Groups.
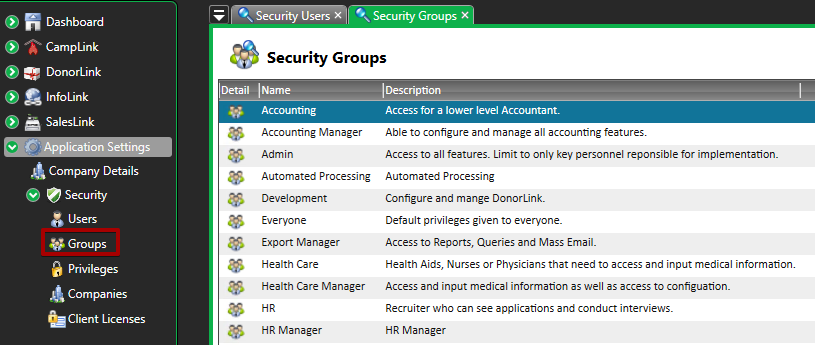
- Select the
 icon next to the group’s name to open the group.
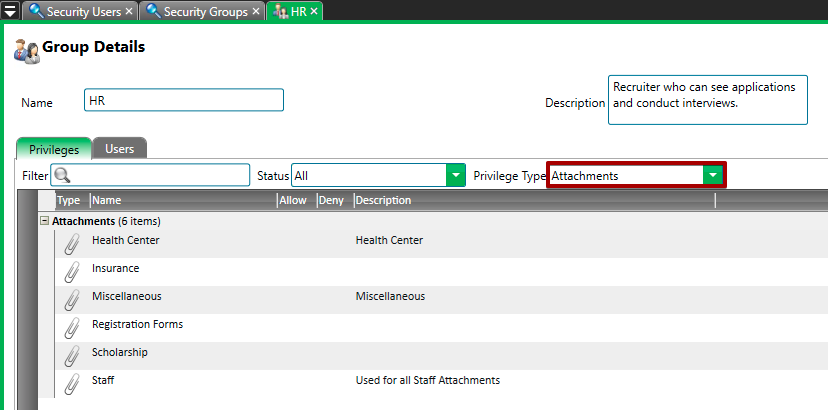
- Under Privileges, select Privilege Type of Attachments.
- Select Allow next to the Attachment Category to give access to all Users in that Security Group.
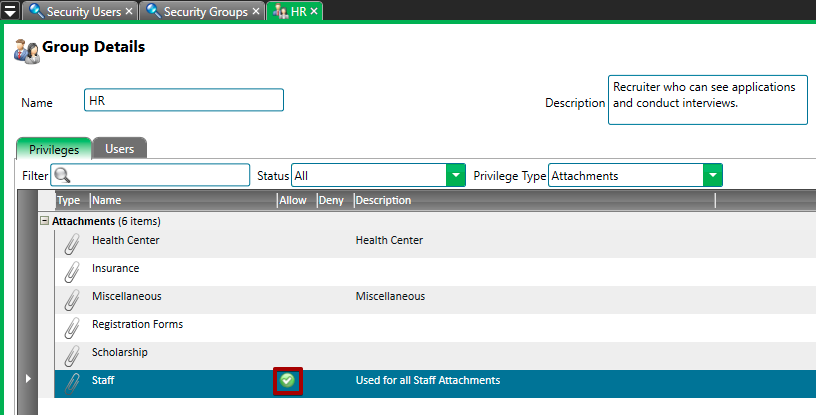
- Go to Actions > Save.
Assign User
To assign access to an Attachment Category for a specific User, follow these steps:
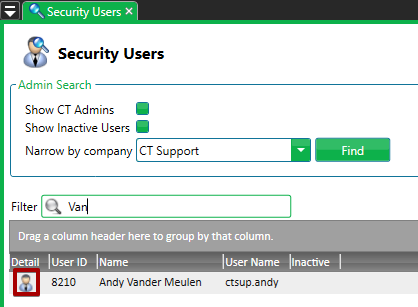
- In CT5, go to Application Settings > Security > Users.

- Search for the User you would like to assign an then select the
 icon next to the User’s name to open their User Details.
- Select Privileges and then set Status to All and the Privilege Type to Attachments.
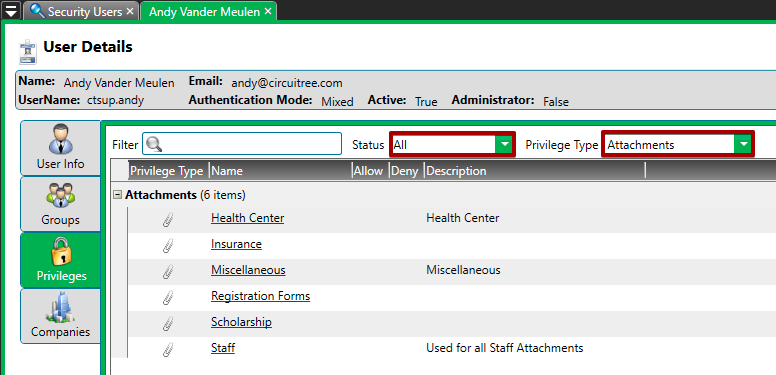
- In the list of Attachments, select Allow next to the Attachment Category you want to give the User access to.
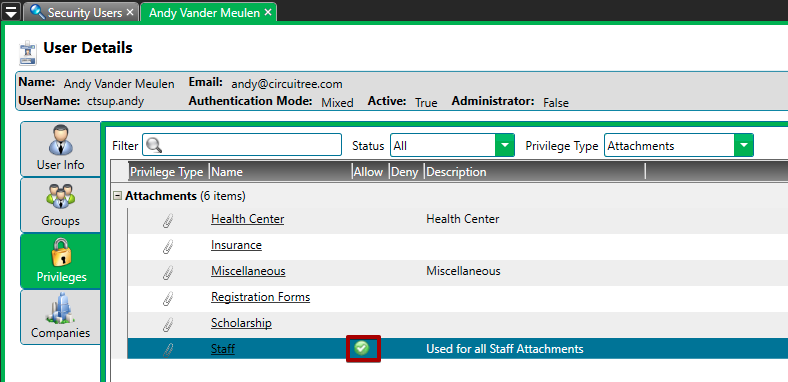
- Go to Actions > Save.
Attachment Types
Attachment Types further define the grouping of Attachments. By setting the Object Type, you can define where Users are allowed to upload Attachments.
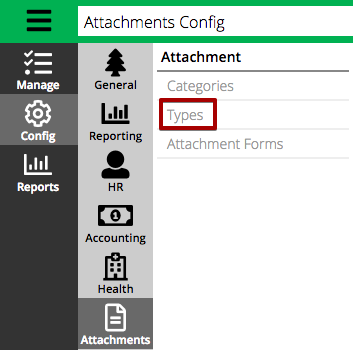
- In CT6, go to Config > Attachments > Types.
- In the lower right hand corner, select Add Attachment Type.
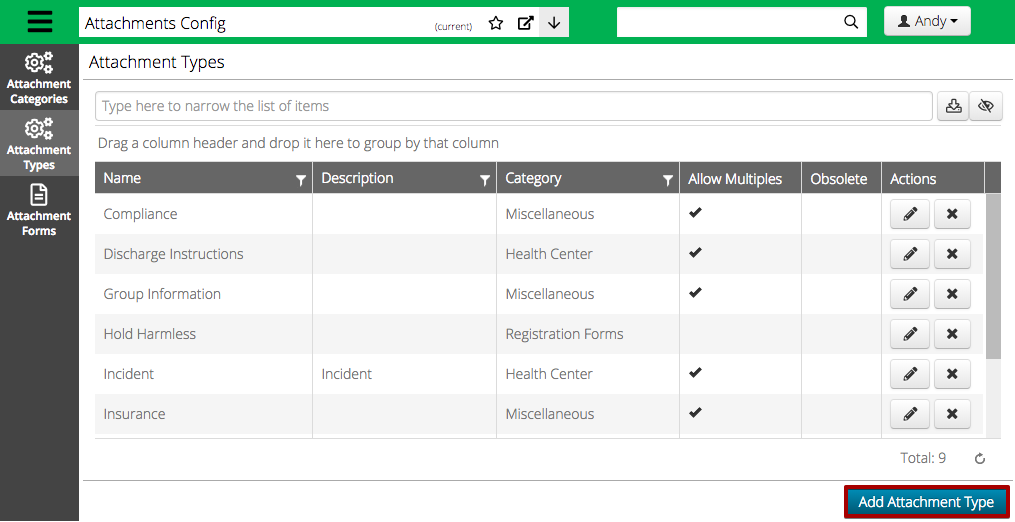
- Fill out the information then select Save.
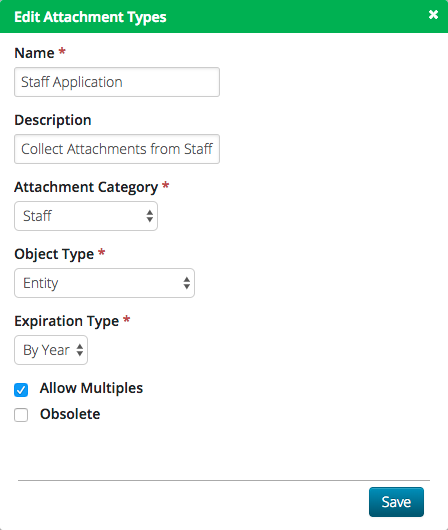
- Name – Enter a name for the Attachment Type.
- Description – Enter a description for reference in the list of Attachment Types.
- Attachment Category – Select an Attachment Category.
- Object Type – Select an Object Type where Users will be able to upload Attachments.
- Entity – Add to an Individual, Family or Group.
- Health Center Complaint – In Health Center, add to a Complaint.
- Incident – In Health Center, add to a Complaint that is turned into an Incident. Typically used for Insurance purposes.
- Itinerary – Add to a Group or Family Itinerary.
- Registration – Add to a Registation for an Individual.
- Reservation – Add to a Reservation.
- Expiration Type – Select when the Attachment uploaded to this Attachment Type will expire.
- By Year – Expires at the end of the calendar year.
- By Date – Allows input of an Expiration Date when uploading the form internally.
- Never – Attachment never expires.
- Allow Multiples – Allows for multiple Attachments using the same Type to be uploading internally. Selecting option does not allow multiple upload from the Registration or HR Site.
- Obsolete – Select to remove the Attachment Type as an option to select when uploading new Attachments.
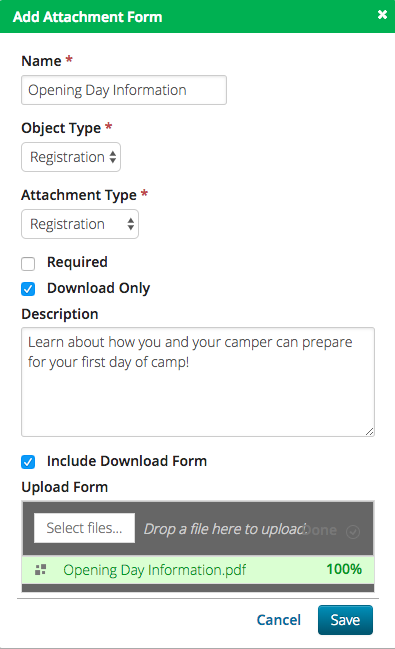
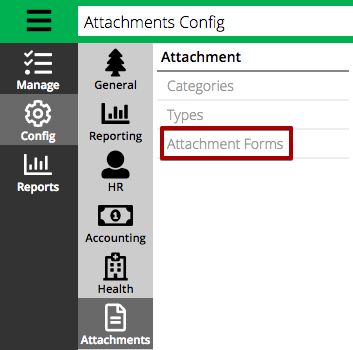
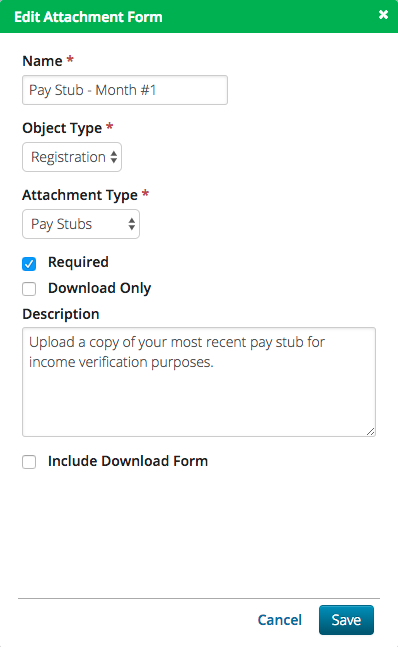
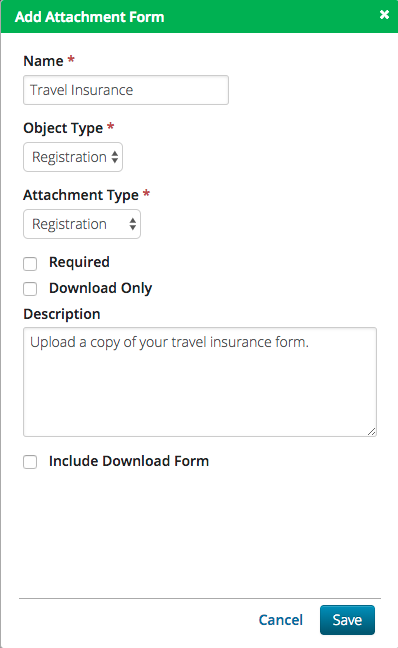
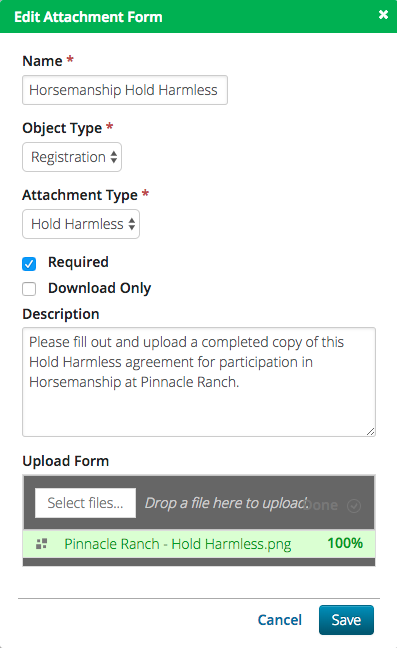
Attachment Forms
Optionally allow Customers to upload Attachments on the Registration Site or Applicant to upload Attachments on the HR Site. There are several options to collect the right Attachments from the right people.
- In CT6, go to Config > Attachments > Attachment Forms.
- In the lower right hand corner, select Add Attachment Form.
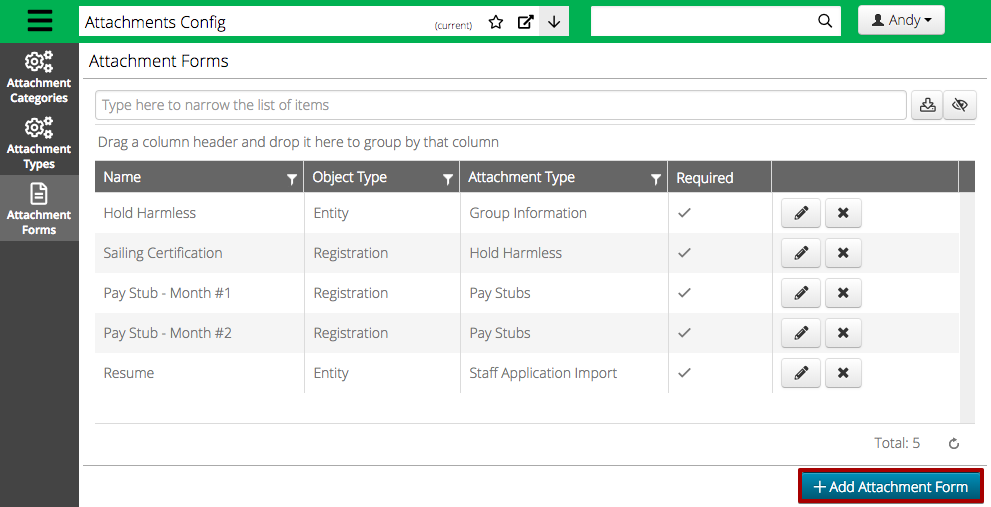
- Fill out the information and select Save.
- Name – Enter a name for the Attachment Form.
- Object Type – Select either Entity or Registration.
- Attachment Type – Select from a list of Attachment Types based on the Object Type.
- Required – Select if the Attachment is required to be uploaded by the User.
- Download Only – Select if the Attachment can only be downloaded.
- Description – Enter a description.
- Include Download Form – Select to upload an Attachment that a User can download. File can be any of the following types:
- .PNG
- .JPG
- .DOC
- .XSLX
- .CSV
HR Examples
There are several different ways that you can use Attachment Forms to collect information from users on the HR Site.
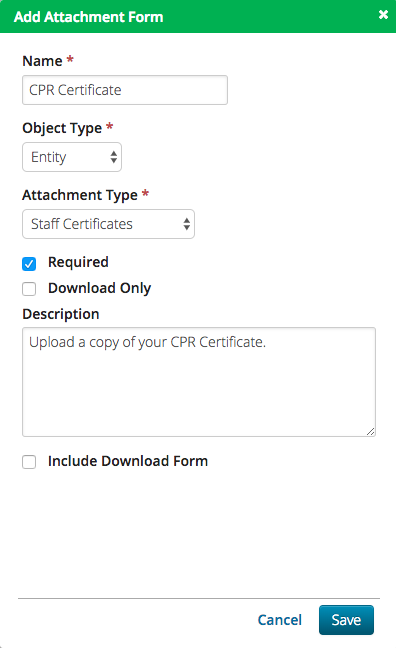
Required Upload
Add an Attachment Form to allow Applicants or Staff to upload their certificates.
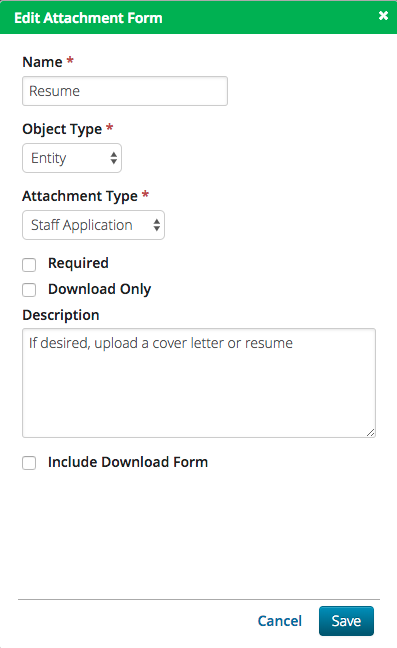
Optional Upload
Allow Applicants to upload a Resume on their Application.
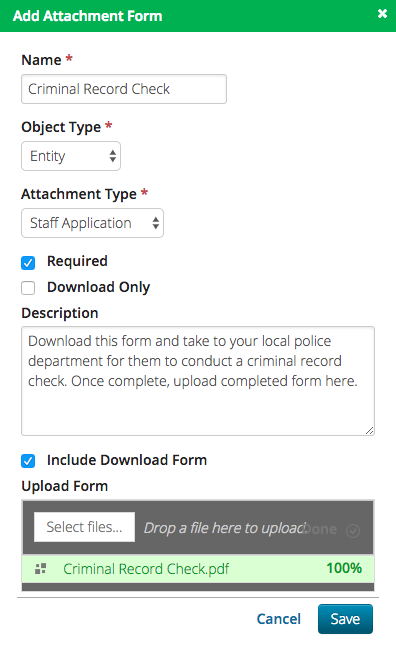
Required Download / Upload
If you need a specific form that the User must complete, include a form that the User can download, fill out and then upload.
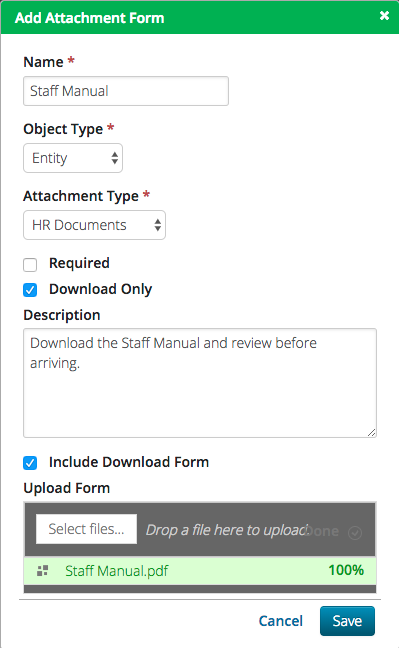
Download Only
Users can download important attachments like a staff manual during Onboarding.
Registration Site
Require Upload
Allow Customers to upload documents for verification purposes like for a Scholarship.
Optional Upload
Allow Customers to upload a Travel Insurance document.
Required Download / Upload
Collect third party forms from your Customers.
Download Only
Add Attachments that Customers can download for informational purposes.