A Bump Printer allows you to print receipts for specific items to a different printer than your customer receipt printer. When a Bump Printer is configured on an Inventory Item, only orders that contain that Inventory Item will print on the Bump Printer.
Example
A customer places the following order:
- Fountain Drink
- Sour Patch Kids
- Hamburger
- Fries
When the order is complete, two receipts are printed:
- Order Receipt sent to Cashier’s terminal
- All items
- Bump Printer Receipt sent to Kitchen
- Hamburger
- Fries
The Kitchen Bump Printer is sent a receipt with only the Hamburger and Fries for the kitchen to fulfill as part of the order. The Cashier fulfills the rest of the order and hands the customer the order receipt.
Configure
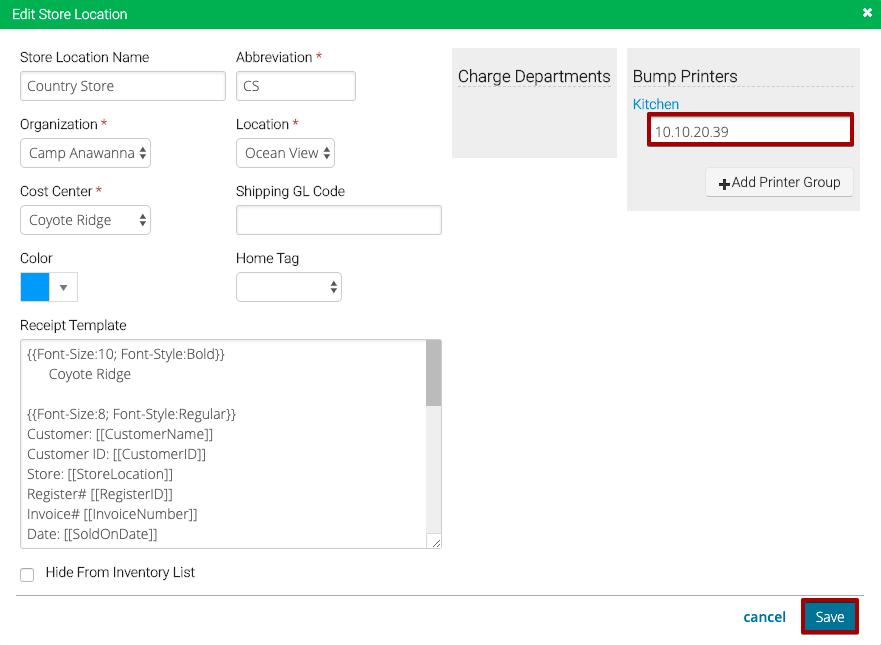
- Go to Config > SalesLink > Store Locations and then select
 to edit a Store Location.

- Select Add Printer Group.

- Enter then name of the Bump Printer Group and select Save.

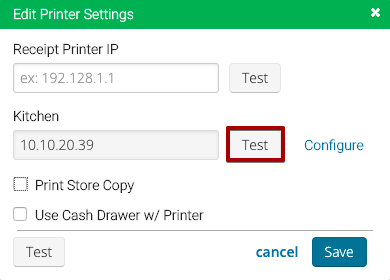
- Enter the IP Address for the printer and then select Save.
Edit / Delete
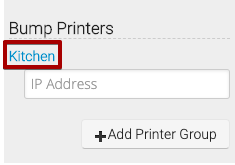
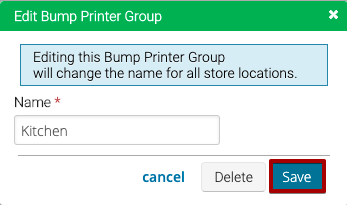
- To edit the name of a Bump Printer Group, select the name.
- Update the name and then select Save.
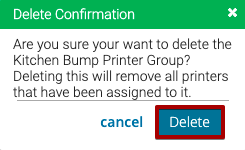
- To delete a Bump Printer Group, select Delete.
Test Printer
After you have added a Bump Printer to a Store Location, test printing a receipt.
- Go to Manage > SalesLink > Printer Settings.
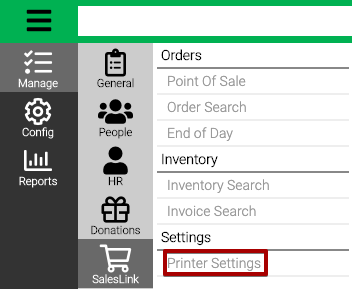
- Select Test to print a test receipt.
Assign Bump Printer Group
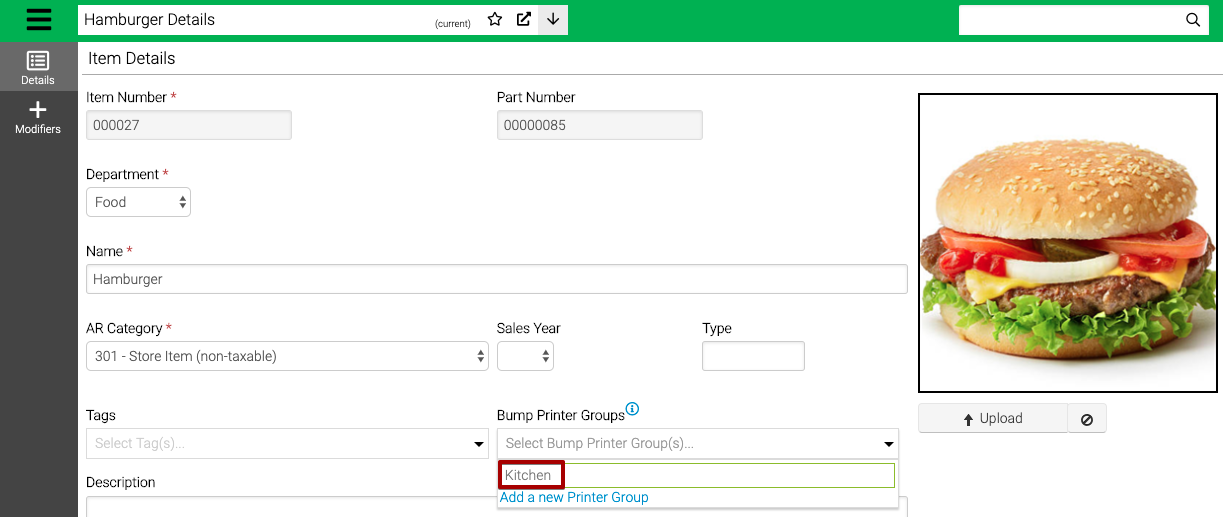
Once you have tested your printer, add it to the Inventory Items which you want to use the Bump Printer.
- Go to Manage > SalesLink > Inventory Search and find the item you want to add a Bump Printer to and select View.
- Under Bump Printer Group, select one from the list and then select Save.
Print Order
When an Order is completed that contains any Items that have a Bump Printer Group assigned, the bump printer will print a receipt for those items.