Overview
Sometimes you need to adjust your inventory levels based on external factors like shrinkage or damage. The following is how to adjust your inventory.
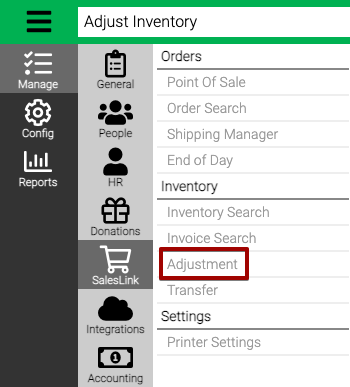
How to: Navigation
- Go to Manage > SalesLink > Adjustment.
- Enter the Criteria and select Find.
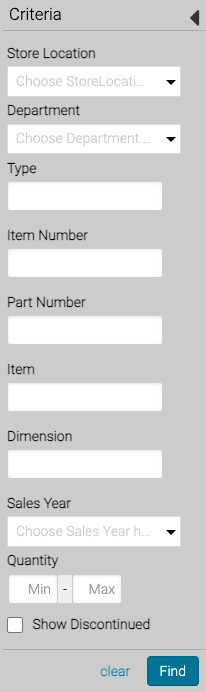
- Store Location – Select a Store Location to adjust inventory levels.
- Department – Filter by Department.
- Type – Select a Type to filter by.
- Item Number – Search for an Item Number.
- Part Number – Search for a Part Number.
- Item – Search using the name of an Item.
- Dimension – Search for a Dimension.
- Sales Year – Select a Sales Year to filter by.
- Quantity (Min/Max) – Set a range of inventory quantity to filter by.
- Show Discontinued – Select to include discontinued items in the results.
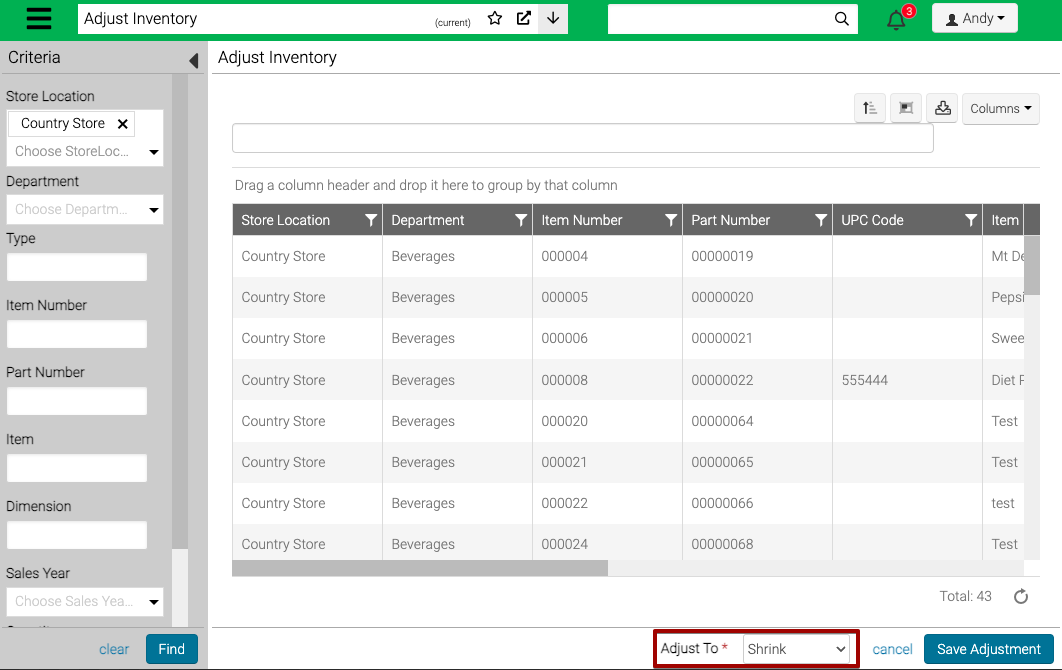
How To: Select Adjust To Store Location
Adjustment can be made to Shrink or Damage. If you want to transfer Inventory between two Store Locations, you should use the Transfer feature.
- In the lower right hand corner, select either Shrink or Damage.
How To: Make Adjustments
- Enter in either the Actual Quantity or Adjustment for the Inventory Item.
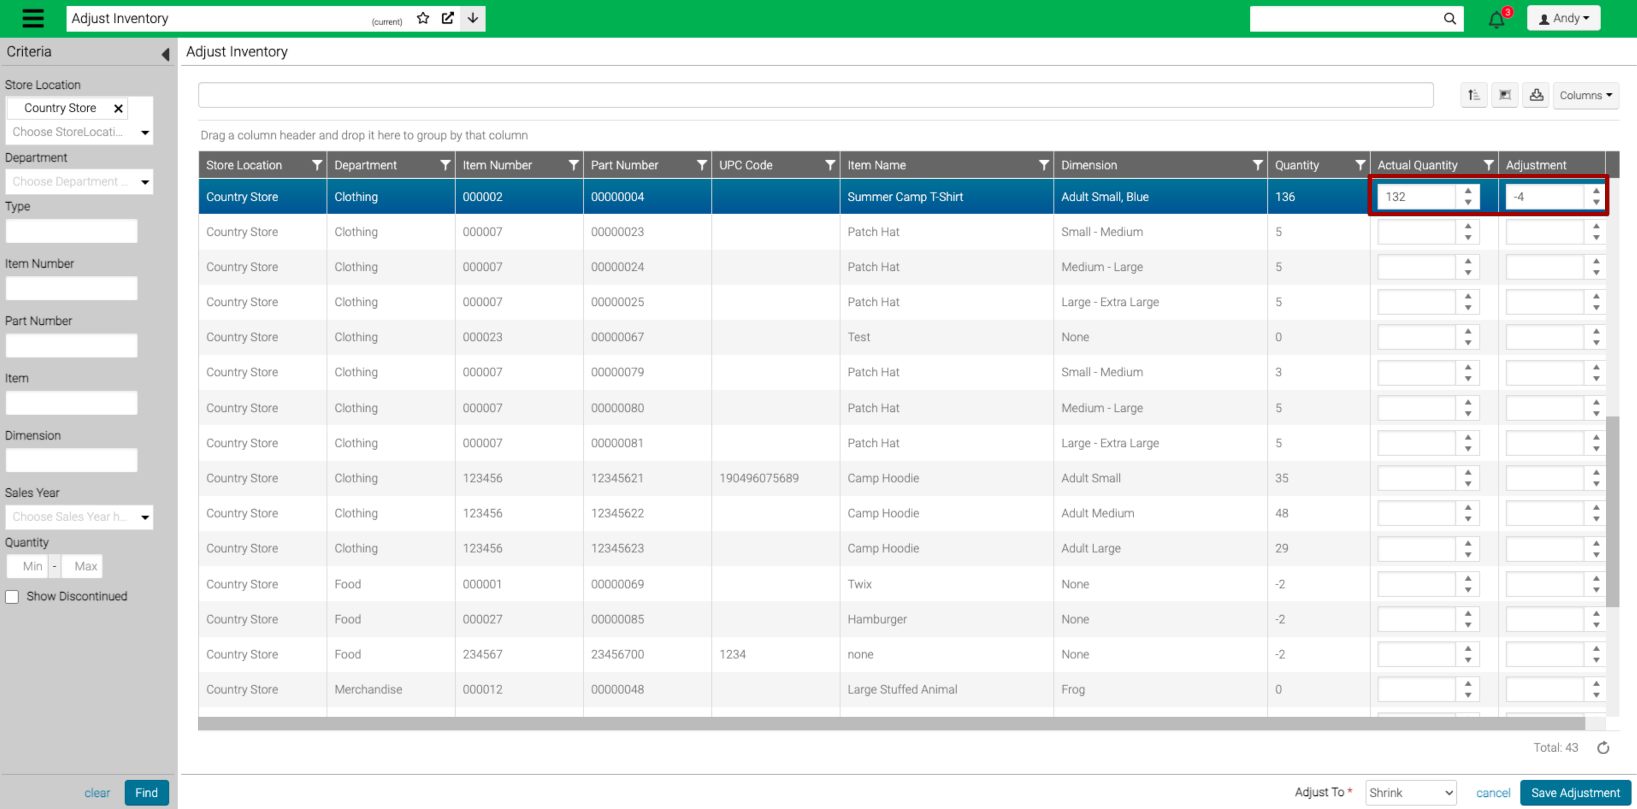
- Select Save Adjustment.
How To: Run Inventory Reports
If you want to see a list of adjustment made, run the Inventory Transfers report.
![]()