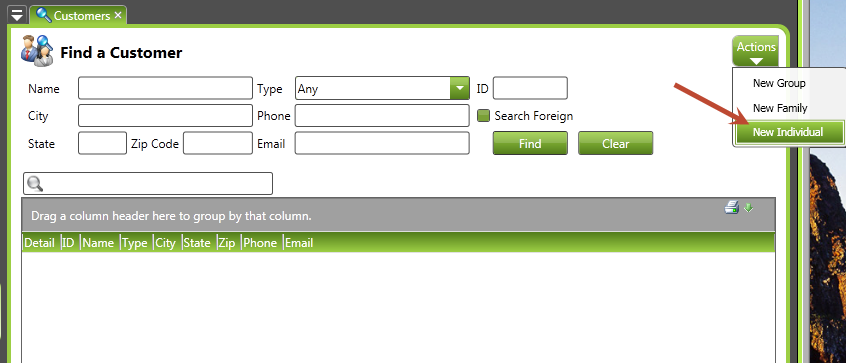
This shows how to create an individual that isn’t part of a larger family or group.
Step 1: Choose New Individual from Actions menu
Begin by choosing New Individual from the Actions menu on the top right corner of the screen. (Note that it’s useful to use the Find screen to see if the person is already in the system.)
Navigation: CampLink > CustomersStep 2: Enter the information into the screen
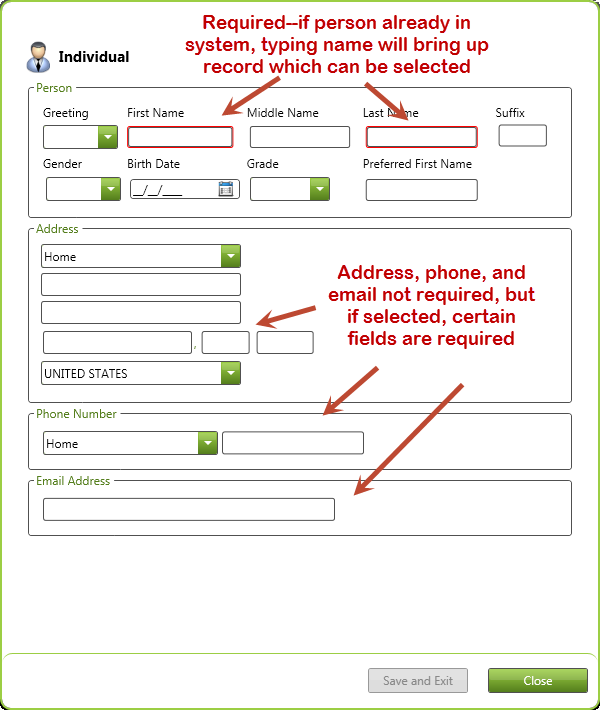
Enter the necessary information in the screen that appears. First and last name are required. Nothing else is by default; if, however, you begin filling out a section, then some fields may be required. For example, if you enter a street address, you then need to fill in a city, state, and zip code in the proper format. (Helpful hint: typing the zip code will automatically fill in the city and state.)
When typing in a name, it may already be present in the system. If so, typing will bring up a box with the name listed in it (as well as all other matches–this list tends to shrink as you type and clarify the name further). If this is the person you want, you can click on the name, and it will fill out the rest of the information like address and phone. (Please note that you are not actually creating an individual when you do this–you’re linking to that existing record.) Once the information has been satisfactorily filled out, click Save and Exit to finish the process. You can then review the individual screen and make modifications or additions if necessary.
Navigation: CampLink > Customers > [new individual]Show Me How
0:00 – 2:10: Creating the Individual
2:10 – 5:14: Describes various tabs and subtabs found in the individual screen like Contact Info, Personal Info, Member Of, Attributes, Registrations, Donations, etc.


